Ingredient Ideology | Delectable Mango Delicacies To Enjoy This Summer Of 2024 By: Dr. Kaviraj Khialani- Celebrity Master Chef.

Introduction to Mangoes:

Mangoes, often hailed as the "king of fruits," are tropical stone fruits known for their sweet, juicy flesh and unique flavor. They belong to the Mangifera genus and are native to South Asia, where they have been cultivated for thousands of years. Mangoes are not only delicious but also rich in vitamins, minerals, and antioxidants, making them a nutritious addition to your diet. There are hundreds of varieties of mangoes, each with its own distinctive taste, shape, and color, ranging from vibrant yellow and orange to green and red. Mangoes are not only enjoyed fresh but also used in various culinary dishes, such as salads, smoothies, desserts, and even savory dishes

Origin Of Mangoes 

Mangoes are believed to have originated in South Asia, specifically in the region that includes eastern India, Myanmar (Burma), and Bangladesh. The fruit has been cultivated in these areas for over 4,000 years. From there, mango cultivation spread to other parts of Asia, including the Philippines and Malaysia, and eventually to other tropical and subtropical regions around the world. Today, mangoes are grown in many countries with suitable climates, including India, Pakistan, Thailand, Mexico, and the Philippines, among others.


Health Benefits of Mangoes 

Mangoes offer a range of health benefits due to their rich nutrient content. Here are some key benefits:

1. Rich in Nutrients: Mangoes are packed with vitamins and minerals, including vitamin C, vitamin A, vitamin E, and a range of B vitamins. They also contain minerals like potassium, magnesium, and copper.

2. High in Antioxidants: Mangoes are rich in antioxidants like mangiferin, which can help protect against oxidative stress and inflammation.

3. Boost Immunity: The high vitamin C content in mangoes can help boost the immune system and protect against infections.

4. Support Digestive Health: Mangoes contain dietary fiber and enzymes like amylases, which can aid digestion and promote gut health.

5. May Help Lower Cholesterol: Some studies suggest that compounds in mangoes may help lower cholesterol levels, which can benefit heart health.

6. Promote Skin Health: The vitamin A and vitamin C in mangoes can help promote healthy skin and may even help reduce signs of aging.

7. May Help Regulate Blood Sugar: Despite their natural sweetness, mangoes have a low glycemic index and may help regulate blood sugar levels.

It's important to note that while mangoes offer numerous health benefits, they should be consumed as part of a balanced diet and in moderation, especially for those watching their sugar intake.


Uses of Mangoes In Indian Kitchen

Mangoes are a versatile fruit used in various ways in Indian cuisine. Here are some common uses:

  • Fresh Consumption: Ripe mangoes are often eaten as a fruit, either on their own or in fruit salads.

  • Mango Lassi: A popular drink made with ripe mangoes, yogurt, milk, and sugar, blended to a smooth consistency.

  • Mango Pickle: Raw mangoes are used to make a variety of pickles, both sweet and savory, that are enjoyed as condiments with meals.

  • Curries and Chutneys: Raw or ripe mangoes are used to make delicious curries, chutneys, and sauces that accompany main dishes.

  • Desserts: Mangoes are used in a variety of desserts, such as mango pudding, mango ice cream, and mango kulfi (a type of Indian ice cream).

  • Mango Rice: A popular South Indian dish made with cooked rice, grated raw mango, and spices.

  • Mango Shrikhand: A sweet dish made with strained yogurt, sugar, and ripe mango puree, often flavored with cardamom and saffron.

  • Mango Juice: Ripe mangoes are often juiced and enjoyed as a refreshing drink.

These are just a few examples of how mangoes are used in Indian kitchens. The fruit's sweet and tangy flavor adds a unique taste to both sweet and savory dishes, making it a versatile ingredient in Indian cooking.

6 recipes using mangoes in salads and dips:

1. Mango Avocado Salad:

Ingredients

  • 1 ripe mango 

  • 1 ripe avocado 

  • 1/4 cup red onion (chopped) 

  • 2 tbsp cilantro (chopped) 

  • juice of 1 lime 

  • salt and pepper to taste.

Method: 

  1. Dice mango and avocado into cubes. 

  2. Combine with chopped onion and cilantro. 

  3. Squeeze lime juice over the salad and season with salt and pepper.

2. Spicy Mango Salsa:

Ingredients: 

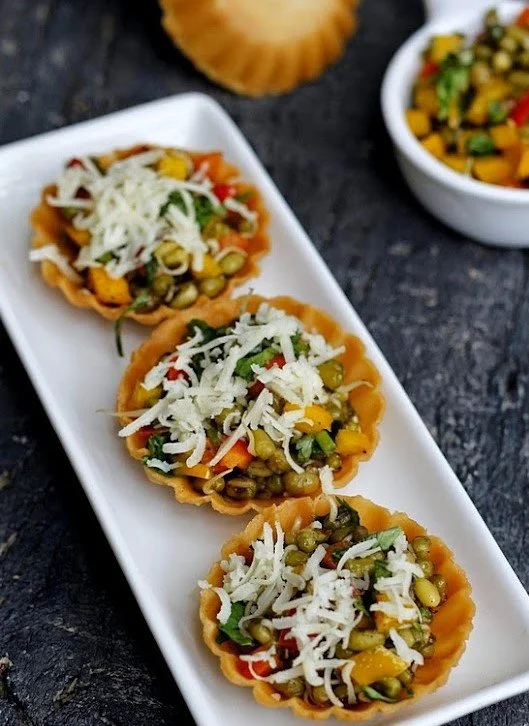
  • 1 ripe mango (diced) 

  • 1/4 cup red bell pepper (diced) 

  • 1/4 cup red onion (chopped) 

  • 1 jalapeño (seeded and minced) 

  • 2 tbsp cilantro (chopped) 

  • juice of 1 lime 

  • salt to taste.

Method: 

  1. Mix all ingredients in a bowl. 

  2. Adjust seasoning to taste. 

  3. Serve with tortilla chips or as a topping for grilled chicken or fish.

3. Mango Cucumber Salad:

Ingredients: 

  • 1 ripe mango (diced) 

  • 1 cucumber (peeled seeded, and diced) 

  • 1/4 cup red onion (chopped) 

  • 2 tbsp mint leaves (chopped) 

  • juice of 1 lemon 

  • salt and pepper to taste.

Method: 

  1. Combine mango, cucumber, onion, and mint in a bowl. 

  2. Squeeze lemon juice over the salad and season with salt and pepper.

4. Mango Yogurt Dip:

Ingredients: 

  • 1 ripe mango (peeled and diced)

  • 1 cup plain yogurt 

  • 1 tbsp honey 

  • 1/2 tsp ground cinnamon.

Method: 

  1. Blend mango, yogurt, honey, and cinnamon until smooth. 

  2. Serve chilled with fruit skewers or as a topping for pancakes or waffles.

5. Spicy Mango Hummus:

Ingredients: 

  • 1 can chickpeas (drained and rinsed) 

  • 1 ripe mango (peeled and diced) 

  • 1/4 cup tahini

  • 2 tbsp olive oil 

  • juice of 1 lemon 

  • 1 garlic clove (minced) 

  • 1/2 tsp cayenne pepper

  • salt to taste.

Method: 

  1. Blend all ingredients in a food processor until smooth. 

  2. Adjust seasoning as needed. 

  3. Serve with pita bread or vegetable sticks.

6. Mango Ginger Dressing:

Ingredients: 

  • 1 ripe mango (peeled and diced)

  • 2 tbsp rice vinegar 

  • 1 tbsp soy sauce 

  • 1 tbsp honey 

  • 1 tbsp fresh ginger (grated) 

  • 2 tbsp olive oil.

Method: 

  1. Blend mango, rice vinegar, soy sauce, honey, and ginger until smooth. 

  2. Slowly add olive oil while blending to emulsify. 

  3. Drizzle over mixed greens or use as a marinade for grilled chicken or shrimp.

Conclusion 

Incorporating mangoes into salads and dips adds a vibrant and tropical twist to your meals. Whether you're looking for a refreshing salad or a zesty dip, these recipes offer a delightful balance of sweet, spicy, and savory flavors. Experiment with different combinations and enjoy the unique taste of mango in your dishes.

Ingredient Ideology | The Magic Of Ruby Chocolate By: Dr. Kaviraj Khialani – Celebrity Master Chef

THE MAGIC OF RUBY CHOCOLATE

INTRODUCTION TO RUBY CHOCOLATE:

Ruby chocolate represents one of the most exciting developments in the chocolate industry in over 80 years, joining the ranks of dark, milk, and white chocolate as a distinct category. Introduced to the world in 2017 by the Belgian-Swiss cocoa company Barry Callebaut, ruby chocolate is made from specially selected cocoa beans known as "ruby cocoa beans." These beans undergo a unique processing method that preserves their naturally occurring precursors, which, after specific fermentation and conching processes, yield the chocolate's characteristic pink hue and flavor profile.

ORIGIN OF RUBY CHOCOLATE:

Ruby chocolate was introduced to the world by the Swiss chocolate company Barry Callebaut in September 2017. This new type of chocolate is made from the Ruby cocoa bean, which gives the chocolate its distinct pink color naturally, without the addition of any dyes or fruit flavors. The Ruby cocoa bean undergoes a unique processing method, which was developed by Barry Callebaut over a decade, to unlock the flavor and color present in the bean itself.

The exact origin of the Ruby cocoa bean and the specific process used to create Ruby chocolate have been closely guarded secrets, with Barry Callebaut not disclosing the full details. However, it is known that these beans can be found in different regions of the world, including Ecuador, Brazil, and Ivory Coast.

HEALTH BENEFITS OF RUBY CHOCOLATE

While ruby chocolate contains similar basic ingredients as milk, dark, and white chocolate—cocoa mass, sugar, and cocoa butter—the health benefits associated with ruby chocolate can be considered from a few perspectives

  • Antioxidants: Like dark chocolate, ruby chocolate is made from cocoa beans, which means it naturally contains antioxidants such as flavonoids. These compounds are known for their ability to neutralize free radicals in the body, potentially reducing oxidative stress and the risk of chronic diseases. The precise antioxidant content in ruby chocolate can vary depending on the processing and the proportion of cocoa mass used.


  • Mood Improvement: Chocolate is famous for its ability to improve mood, and ruby chocolate is no exception. It contains compounds such as theobromine and caffeine, which are mild stimulants. Additionally, chocolate stimulates the production of endorphins, the body's natural opiates, which can evoke feelings of pleasure and well-being.


  • Heart Health: The flavonoids in ruby chocolate, like those in dark chocolate, may contribute to heart health by improving blood flow and lowering blood pressure. They may also play a role in increasing the level of high-density lipoprotein (HDL) cholesterol, often referred to as "good" cholesterol, which can help to reduce the risk of cardiovascular diseases. 


  • Potential Downsides: It's important to note that, like other types of chocolate, ruby chocolate also contains sugar and fat, which can offset some of its health benefits if consumed in excess. Moderation is key to enjoying ruby chocolate as part of a balanced diet.


USES OF RUBY CHOCOLATE IN KITCHEN

Ruby chocolate, introduced to the world in 2017, is the fourth type of chocolate, alongside dark, milk, and white chocolate. 

1. Desserts and Confectionery

  • Chocolate Bars and Truffles: Ruby chocolate's unique color and taste make it an excellent choice for creating visually stunning and delicious chocolate bars and truffles.

  • Baking: Ruby chocolate chips or chunks can be used in cookies, brownies, or muffins for a surprising pop of color and flavor.


2. Decorative Elements

  • Garnishes: Melted ruby chocolate can be drizzled over cakes, cupcakes, or even savory dishes to add a touch of sweetness and a burst of color.

  • Chocolate Shapes: Melt and temper ruby chocolate to create decorative shapes, letters, or swirls to adorn your culinary creations.


3. Beverages

  • Hot Chocolate: A ruby chocolate hot chocolate offers a new twist on the classic winter beverage, providing a creamy texture with fruity notes.

  • Cocktails and Mocktails: Grated ruby chocolate or a ruby chocolate rim can add a unique flair and flavor to both alcoholic and non-alcoholic beverages.


4. Breakfast Items

  • Pancakes and Waffles: Incorporate ruby chocolate chips into the batter, or melt ruby chocolate to drizzle over the top for a decadent breakfast treat.

  • Oatmeal and Yogurt: Sprinkle ruby chocolate pieces over oatmeal or yogurt for a touch of sweetness and a burst of color.


5. Savory Dishes

  • While less common, the fruity and slightly tart flavor profile of ruby chocolate can complement certain savory dishes. For example, it can be used as a glaze for meats or added to vinaigrettes for salads, especially those featuring fruits or nuts.


6. Ice Cream and Gelato

  • Ruby chocolate can be used in making ice cream or gelato, either as the main flavor or in the form of chips and swirls, creating a visually appealing and deliciously fruity frozen dessert.


RECIPES USING RUBY CHOCOLATE 

1. Ruby Chocolate Chip Cookies

Ingredients:

  • 2 1/4 cups all-purpose flour

  • 1/2 teaspoon baking soda

  • 1 cup unsalted butter, room temperature

  • 1/2 cup granulated sugar

  • 1 cup packed light-brown sugar

  • 1 teaspoon salt

  • 2 teaspoons vanilla extract

  • 2 large eggs

  • 2 cups Ruby chocolate chips

Instructions:

  1. Preheat your oven to 350°F (175°C).

  2. In a bowl, whisk together the flour and baking soda.

  3. In another bowl, beat the butter and sugars until fluffy. Add the salt, vanilla, and eggs. Beat until well mixed.

  4. Gradually add the flour mixture and mix. Stir in the Ruby chocolate chips.

  5. Drop tablespoon-sized balls of dough onto baking sheets.

  6. Bake for 10-12 minutes or until golden brown. Cool on baking sheets for 2 minutes; transfer to wire racks to cool completely.


2. Ruby Chocolate Brownies

  • Ingredients:

  • 1/2 cup unsalted butter

  • 1 cup sugar

  • 2 large eggs

  • 1 teaspoon vanilla extract

  • 3/4 cup all-purpose flour

  • 1/4 cup cocoa powder

  • 1/2 teaspoon baking powder

  • 1/4 teaspoon salt

  • 1 cup Ruby chocolate chunks

Instructions:

  1. Preheat the oven to 350°F (175°C). Grease an 8-inch square baking pan.

  2. Melt the butter and mix it with sugar. Add the eggs and vanilla, mixing well.

  3. In another bowl, whisk together flour, cocoa powder, baking powder, and salt.

  4. Gradually add the dry ingredients to the wet, mixing until smooth. Fold in Ruby chocolate chunks.

  5. Pour the batter into the prepared pan and smooth the top.

  6. Bake for 20-25 minutes. Let it cool before cutting into squares.

3. Ruby Chocolate Raspberry Muffins

Ingredients:

  • 2 cups all-purpose flour

  • 1/2 cup sugar

  • 2 1/2 teaspoons baking powder

  • 1/2 teaspoon salt

  • 1 cup milk

  • 1/4 cup unsalted butter, melted

  • 1 large egg

  • 1 teaspoon vanilla extract

  • 1 cup Ruby chocolate chips

  • 1 cup fresh raspberries

Instructions:

  1. Preheat the oven to 375°F (190°C). Line a muffin tin with paper liners.

  2. In a large bowl, combine flour, sugar, baking powder, and salt.

  3. In another bowl, mix milk, melted butter, egg, and vanilla. Add to the dry ingredients, stirring until just combined.

  4. Gently fold in Ruby chocolate chips and raspberries.

  5. Divide the batter among the muffin cups and bake for 20-25 minutes or until a toothpick inserted into the center comes out clean.

  6. Cool in the pan for 5 minutes, then transfer to a wire rack to cool completely.

4. Ruby Chocolate Cheesecake

Ingredients:

  • 150g crushed graham crackers

  • 75g melted butter

  • 500g cream cheese, softened

  • 100g sugar

  • 200g ruby chocolate, melted

  • 2 eggs

  • 1 tsp vanilla extract

Instructions:

  1. Preheat your oven to 160°C (320°F).

  2. Mix graham crackers and butter, press into the bottom of a springform pan.

  3. Beat cream cheese and sugar until smooth. Add melted ruby chocolate, eggs, and vanilla; beat until combined.

  4. Pour over the crust and bake for 45-55 minutes. Chill before serving.

5. Ruby Chocolate Madeleines

Ingredients:

  • 130g all-purpose flour

  • 1 tsp baking powder

  • 120g sugar

  • 120g unsalted butter, melted

  • 2 eggs

  • 100g ruby chocolate, melted

  • Powdered sugar for dusting

Instructions:

  1. Preheat your oven to 190°C (375°F) and prepare a madeleine pan.

  2. Whisk together flour and baking powder.

  3. In another bowl, beat eggs and sugar until light. Gradually add melted butter and ruby chocolate, then fold in the flour mixture.

  4. Fill each madeleine mold about three-quarters full. Bake for 8-10 minutes.

  5. Cool slightly and dust with powdered sugar.

6. Ruby Chocolate Scones

Ingredients:

  • 250g all-purpose flour

  • 2 tsp baking powder

  • 1/2 tsp salt

  • 50g sugar

  • 75g cold unsalted butter, cubed

  • 100ml cold milk

  • 150g ruby chocolate chips

Instructions:

  1. Preheat your oven to 220°C (425°F).

  2. Combine flour, baking powder, salt, and sugar. Cut in butter until mixture resembles coarse crumbs.

  3. Stir in milk just until dough comes together. Fold in ruby chocolate chips.

  4. Pat dough into a round, cut into wedges, and place on a baking sheet.

  5. Bake for 12-15 minutes.

INSTRUCTIONS

  • Ruby chocolate has a distinct taste, different from its dark, milk, and white counterparts. It offers a fruity flavor with slightly sour notes, which can complement many ingredients but might clash with others. 

  • When melting ruby chocolate, use a gentle heat to avoid burning or seizing. A double boiler or a microwave (in short bursts, stirring in between) works well. Ruby chocolate can be sensitive to temperature changes, so keeping a steady, moderate heat is crucial.

  •  the chocolate to set with a glossy finish and a snap, such as chocolate bars or dipped fruits, tempering ruby chocolate is essential. 

  • Incorporate ruby chocolate into baked goods with caution due to its unique flavor and color. It works well in recipes where its fruity essence can shine, such as muffins, scones, or blondies. 

CONCLUSION

Ruby chocolate offers a unique and innovative twist to the world of baking and confectionery, with its distinct color and fruity flavor profile. Its versatility allows it to be seamlessly incorporated into a wide range of baked goods, from brownies and cookies to cheesecakes and tarts, providing a vibrant and flavorful experience that stands out from traditional chocolate varieties. The recipes provided are just the beginning, offering a glimpse into the potential of ruby chocolate to transform and elevate desserts and sweet treats.

Ingredient Ideology | Passion For Peanuts By: Dr. Kaviraj Khialani- Celebrity Master Chef

Introduction to Peanuts 

Peanuts are nutrient-rich legumes cultivated in warm climates worldwide. They're packed with protein, healthy fats, and essential vitamins and minerals. Commonly consumed as snacks, in peanut butter, or as cooking oil, they're a staple in many cuisines. Peanuts offer numerous health benefits but can cause severe allergies in some individuals. Despite being legumes, they're often treated as nuts. Overall, peanuts hold cultural significance and are valued for their versatility, nutritional content, and culinary uses.

Origin of Peanuts

Peanuts, scientifically known as Arachis hypogaea, originated in South America, likely in the region that is now Bolivia and Peru. They have been cultivated for thousands of years by indigenous peoples in the area. Peanuts were later introduced to other parts of the world by Spanish and Portuguese explorers during the colonial period. Today, peanuts are grown in various regions around the world, including Africa, Asia, and North America, with China, India, and the United States being the largest producers. 

Health Benefits of Peanuts 

1. Nutrient-Rich: Peanuts are rich in protein, healthy fats, fiber, vitamins (such as vitamin E, niacin, and folate), and minerals (like magnesium, phosphorus, and potassium).

2. Heart Health: The monounsaturated and polyunsaturated fats in peanuts can help lower bad cholesterol levels (LDL) and reduce the risk of heart disease. They also contain resveratrol, a compound linked to improved heart health.

3. Weight Management: Despite being calorie-dense, peanuts can help with weight management due to their high protein and fiber content, which promote feelings of fullness and reduce overall calorie intake.

4. Blood Sugar Control: Peanuts have a low glycemic index, meaning they cause a slower rise in blood sugar levels, making them suitable for people with diabetes when consumed in moderation.

5. Antioxidant Properties: Peanuts contain antioxidants such as vitamin E, resveratrol, and other phenolic compounds that help protect cells from damage caused by free radicals, reducing the risk of chronic diseases like cancer and Alzheimer's.

6. Nutrient Absorption: The healthy fats in peanuts aid in the absorption of fat-soluble vitamins like vitamin A and vitamin D, enhancing overall nutrient absorption.

7. Muscle Health: Peanuts are a good source of protein, which is essential for building and repairing muscles, making them beneficial for athletes and individuals engaging in regular exercise.

8. Brain Health: The niacin and folate content in peanuts support brain function and development, potentially reducing the risk of cognitive decline and improving mood.

However, it's essential to consume peanuts in moderation, as they are high in calories and may trigger allergic reactions in some individuals.


Uses Of Peanuts in Indian Kitchen 

  1. Peanuts are extensively used in Indian cuisine, offering flavour, texture, and nutrition to various dishes. Here are some common uses of peanuts in Indian kitchens:

  2. Chutneys and Sauces: Peanuts are a key ingredient in many Indian chutneys and sauces, such as peanut chutney (ground peanuts with spices and herbs), which is served as a condiment with dosa, idli, and other South Indian dishes.

  3. Curries and Gravies: Ground peanuts or peanut paste are often added to curries and gravies to enhance flavour, texture, and thickness. They are commonly used in dishes like peanut curry (shengdana chi amti) and peanut-based gravies for vegetables and meats.

  4. Snacks and Street Food: Roasted or fried peanuts are popular snacks in India, enjoyed on their own or mixed with spices and herbs. They are also a common ingredient in street food snacks like bhel puri, a savory snack made with puffed rice, vegetables, and chutneys.

  5. Sweets and Desserts: Peanuts are used in traditional Indian sweets and desserts, such as peanut ladoo (sweet balls made with peanuts, jaggery, and ghee) and chikki (a type of brittle made with peanuts and jaggery or sugar).

  6. Vegetable Stir-Fries: Peanuts are often added to vegetable stir-fries for added crunch and flavour. They pair well with vegetables like cabbage, beans, and carrots, adding a nutty taste to the dish.

  7. Pilafs and Rice Dishes: Peanuts are sometimes added to rice dishes and pilafs for extra texture and protein. They can be sprinkled on top of rice dishes or mixed into the rice during cooking.

  8. Spice Mixes: Ground peanuts are used in spice mixes and masalas to add depth and richness to Indian dishes. They are often combined with other spices like cumin, coriander, and chili powder to create flavourful blends.

Overall, peanuts are a versatile ingredient in Indian cuisine, used in a wide range of savoury and sweet dishes to add flavor, texture, and nutritional value.

6 recipes using peanuts 

1.Peanut Chutney:

Ingredients:

  • 1 cup roasted peanuts

  • 2-3 green chilies

  • 2 cloves of garlic

  • Small piece of tamarind (about 1 teaspoon)

  • Salt to taste

  • Water as needed

Method:

  1. In a blender, combine roasted peanuts, green chilies, garlic, tamarind, and salt.

  2. Grind into a coarse paste, adding water gradually until desired consistency is reached.

  3. Transfer to a serving bowl and serve as a side with dosa, idli, or any South Indian breakfast dishes.

2. Peanut Masala:

Ingredients:

  • 1 cup roasted peanuts

  • 1 onion, finely chopped

  • 2 tomatoes, chopped

  • 2 green chilies, slit

  • 1 teaspoon ginger-garlic paste

  • 1/2 teaspoon turmeric powder

  • 1 teaspoon cumin seeds

  • 1 teaspoon coriander powder

  • 1/2 teaspoon garam masala

  • Salt to taste

  • 2 tablespoons oil

Method:

  1. Heat oil in a pan. Add cumin seeds and let them splutter.

  2. Add chopped onions and green chilies. Sauté until onions turn golden brown.

  3. Add ginger-garlic paste and cook until raw smell disappears.

  4. Add chopped tomatoes and cook until they turn soft and mushy.

  5. Stir in turmeric powder, coriander powder, garam masala, and salt.

  6. Add roasted peanuts and mix well. Cook for a few more minutes.

  7. Garnish with chopped cilantro and serve hot with roti or rice.

3. Peanut Salad:

Ingredients:

  • 1 cup boiled peanuts

  • 1 cucumber, chopped

  • 1 tomato, chopped

  • 1 onion, finely chopped

  • 2 tablespoons chopped cilantro

  • Juice of 1 lemon

  • Salt to taste

  • 1/2 teaspoon chaat masala (optional)

Method:

  1. In a large mixing bowl, combine boiled peanuts, chopped cucumber, tomato, onion, and cilantro.

  2. Squeeze lemon juice over the salad.

  3. Sprinkle salt and chaat masala (if using).

  4. Toss well until everything is evenly coated.

  5. Serve immediately as a refreshing salad.

4. Peanut Ladoo:

Ingredients:

  • 1 cup roasted peanuts

  • 3/4 cup grated jaggery

  • 2 tablespoons ghee (clarified butter)

  • 1/2 teaspoon cardamom powder

Method:

  1. Grind roasted peanuts into a coarse powder using a blender or food processor.

  2. Heat ghee in a pan over low heat. Add grated jaggery to the pan.

  3. Stir continuously until the jaggery melts and forms a syrup-like consistency.

  4. Add the peanut powder and cardamom powder to the pan. Mix well until everything is combined.

  5. Turn off the heat and allow the mixture to cool slightly.

  6. While the mixture is still warm, shape it into small balls (ladoos) using your hands.

  7. Repeat with the remaining mixture.

  8. Let the ladoos cool completely before serving. Enjoy as a sweet treat.

5. Peanut Rice:

Ingredients:

  • 2 cups cooked rice

  • 1/2 cup roasted peanuts

  • 1 teaspoon mustard seeds

  • 8-10 curry leaves

  • 2 green chilies, slit

  • 1/2 teaspoon turmeric powder

  • Salt to taste

  • 2 tablespoons oil

Method:

  1. Heat oil in a pan. Add mustard seeds and let them splutter.

  2. Add curry leaves and slit green chilies. Sauté for a few seconds.

  3. Add cooked rice to the pan. Mix well to combine.

  4. Stir in turmeric powder and salt.

  5. Add roasted peanuts and mix again until everything is evenly distributed.

  6. Cook for a few more minutes, stirring occasionally, until heated through.

  7. Serve hot as a main dish or side with yogurt or pickle.

6. Peanut Curry (Shengdana Chi Amti):

Ingredients:

  • 1 cup roasted peanuts

  • 1/4 cup grated coconut

  • Small piece of tamarind (about 1 teaspoon)

  • 1 tablespoon jaggery (optional)

  • 1 teaspoon turmeric powder

  • 1 teaspoon cumin seeds

  • 1 teaspoon coriander seeds

  • 2-3 dried red chilies

  • 3-4 garlic cloves

  • Salt to taste

  • 2 tablespoons oil

Method:

  1. Dry roast cumin seeds, coriander seeds, dried red chilies, and garlic cloves until fragrant.

  2. Grind the roasted spices along with roasted peanuts, grated coconut, tamarind, jaggery (if using), turmeric powder, and salt into a smooth paste using a blender or food processor.

  3. Heat oil in a pan. Add the ground paste and cook over medium heat for a few minutes.

  4. Add water to adjust the consistency of the curry as desired.

  5. Bring the curry to a gentle boil, then reduce the heat and let it simmer for 5-7 minutes.

  6. Serve hot with steamed rice or roti.

Conclusion In conclusion, peanuts are a versatile and nutritious ingredient widely used in Indian cuisine. From savory dishes like peanut masala and peanut curry to sweet treats like peanut ladoo, peanuts add flavor, texture, and nutritional value to a variety of recipes. Whether roasted, ground into chutneys, or mixed into salads, peanuts offer a delicious way to enjoy the rich flavours of Indian cooking. With their abundance of protein, healthy fats, and essential vitamins and minerals, peanuts not only enhance the taste of dishes but also contribute to a balanced and wholesome diet. So next time you're in the kitchen, consider incorporating peanuts into your Indian culinary adventures for a delightful and satisfying meal experience.

Ingredient Ideology | Culinary Delights Using White Mooli By: Dr. Kaviraj Khialani- Celebrity Master Chef

Culinary Delights Using White Mooli

Introduction to Mooli or White Radish:

Mooli, also known as white radish or daikon radish, is a versatile root vegetable with a mild, slightly peppery flavour. It is commonly used in South Asian cuisines, both raw in salads and pickled, as well as cooked in various dishes like stir-fries and soups. Rich in vitamin C, potassium, and fibre, mooli is low in calories and offers potential health benefits, including digestive support. It's a popular ingredient known for its crisp texture and subtle taste.

Winter mooli or white Radish it's health benefits

Winter mooli, or white radish (daikon radish), offers several health benefits, especially during the colder months. Here are some of its advantages:

  1. Rich in Vitamin C: Winter mooli is a good source of vitamin C, which is essential for immune system support. Adequate vitamin C intake during the winter months can help the body fend off colds and flu.

  2. Digestive Health: The fiber content in mooli promotes digestive health by preventing constipation and supporting regular bowel movements. This is particularly beneficial during the winter season when dietary habits may change.

  3. Hydration: Mooli has a high-water content, which contributes to hydration. Staying well-hydrated is important, especially in winter when the air tends to be drier and can contribute to dehydration.

  4. Low in Calories: For those watching their calorie intake, winter mooli is a good choice. It is low in calories but still provides essential nutrients, making it a healthy option for weight-conscious individuals.

  5. Diuretic Properties: Mooli is believed to have diuretic properties, promoting the elimination of excess water from the body. This can be beneficial for those looking to reduce water retention.

  6. Antioxidant Properties: The radish contains antioxidants that help neutralize harmful free radicals in the body, potentially reducing the risk of chronic diseases and supporting overall health.

  7. Potential Detoxification: Some traditional practices attribute detoxification properties to mooli, suggesting that it may help cleanse the liver and kidneys.

It's important to note that while mooli has several health benefits, a balanced and varied diet is crucial for overall well-being. Including a variety of fruits, vegetables, and other nutrient-rich foods in your diet will contribute to optimal health. As always, individual dietary needs and responses may vary, so it's advisable to consult with a healthcare professional or nutritionist for personalized advice.

How to use mooli in our day-to-day cooking?

Mooli, or white radish, can be a versatile and tasty addition to your day-to-day cooking. Here are some ideas on how to use mooli in various dishes:

  1. Raw in Salads:

  • Grate mooli and mix it with other salad ingredients like carrots, cucumbers, and greens.

  • Add a squeeze of lemon juice, salt, and pepper for a simple and refreshing salad.

Pickled Mooli:

  • Slice mooli thinly and pickle it with vinegar, salt, sugar, and your favourite spices.

  • Homemade pickled mooli can be a flavourful condiment to accompany various meals.

Stir-Fries:

  • Include mooli in stir-fries with other vegetables and proteins like tofu, chicken, or shrimp.

  • Its mild flavour absorbs the seasonings and adds a unique texture to the dish.

Soups and Stews:

  • Dice mooli and add it to soups or stews. It can bring a slightly peppery taste to the broth.

  • Mooli complements well with other winter vegetables in hearty soups.

Mooli Paratha (Indian Flatbread):

  • Grate mooli and mix it with whole wheat flour to make a dough for parathas.

  • Cook on a griddle with ghee or oil for a flavourful and nutritious flatbread.

Mooli Raita:

  • Grate mooli and mix it with yogurt. Add cumin, salt, and a dash of chili powder.

  • Mooli raita makes a cooling side dish to complement spicy curries.

Mooli Sabzi (Indian-style Curry):

  • Cook mooli with spices like cumin, coriander, turmeric, and garam masala for a flavourful Indian-style curry.

  • Serve with rice or flatbread.

Juicing:

  • Blend mooli with other fruits and vegetables for a nutritious juice.

  • You can add a touch of ginger or lemon for extra flavour.

7 Recipes using Mooli

1. Mooli Paratha (Indian Flatbread):

Ingredients:

  • 2 cups whole wheat flour

  • 1 cup grated mooli (squeeze out excess water)

  • 1 teaspoon cumin seeds

  • 1/2 teaspoon turmeric powder

  • Salt to taste

  • Water for kneading

Instructions:

  1. Mix whole wheat flour, grated mooli, cumin seeds, turmeric powder, and salt.

  2. Knead into a soft dough using water.

  3. Divide into small balls, roll into parathas.

  4. cook on a griddle with ghee.

2. Mooli Sabzi (Radish Curry):

Ingredients:

  • 2 cups grated mooli

  • 1 onion, finely chopped

  • 2 tomatoes, chopped

  • 1 teaspoon ginger-garlic paste

  • 1/2 teaspoon cumin seeds

  • 1/2 teaspoon turmeric powder

  • 1 teaspoon coriander powder

  • Salt and red chili powder to taste

Instructions:

  1. Sauté cumin seeds, add onions and ginger-garlic paste.

  2. Add tomatoes, spices, and grated mooli. 

  3. Cook until mooli is tender.

3. Mooli Ki Kadhi (Radish in Yogurt Gravy):

Ingredients:

  • 1 cup grated mooli

  • 1 cup yogurt

  • 2 tablespoons besan (gram flour)

  • 1 teaspoon mustard seeds

  • Curry leaves and dry red chilies for tempering

  • Salt and turmeric powder to taste

Instructions:

  1. Mix grated mooli, yogurt, besan, turmeric, and salt.

  2. Temper with mustard seeds, curry leaves, and red chilies. Cook until it thickens.

4. Mooli Kofta Curry:

Ingredients:

For Koftas:

  • 1 cup grated mooli

  • 2 tablespoons besan

  • 1/2 teaspoon garam masala

  • Salt to taste

For Curry:

  • 1 onion-tomato gravy base

  • 1/2 cup cream or coconut milk

  • 1 teaspoon kasuri methi (dried fenugreek leaves)

Instructions:

  1. Mix grated mooli, besan, garam masala, and salt. Shape into koftas and fry until golden.

  2. Prepare a curry base with onions and tomatoes. Add cream or coconut milk, kasuri methi, and koftas.


5. Mooli Moong Dal (Radish and Lentil Soup):

Ingredients:

  • 1 cup yellow moong dal (split yellow lentils)

  • 1 cup grated mooli

  • 1 tomato, chopped

  • 1 teaspoon cumin seeds

  • 1/2 teaspoon turmeric powder

  • 1/2 teaspoon mustard seeds for tempering

Instructions:

  1. Cook moong dal with grated mooli, tomato, cumin seeds, and turmeric powder.

  2. Temper with mustard seeds. Garnish with cilantro.

6. Mooli Thepla (Radish Flatbread):

Ingredients:

  • 2 cups whole wheat flour

  • 1 cup grated mooli

  • 1 teaspoon ginger-green chili paste

  • 1/2 teaspoon turmeric powder

  • 1/2 teaspoon cumin powder

  • Salt to taste

Instructions:

  1. Mix whole wheat flour, grated mooli, ginger-chili paste, turmeric, cumin powder, and salt.

  2. Knead into a soft dough, roll into theplas, and cook on a griddle.

7. Mooli Ka Achar (Radish Pickle):

Ingredients:

  • 1 cup grated mooli

  • 2 tablespoons mustard oil

  • 1 teaspoon fenugreek seeds

  • 1/2 teaspoon turmeric powder

  • Red chili powder and salt to taste

Instructions:

  1. Heat mustard oil, add fenugreek seeds, and let them splutter.

  2. Mix in grated mooli, turmeric, red chili powder, and salt. Cook until mooli softens

Conclusion 

Mooli, or white radish, is a versatile and nutritious vegetable that can be incorporated into various Indian dishes across different categories. From the hearty Mooli Paratha to the refreshing Mooli and Carrot Salad, the mild yet distinctive flavour of mooli adds a unique dimension to your culinary repertoire. Whether enjoyed in traditional curries, pickles, or innovative salads, mooli offers a range of health benefits, including digestive support and immune system boost. Embrace the culinary diversity of mooli in your day-to-day cooking, exploring the rich tapestry of flavours it brings to your table.


Ingredient Ideology | Ways with Vermicelli By: Dr. Kaviraj Khialani- Celebrity Master Chef.

Easy to Make & Amazing to Cherish Vermicelli Recipes

Vermicelli is a traditional type of pasta round in a section similar to spaghetti. In English-speaking regions, it is usually thinner than spaghetti, while in Italy it is typically thicker. The term vermicelli is also used to describe various types of thin noodles from Asia. Out of the various ingredients used for making upma and payasam, the Vermicelli, also known as Semiya (in Tamil), Seviyan (Hindi), and Shemai (Bengali), finds a special mention. It is popular in several Indian states and is most commonly used for preparing a sweet preparation similar to kheer. 

Also to note that as vermicelli is a high-calorie food rich in simple carbohydrates, it is not a good meal option for weight loss. Vermicelli/ Sevai/ Semiya which is made from Sooji and no Maida i.e. refined wheat flour. Vermicelli is an effortless, healthy, and wholesome breakfast recipe. It's high in fiber and low in calories too these days by some brands and companies.

Nutritionally vermicelli is calorie-dense high in carbs, fat, and cholesterol free low in sodium. A great alternative to other forms of pasta and oats liked by all irrespective of age. Breakfast prepared with vermicelli is incredibly delicious which is also good for toddlers and pregnant women. The extra fiber in brown rice means it is a bit lower on the glycemic index (GI), with a score of 50—compared to 72 for white rice. Rice vermicelli scores 58 on the glycemic index, so it's in between these scores. Rice noodles are also called rice sticks, vermicelli, and other variations of these words. The noodles are naturally gluten-free with a typical ingredient list of rice flour and water. Vermicelli actually refers to the width of the noodle rather than the flour it is made of.

Here are a few easy-to-make yet delicious concoctions to try out this festive season!

Recipe-1] DILKHUSH NUTKHUT VERMICELLI

Ingredients:

Seviyan- ½ packet/ 1 and a half cup, semi-roasted

Ghee-1 tsp

Sugar- 1 cup or as per taste

Honey-2-3 tsp

Green cardamom powder-1/4 tsp

Cashew powder-1 tsp

Almond powder-1 tsp

Raisins- 2 tsp, chopped

Milk-750 ml or as needed

Mava – 100 gms, grated

Condensed milk- ¼ cup

Method:

1. prepare all the ingredients as per the recipe sheet and as per the quantities given in above.

2. using a thick-bottomed pan, add ghee, seviyan, sugar and start roasting it all lightly on a low to medium flame, add in the milk and stir well.

3. reduce the flame and stir well ensuring there are no lumps in the pan. Add in some of the nuts and mix well, simmer and allow to cook for 6- 8 mins.

4. add in mava, and condensed milk and stir well. Check for sugar as per taste and add more if needed. Add honey and mix well. Cook for another 3-4 mins and turn off the flame.

5. portion out the sweet in a serving dish or in individual bowls, dessert cups and garnish it well with nuts, dried rose petals etc and raisins, dates etc can also be used to adorn the sweet. At times I also use dark chocolate garnishes or shavings as well on the chilled dessert as an option.


Recipe-2] VERMICELLI KHEER SHORTS

Ingredients:

Ghee-1 tsp

Vermicelli- 1 and a half cup, semi roasted

Sugar- 1 cup or as needed

Milk-750 ml or as needed

Green cardamom powder-1/4 tsp

Mava- 1 tbsp. grated

Condensed milk-2-3 tsp

Chopped nuts-2-3 tsp

To layer in the glasses later for serving:

Rabdi- 1 and a half cup

Assorted fresh fruits- 1 cup

Glazed cherries- 1-2 tsp sliced

Rose syrup/ khus syrup-1-2 tsp

Method:

1. Prepare all the ingredients for the sweet recipe as per the list above.

2. To start with the cooking of the sweet, heat ghee in a thick-bottomed pan, add in ghee add vermicelli, and sugar, and stir well, lightly saute add in the green cardamom powder, add in milk and give it all a nice stir.

3. allow the sweet to simmer and cook for around 10-12 mins, now add in the nuts and also cook it further for 3-4 mins on low flame. The texture of the sweet needs to be a little thick and creamy therefore a little condensed milk may be added too.

4. check the sweetness and overall balance in the recipe and then choose to turn it off. Allow the sweet to cool down and chill for 30-45 mins.

5. now to start the layering of the sweet, choose between sweet glasses, cups, pudding bowls etc and place a little of the seviyan sweet at the base and then layer with fresh fruits, rabdi, nuts and add some cherries, tooti frooti etc to add some crunch and color.

6. allow the glasses to chill in the fridge for around 30- 45 mins and then serve the dessert.

Recipe-3] FUSION FUNDA WALI VERMICELLI

Ingredients:

Butter-1 tsp

Ghee-1 tsp

Brown sugar-1/2 cup

White sugar-1/2 cup

Seviyan-1 and a half cup

White chocolate-1/2 cup melted

Dark chocolate -1/2 cup melted

Milk- 750 ml

Green cardamom powder/ cinnamon powder-1 pinch

Angoori Gulab jamuns- 10-12 pieces

Angoori rasmalai- 10-12 pieces

Cashews-2 tsp chopped

Raisins-2 tsp chopped

Walnuts-2 tbsp. chopped

Dates-2 tbsp. chopped

Rose water-2 tsp

Praline- ¼ cup crushed/ chikki

Rose petals- ½ cup optional for garnish

Edible varq- 1-2 pieces for garnish.

Method:

1. prepare all the ingredients for the sweet as listed above and keep ready.

2. to start preparing the sweet using a thick-bottomed pan, add ghee and butter and saute the vermicelli for a few seconds, add in the white and brown sugar, and some green cardamom or cinnamon powder for flavor.

3. add in the milk and chopped dates and allow to simmer and cook. Once the seviyan starts cooking we need to check on the texture of the sweet to ensure that the thickness, sweetness, and overall balance is maintained.

4. once the seviyan starts thickening the sweet, turn off the flame and allow to cool. Now start with the fusion aspect of coating the ras malai with dark chocolate and the jamuns with white chocolate, once coated, allow to set in the fridge for some time.

5. now start with the assembling of the sweets, use dessert cups, short glasses, pudding bowls, start with the kheer first and then layer the set chocolate goodies, cover with a little more seviyan mixture, and then garnish with nuts, petals, and garnishes as desired.

6. chill the dessert for another 30-45 mins before serving it out. The chilling in the fridge adds a lot of dimension and texture as well to the sweet dish.

Recipe- 4] KHAJOOR WALI MEETHI VERMICELLI

Ingredients:

Ghee-1 tsp

Oil-1 tsp

Honey-1 tbsp.

Seviyan- 1 and a half cup

Green cardamom powder-1/4 tsp

Sugar- ½ cup white

Jaggery-1/2 cup grated

Milk- 750 ml

Mava- 50 gms grated.

Condensed milk-1/4 cup

Assorted chopped nuts- 2 tbsp. cashews, walnuts, raisins.

Date puree-1/2 cup

Melted dark chocolate/ choco chips- ¼ cup

Method:

1. prepare all the ingredients for the recipe as listed above and keep ready.

2. to start with the cooking of the sweet dish, we need to take a thick-bottomed pan, add in the ghee, oil etc and start the roasting process of the seviyan add elaichi powder, and sugar to taste and stir well.

3. add in the milk and allow to come to a boil, once the sweet starts to cook, it starts thickening add in the jaggery and mix well. Add some honey and condensed milk as well to get the right sweetness.

4. simmer and allow to cook for 10-12 mins, check for sweetness, and texture and get the right balance in the sweetness. It is important to taste the sweet while being cooked so that there is no overpowering. Also we must ensure that the sweet doesn’t stick at the base.

5. turn off and allow to cool and chill the sweet, add nits to garnish the sweet dish. This dessert turns out the best when well chilled, add chocolate sauce/chips and some fresh fruits as well like strawberries/ kiwi/ dragon fruit etc to add a little variety in the look and presentation.

Recipe- 5] KHUSH MIJAZ VERMICELLI

Ingredients:

Ghee- 1 tsp

Butter-1 tsp

Seviyan -1 and a half cup

White sugar- ½ cup

Condensed milk-1/4 cup

Green cardamom powder-1/4 tsp

Saffron-1/4 tsp soaked in ½ cup warm milk

Chopped cashews- 2 tsp

Raisins-2 tsp chopped

Almonds-2 tsp chopped

Dates-2 tsp chopped

Milk- 750 ml

Kesari pedha- 50 gms

Rabdi-1 cup

Method:

1. prepare all the ingredients for the sweet recipe and keep aside.

2. to start the cooking process take a thick-bottomed pan and add in ghee/butter add in the vermicelli, sugar, and elaichi, and saute well for a few seconds.

3. add in the milk and condensed milk and give it a nice mix. Allow to simmer for 10-12 mins. Check for the sweetness and adjust it accordingly.

4. once the sweet starts getting thick, add in the roughly crumbled kesari pedha and dates and mix well. Turn off the flame and allow it to cool.

5. set the sweet in small dessert cups/bowls etc. and allow to set in the fridge for 30-45 mins. Add nuts for garnish and relish the sweet. For some more added fusion touch to it, try adding a jalebi injected with rum, flamed, and place it on the top and enjoy it.

Ingredient Ideology | A Melange Of Desi Flavors To Offer This Festive Season, By: Dr. Kaviraj Khialani- Celebrity Master Chef

It’s Festivity Time- Ganapati Bappa Morya!

We are finally at that part of the year when the festivity has just begun! With the onset of the auspicious occasion of Lord Ganesh Festival, we are now looking up to a series of occasions to celebrate, have an array of spreads and sweet treats to entice our palate and offer blessed delicacies to our loved ones, friends & families. Food has always been an integral part of any festival and it somehow connects us together and spreading the joy of happiness and bites of delicious preparations adds it up all the more, making it memorable.

Sweets & mithai are always a temptation but moderation being the key to balance must be always kept in mind. Planning is of vital importance when it comes to festive cooking and especially with sweets, it is always a good idea to make a list of ingredients needed, approximate quantities required, any special unusual product/ equipment etc needed or so must be on the reminder list before we start getting into the kitchen to get things rolling. Also another important element to perfection here is to follow the recipe and do not always go with just guessing and approximation since some of the sweet recipes need formula balancing as we technically call it.

Here are a few of my favorite sweets, easy to make in your kitchens and offer it to the almighty and loved ones!

Recipe-1] MODAK KA PRASHAD

Ingredients:

For the covering of the modak:

Water-2 cups

Salt-1/2 tsp

Rice flour-2 cups

1-2 tsp ghee

For the stuffing of the modak:

Ghee-1-2 tsp

Coconut- grated-2 cups

Jaggery-1 cup, grated

Green cardamom powder-1/2 tsp

Method:

1. In a thick bottomed pan or kadai firstly prepare the stuffing for the modak prashad.

2. Add ghee to the pan and place in the grated coconut and on a medium to low flame keep sautéing the coconut until it gets nice and aromatic.

3. Now add in the grated jaggery and give It a nice mix, stir it well until the jaggery melts down well into the coconut and flavors it well, finally add the cardamom powder, mix and keep aside.

4. Now let us prepare the covering for the modak, heat up water, salt, ghee in a pan, add in the rice flour and give it a nice mix for a minute or so, cook until the water is all well absorbed, cover and turn off the flame, rest for 3-5 mins.

5. Now knead the mixture by placing it in a large steel bowl and convert it into a dough and use a little wet hand if it feels dry.

6. To shape up the modak, divide the prepared dough mix into small portions, flatten slightly place the coconut filling in the center and start sealing either with hands or using a modak mould.

7. To steam the modak, prepare a steamer with water simmering in it. Place the prepared modak on the racks and continue to steam for 10-12 mins, or until they all look brighter and shiny in texture, carefully take them out of the steamer, arrange on a serving platter and offer to the lord first.


Recipe-2] KESARI BADAMI SHRIKHAND

Ingredients:

Curd- 1 cup

Powder sugar- 4-5 tbsp.

Warm water-1-2 tsp

Saffron strands- 4-6 no

Almonds-2 tsp chopped

Cashews-2 tsp chopped

Cardamom powder-1/4 tsp

Charoli/ assorted nuts as needed for garnish.

Method:

1. Firstly, place a sieve in a large bowl. Place a muslin cloth on it. Transfer the curd on the cloth and tie it. Keep it in the refrigerator for 2-3 hrs or overnight. So that all the water is removed from the curd. Add saffron strands to 1 tsp of warm water and keep aside.

2. Now transfer the hung curd to the sieve and add powder sugar to it. Sieve the curd and sugar. Now add saffron water to the curd and mix everything well. Add cardamom powder and chopped almonds to it and mix well.

3. Lastly, transfer the shrikhand to a serving bowl and garnish with some more chopped almonds and a pinch of cardamom powder. 

Note -
1. Make sure to use fresh thick curd, to have rich quality shrikhand.
2. The amount of sugar depends on the sourness of the curd. Do not use too sour curd for shrikhand.

Recipe- 3] MAAVEDAAR HALWA

Ingredients:

Carrots- 500 gms, peeled, grated

Ghee-1/4 cup

Green cardamom powder-1/4 tsp

Sugar-1 cup or as per taste

Mava/ khoya-1/2 cup

Cashews-2 tsp chopped

Almonds-2 tsp chopped

Raisins-2 tsp 

Milk- 600 ml

Method

1.Firstly, peel the skin of carrot and grate finely. keep aside. Traditionally the winter carrots are used to prepare halwa during winter seasons.

2. In a large kadai heat ¼ cup ghee and fry the assorted nuts like cashews, raisins, almonds etc. Fry until it turns golden brown. keep aside.

3. In the same ghee add grated carrot and saute well. Saute for 5 minutes or until it changes colour slightly.

4.Now pour 3 cup milk and give a good stir, boil for 10 minutes stirring occasionally, continue to boil until the carrots are cooked well and milk reduces.

5. Once the milk starts to thicken a little, add ¾ cup sugar. Mix well and cook until the sugar dissolves and thickens. Cook until the halwa thickens and ghee releases from sides.

6.Finally turn off the flame and ½ cup mava/ grated khoya, ¼ tsp cardamom powder and fried nuts.mix well making sure everything is well combined. Finally, enjoy gajar ka halwa or carrot halwa chilled or warm

Ingredient Ideology | Tri Color Treats The Eve Of Independence Day By: Dr. Kaviraj Khialani- Celebrity Master Chef.


In India, the term "tricolour" refers to the Indian national flag. The National flag of India is a horizontal tricolour of deep saffron (kesari) at the top, white in the middle and dark green at the bottom in equal proportion. The design of the flag of India that was first presented in 1921 to Late Shri. Mahatma Gandhi, leader of the All-India Congress, was created by Pingali Venkayya. 

The Chakra or the wheel also symbolizes the Power of the State governed by Dharma. It is also called the tiranga or tricolour. The National Flag is a horizontal tricolour of India saffron (kesari) at the top, white in the middle and India green at the bottom in equal proportion.

 The ratio of width of the flag to its length is two to three. In the centre of the white band is a navy-blue wheel which represents the chakra. The top saffron colour, indicates the strength and courage of the country. The white middle band indicates peace and truth with Dharma Chakra. The green shows the fertility, growth and auspiciousness of the land.

Food is also one of the important elements associated with the tricolour and as we represent various meanings and values via colours it not only pleases the senses and whets the appetite but also creates wonderful concoctions and makes our culinary diaspora more rich and varied from Indian cooking to international it gives a sense of brotherhood and togetherness creating a melange of flavours, tastes and balance.

Here are a few of my favourite easy to make recipes with a mix-n-match touch of twist on this auspicious occasion of 15th August!

Recipe-1] TIRANGA SUBZI PULAO

Ingredients:

Basmati rice- 2 cups boiled, divided into 3 parts.

Makhani gravy- for the orange layer- 1 and a half cup

White onion- cashew- coconut gravy- 1 cup for white layer

Green spinach gravy- 1 cup for the green layer

Star anise-1 no for the center garnish.

To assemble the pulao:

Edible food colors which are safe to use may be used to color the rice lightly or just lightly toss them in the respective gravies as well with a little butter.

Fried onions/ birishta- 1 cup

Fried cashews and raisins-1/2 cup

Rose water-2-3 tbsp.

Kewra essence-2-3 tsp

Pure ghee-2-3 tsp

Coriander and mint leaves-1/2 cup chopped

Saffron and milk solution-1/4 cup

For adding into the makhani gravy:

 Saute some cubes of chicken tikka for non veg- or Paneer cubes/ mushroom quarters/ carrot cubes/ soya chunks etc and cook it in the gravy and keep aside.

For adding into the white gravy:

Fried makhanas, cubes of cooked potatoes, grated cheese or cream cheese can be used, for non-veg options use marinated fish or boneless chicken cubes in malai tikka marination.

For adding into the green gravy:

Boiled green peas, cubes of blanched green zucchini, blanched broccoli florets, blanched snow peas, methi paneer koftas, for non-vegetarian options use prawns or shrimps or pahadi chicken tikka sliced.

Method:

1. This recipe is more of a pre-prepared assembly recipe in which we are trying to combine together three different flavors of indian cuisine in one pulao recipe, we can choose veg or non-veg.

2. Once we have prepared the rice as per the divisions and also tossed the veg/non-veg in respective gravies we need to now assemble and layer the pulao in a flat thick bottomed kadai.

3. Spoon in a little ghee at the base of the kadai and then start placing the respective gravy tossed veggies/non-veggies in three sections in the kadai, sprinkle all the biryani garnishes and flavorings all over and then top with the respective colored rice.

4. Place a tava below the kadai, cover with a tight-fitting lid, apply atta on the side or aluminum foil and place some weight on the top and give dum to the tri-colored pulao for 20-25 mins, serve hot.

Recipe-2] TIRANGA PANEER ZAIKEDAAR

Ingredients:

Paneer/ tofu – 400 gms, cut into cubes, divide into three parts.

For the orange marination:

Use a tandoori marinade as always and coat the paneer or tofu cubes and keep aside for 20-25 mins, arrange them on a skewer and cook either in a non-stick grill pan or using the oven/tandoor.

For the white marination:

Use a combination of little oil, curd, cream, cashew paste, salt, garam masala powder, ginger-garlic paste and apply on the paneer or tofu and keep aside for 20-25 mins, arrange them on a skewer and cook either in a non-stick grill pan or using the oven/ tandoor.

For the green marination:

Use a combination of little oil, curd and green mint and coriander chutney with a little blanched spinach puree as well, green chili-ginger-garlic paste and touch of spices, apply on the paneer or tofu and keep aside for 20-25 mins, arrange them on a skewer and cook either in a non-stick grill pan or using the oven/ tandoor.

To serve with:

Green mint and coriander chutney/ assorted dips.

Sliced onion & lemon slices/wedges.

Method:

1. The paneer or tofu preparation in this case also uses three different colors as marination and shall be assembled separately, cooked and then served on the same platter.

2. Being a starter category recipe, we can make this pre-preparation a day prior and keep it refrigerated as well, we can also use chicken or fish for non-veg variations for the same recipe.

3. Once we have cooked the paneer/ tofu skewers as per choice of method of cooking it, we need to assemble the platter to serve this colorful starter.

4. Place the cubes of paneer/tofu de-skewer them on the platter, sprinkle a little lime juice and dash of chaat masala over and arrange the chutneys and other accompaniments by the side and serve hot.


Recipe-3] TRI- COLOURED GRILLED SANDWICHES

Ingredients:

Sliced white/ brown/ multi-grain bread- 12-14 slices

For the orange layer:

Butter-1 tsp to spread on the bread slices

Tandoori mayonnaise/schezuan sauce-2-3 tsp to spread

Tomato slices- ½ cup de-seed and use them.

Salt- pepper- chaat masala to flavor.

For the white layer:

Butter-1 tsp to spread on the bread slices

Eggless mayonnaise-2-3 tsp to spread

Sliced cucumbers-1/2 cup or boiled sliced potatoes-1/2 cup

Salt-pepper- chaat masala to flavor.

Grated cheese-1/2 cup to spread.

For the green layer:

Butter-1 tsp to spread

Mint mayonnaise-2-3 tsp to spread

Shredded green capsicums-1/2 cup

Salt-pepper- chaat masala to flavor.

Method:

1.Pre-prep all the ingredients as per the divisions to get the tri color effect in this bulky grilled sandwich concept, good for a brunch or evening snack.

2. Apply butter and then the flavoured spread on the bread slices, assemble the ingredients as listed and sandwich them.

3.Now the tri color layered sandwiches are ready and assembled, heat up a griller or grill pan and place it carefully to get nice grill marks on both sides turning them carefully and smearing a little melted butter as well when we do that.

4. Once we get a nice grilled effect and golden brown color on our sandwiches, remove them, cut them with a sharp knife into triangles/squares etc and assemble them on the serving platters and serve them with ketchup, hung curd- mint and cucumber dip, green pesto chutney etc and wafers/chips/french fries.

Recipe-4] TRIO SWEET TEMPTATIONS

Ingredients:

For the dessert mix:

Milk- 1 litre boiled

Sugar- to taste

Condensed milk may also be used if desired.

Green cardamom powder-1/2 tsp

Rice paste- ½ cup, raw rice and water to grind- fine paste

Rose water-2-3 tsp

Mava- 100 gms grated

For the orange flavor and color:

Use orange essence

Use orange crush

Use orange segments

For the white layer and flavor:

To be used the way it is add blanched sliced almonds

For the green flavor and color:

Use fresh kiwi fruit puree

Use kiwi crush

Use khus syrup 

For garnishing we can use many options:

praline/chikki can be crushed and used.

Glazed cherries

Meetha paan can be chopped and used

Method:

1. Prepare a basic mixture of the phirni concept by using a thick bottomed saucepan, combine together the milk, sugar to taste, elaichi powder, rice paste and keep stirring it carefully and cook the mixture for around 30-45 mins until nice and thick like custard and well cooked.

2. Turn off the flame and check for sweetness adjust and divide the mixture into three portions.

3. Mix in the ingredients as listed above to get the desired color contrasts in the prepared phirni.

4. Use dessert glasses/ cups and layer the tri-coloured phirni and garnish as desired accordingly.

5. We need to chill this dessert for 2-3 hours in the fridge and then relish the flavors from these layers one by one.

Recipe-5] TRIO COLORED DESI TEMPERED SEMOLINA DISCS

Ingredients:

Semolina/rava-1 and a half cup

Curd- 1 cup sour curd to be used ideally

Salt to taste

Sugar -1/2 tsp

Ginger-1 tsp grated

Green chilies-1 tsp chopped

Water-1/2 cup

For the orange layer-1 carrot to be pureed and used

For the green layer-1/4 cup blanched spinach paste/chutney

baking soda- ¼ tsp for each layer for steaming to be added

we can also use ¼ tsp of eno as well in the layers in place of soda.

oil for greasing and tempering for the discs.

For the tempering:

Oil-2 -3 tsp

Hing-1/4 tsp

Curry leaves- 10-12 no

Mustard seeds-1-2 tsp

Green chilies-2-3 slit/shredded

White sesame seeds-1-2 tsp

Lime juice-2-3 tsp

Coriander and mint leaves- ¼ cup chopped

Water- 2-3 tbsp.

Sugar-1-2 tsp

Salt-1 pinch

Combine together and cook for 1-2 mins.

To serve with: assorted chutneys/ dips of your choice to go along with the snack.

Method:

1. Clean the semolina, add it to a bowl add in the sour curd and add little salt and 2 tbsp. water mix well, cover and keep aside for 20 mins.

2. Prepare the blanched carrot puree and blanched spinach paste as well and keep aside.

3. Now post resting we need to divide the semolina curd mixture into three equal parts.

4. Mix in the carrot puree and spinach puree respectively into their parts and keep one part as white itself.

5. Get the steamer ready meantime with water and slice of lime in the water, get the mould/thali ready and greased with little oil or ghee.

6. Add a little water to all the three parts of the semolina mixture to get it to right dropping texture and add in the baking soda and mix well and pour the mixture into the mould.

7. Start with the green layer first, place it in the hot steamer and cover, steam for 5-6 mins, remove and place the white layer and repeat the steaming process and finally the top layer with the orange semolina mixture and steam once again for 5-7 mins, using a toothpick check if it comes out clean, turn off the flame and let the mixture rest in the steamer for 5 mins.

8. Remove the steamed preparation and loosen the edges with a oiled knife and de-mould it and cut into discs using a round cutter and place it on your serving platter.

9. The last step is to prepare the tempering and once it all comes together and cooks for a couple of minutes, pour the hot tempering over the discs and serve it immediately with assorted dips/chutneys of your choice.

Ingredient Ideology |  The Art Of Cooking Wonder Using Air Fryer BY: Dr. kaviraj khialani Celebrity Master Chef

Cooking trends in India have always seen a number of changes every couple of years and we come across a number of Western and globally influenced systems and methods of applying our food to in order to have something new being done and having the foodies and connoisseurs raise their eyebrows with culinary anxiety pangs to relish and cherish something new coming on the plate to please and treat the palates!

While most of us seem to be on track of being aware that health is wealth especially post the pandemic where a lot of concern stayed on with keeping up high on immunity, eating healthy and staying fit in order to keep any contaminations and viruses at length, there also came about a revolution in the style of cooking fried recipes via using air fryers instead of a deep frying kadai full of oil and immersing our foods into it and getting taste and crunch out from it within a few minutes. Here are a few thoughts, ideas and a few recipes which we can try out using air-fryers and satisfy our hunger pangs with a little less guilt!

What Is an Air Fryer?

An air fryer is a countertop cooking appliance that combines a heating element and a powerful fan to circulate hot air, similar to a convection oven. Air fryers produce foods that are crispy outside and moist and tender inside without actual frying. Philips invented the original air fryer and debuted it at a European consumer electronics fair in 2010. Since then, the category has exploded. By some estimates, more than 25 million air fryers were sold in the U.S. over the past two years. Philips’ original brand name, Air fryer, has now become the generic term for the category.

How Does an Air Fryer Work?

Air fryers use convection heat to cook foods so that they are browned and crispy on the outside but remain moist and tender on the inside. Cooking with an air fryer takes less time and makes less of a mess than deep frying or traditional oven roasting. Another plus is that air frying also uses minimal oil. The top section of an air fryer holds a heating mechanism and fan. You place the food in a fryer-style basket and when you turn it on, hot air rushes down and around the food. This rapid circulation makes the food crisp—much like deep-frying but without the oil.

Unlike a deep fat fryer, where food is submerged in hot oil, an air fryer uses convection heat. Air fryers circulate hot air to cook the food, similar to a fan oven and rely on a chemical process known as the Maillard reaction to crisp up the exterior of food, with tasty results.

(The Maillard reaction is an interaction between amino acids—the building blocks of protein—and reducing sugars. It provides the browning of foods and imparts mouth-watering toasty flavors in dishes.)


How Successful has Air Fryer been in India?

“In fact, cooking with an air fryer can be a healthy cooking method as it uses hot air to cook food rather than oil. By using less oil, it can reduce the fat and calorie content of the food compared to deep-frying or pan-frying,” 

As most of the Fried snacks like Samosa, aloo tikki, kulcha, kachori etc can be done in air fryer with minimum amount of oil most of the households with health concern or diet conscious had purchased the same.

It is compact in size which also helps as it required less space in the kitchen.

How comfortable is it for cooking?

Air fryers feature perforated baskets, wire racks, and/or ceramic plates with holes that allow hot air from above to circulate around food at temperatures around 400 degrees Fahrenheit. This cooks the outside first and seals in the moisture. If you’re looking for convenience, you’ll find that some models come with pre-set programs to cook common foods at the touch of a button. You may also have a preference for digital controls – think LEDs and touchscreens – versus analog dials to control time and temperature.

10 popular foods which people can easily made using Air Fryer:

  1. French Fries.

  2. KFC style Chicken Fry / Koliwada Prawns

  3. Paneer Kurkure.

  4. Baked Samosa.

  5. Aloo Tikki

  6. Cookies/ Nankhatai.

  7. Pizza.

  8. Air fryer chicken.

  9. Frozen food Air fried.

  10. Bhajji / Pakora / Potato Fritters.

Minus point of Air fryer in India.

As the Average size of Air fryer in India is about 4L, It is found to be too compact and it is a bit expensive if compared to OTG where OTG can be available from 16l size which can allow to cook more quantity at a time.

In India most of the street vendor prefer OTG as it is user friendly and also the quality of the product turn out excellent. Most of the items which are made using batter does not turn up in same taste as deep fried. As microwave also provide slim fry option now people prefer the same over Air Fryer.

And in India as the people are more concern about flavours & taste Air Fryer option has somehow not been a very convincing solution or alternative as well for everyone on the whole as per my survey, inputs and interactions with food professionals and chefs and I wish to appreciate the efforts put in by Mr. Ankit Mane, in helping this feature happen.


   Here are a few recipes which we can try out using an AIR- FRYER at home:

Recipe- 1] CHATPATI ALOO TIKKIYA 

                   Ingredients:

  • 2-3 med sized Potatoes

  • 1/4 Cup Green peas

  • 1 Tbsp Rice flour

  • 1/4 tsp Turmeric powder

  • 2 tsp Ginger chilli paste

  • 1/2 tsp Garam Masala

  • 1 tbsp Fresh coriander

  • 1-2 tbsp cooking oil

Method:

  1. To make this tikki, we need to steam and cook the potatoes.  I have steamed the potatoes in an instant pot. Add some water into the inner pot. Insert a trivet. keep the washed and cleaned potatoes on it, close the lid. Keep the vent in the sealing position. Pressure cook it for a few mins.

  1. Cook the peas till soft and cool it.

  2. Add the mashed potatoes and peas and mix well

  3. Now add the ginger chilli paste, turmeric powder, garam masala, rice flour and salt

  4. Mix everything together into a very soft mixture.

  5. Make small balls and flatten it in your palms to make small patties

  6. Lightly grease the basket of the air fryer

  7. Preheat the air fryer at 200 deg Celsius for 5 minutes

  8. Arrange the tikkis in the basket

  9. Brush the surface of the patty with little oil.

  10. Air fry them for 7- 8 minutes.

  11. Flip all the patties and air fry them again for 6 minutes to get the crispy delicious aloo tikki.

  12. Serve hot or warm with chutney of your choice for example a chutney- mayo dip or a mango pickle mayo chutney.

Recipe- 2] PANEER KA KURKUREDAAR SNACK

INGREDIENTS

400 gm. Paneer – cut into Cubes.

¼ cup All-Purpose Flour/ refined flour.

1 teaspoon Kashmiri Red Chilli Powder

½ teaspoon Garam Masala Powder

½ teaspoon Turmeric Powder

½ teaspoon Ginger Garlic Paste

1 cup Breadcrumbs or crushed Cornflakes can also be used.

Salt to taste

Water as needed


Method:

1.In a mixing bowl add Maida or all-purpose flour, 1 teaspoon Kashmiri red chilli powder, ½ teaspoon garam masala powder, ¼ teaspoon turmeric powder, ¼ teaspoon ginger garlic paste and salt as needed.

2.Add water little by little and make a thick paste.

3.Now add in the cut paneer cubes and mix them well to coat them with the batter.

4.In a plate add in the breadcrumbs/Cornflakes. Roll each paneer cube coated with batter tightly in breadcrumbs. Set aside in the fridge for 10 mins.

5.Load the air fryer tray with the prepared paneer cubes. Set it on 180°C for         8 mins and switch on the air fryer.

6.Shake the paneer rectangular cubes once at the midway mark at 4 mins and continue cooking to ensure even cooking and colouring while cooking inside.

7.Remove the Kurkure Paneer using tongs onto a serving plate.

8.Serve hot immediately with tomato ketchup or green mint chutney (optional) on the side.


Recipe-3] Murgh Alishan Fryer Snack

Ingredients

  • 750 gms bone-in chicken thighs and legs

  • salt and pepper

  • 2 cups chaas or namkeen buttermilk. 

  • 2 eggs, lightly beaten.

  • 2 cups maida/ refined flour.

  • 1 tablespoon cajun spice mix seasoning

  • 1 tablespoon garlic paste or powder.

  • 1 tbsp. Onion paste or powder.

  • 2 teaspoons paprika powder or red chili powder/ chili flakes

  • 1 teaspoon salt or as per taste.

  • 1 teaspoon black pepper powder

  • Cooking oil to spray as needed while getting done.

Method:

 1 Apply salt and pepper on the chicken thighs and legs. In a medium-sized bowl add the buttermilk and eggs and whisk. In another medium-sized bowl add the flour, cajun, garlic powder, onion powder, paprika, salt, and pepper.

2. Using kitchen tongs, coat the chicken pieces in the flour, then the buttermilk, and then lastly in the flour. Place in the bottom of the air fryer basket.

3. Cook at 180 deg Celsius for 15-20 minutes. Open the basket and spray any flour with the cooking spray. Turn the chicken and cook for another 5-10 minutes until 165 degrees and no longer pink.

Recipe- 4] Baked Khushnuma Samosa 

Ingredients:

For making Baked samosa dough:

  • 1 cup flour/Maida

  • Salt to taste

  • 2 -3 tbsp. cooking oil as needed.

For the Khushnuma Samosa Filling:

  • 100 gm Paneer, grated.

  • ½ cup cabbage chopped

  • ½ cup boiled rajma

  • 3-4 tbsp. grated cheese

  • 4-6 no cherry tomatoes

  • 1 teaspoon chili flakes

  • 1 teaspoon peri masala

  • 1-2 tbsp. veg mayonnaise.

Method:

To prepare the samosa wrappers:

  1. Combine together 1 cup flour, salt to taste, ajwain, and 2 tablespoons of oil. Mix them well and make a stiff dough by adding cold water. Rest the dough it for 30 minutes.

To prepare the Samosa Stuffing:

1.For samosa stuffing, in a bowl mix together small grated paneer, chopped cabbage, boiled Rajma, grated cheese cherry tomatoes, salt to taste, red chili flakes, peri masala, and a tablespoon of veg mayonnaise. Combine them to make samosa stuffing and keep them aside.

To shape the samosas:

1.Now divide the dough into 4 to 6 equal parts and roll out one portion.

2.Cut this in the middle into two parts and make a cone shape. Fill the stuffing and seal the edges. Make all samosas like this and brush with oil.

Baking the prepared Samosas finally in Air-fryer:

1.Now Preheat your air fryer by setting the temp at 180 deg celsius and timer at 5min. after that take out the basket and place the samosa in wire basket of the air fryer.

2.Air fry for 15-17 minutes. Your crispy air fried much healthier Khushnuma Samosas are ready. Serve them hot with chutney/ dips of your choice.


Recipe- 5] Dilkhush Double Roti Stuffed Pockets.

INGREDIENTS

  •  6- 8 Sandwich Bread Slices

  • 1 Onion Finely Chopped

  • ½ cup Boiled Sweet Corn

  • ½ teaspoon Garlic paste

  • 1 teaspoon Italian Spices and herbs

  • 1 teaspoon red chili flakes

  • ¼ cup Mozzarella cheese Grated

  • 2 tablespoons Pizza Sauce

  • 1-2 teaspoon Oil – regular or olive oil.

  • Salt as needed

  • Water as needed

Method:

  1. In a mixing bowl add in the finely chopped onion along with ½ cup of boiled sweet corn. Add ½ teaspoon garlic paste, 1 teaspoon Italian mixed herbs, 1 teaspoon red chili flakes, and salt as needed.

2. also add ¼ cup grated mozzarella cheese & mix everything well together and set aside.

4. Now cut off the edges of 6- 8 sandwich bread slices, fill some water in a small plate and carefully dip a slice of bread for a minute.

6. Next gently squeeze out the excess water by pressing it between your palms. The bread should be soft but not soggy with water, place 1-2 tablespoons of prepared veggie filling at the center. Carefully fold the bread slice in half and tightly seal all the edges.

9. Prepare all the bread slices similarly and set it aside. Meanwhile, preheat the air fryer at 180°C for 5-7 mins. place the pizza pockets in the air fryer tray and gently brush it with a teaspoon of oil.

11. Set the air fryer at 180°C for 15 mins. After 6 mins, remove it and brush it with a few drops of oil again. After 15 mins of air frying, bread pizza pockets should be golden brown, crispy, and fully cooked. If not, extend the cooking time by another 1-2 minutes as needed. Serve hot immediately with some tomato ketchup/ chutney on the side. 

On a concluding note: 

While cooking is an art and it involves a mix of skill sets and creative ideas to fall in place with the right balance and approach, trends and styles of cooking foods keep coming our way with a ray of hope and thought processes that make us want to incorporate them into our daily cooking as well. In my opinion, it would be a little difficult for me to accept the air-frying concept and equipment in my personal kitchen since my personal views when it cooking have always been “what it should be” In this context, it refers to the fact that if a pakora or a fritter, batata Vada or a medu Vada has to go through the immersion concept coming out well drained from a hot kadai of oil so be it! to balance the health aspect in that case one could look at a nice workout and burnout session to help the absorption levels in the body so as to not gain or store up calories. 

Happy Cooking!!!


Ingredient Ideology | PASTA TO PERFECTION By: Dr. Kaviraj Khialani- Celebrity Master Chef.

Connecting up flavors and tastes to appease our Compassion.

Pasta is one ingredient close to many hearts and taste buds for various reasons well justified by most of us and seriously taken by a number of us too! Cooking and eating good food not only needs a bit of variation sometimes but also needs to create a bit of interest to try out something which is not regular always and that’s the kind of thinking which makes us go a long way in creating new concepts and concoctions to please our palate!

Cooking with pasta is now pretty much an old story but the newness that comes to it with our ideology is what keeps it right there on the popularity charts for a long time which shall continue in the future also. From kids to teenagers and to all age groups pasta is a good break from routines making it fun and so is enjoying it until the last bite!

My experience with pasta goes back to the times when we only had a couple of basic sauces the white and the tomato which were most common and from the very technique of understanding al dente stage- just cooked or can bite into the stage of cooking pasta to trying it out in fusion variations it has been simply divine and full of wow factors attached to it from the guests I served some really unusual ones.

It is this wow factor that not only enhances the guest experience at a restaurant but also helps us in word-of-mouth publicity on social media as well as getting the guest back for more and most importantly earning his loyalty with us.

Pasta has been known to us in a number of shapes, sizes, patterns, names, and colors as well. They go back to a basic classification of small and long, shapes and plan or stuffed varieties. From the fresh homemade pasta to the machines its journey has been wonderful and chefs around the world have contributed immensely towards its development.

Here are 3 Simple, Easy to Make and Enjoy Pasta Recipes with a little Twist of Taste for all you Foodies to enjoy:

Recipe- 1] MOMENTUM OF PEACE

[Fettucine pasta tossed in an herbed creamy sauce with fresh sliced mushrooms, star anise, and pepper, cooked to perfection]

Ingredients:

Fettucine pasta- 100 gms, boiled to al dente stage.

Fresh sliced mushrooms- 150gms.

For the sauce:

Oil/olive oil-1 tbsp.

Butter- 1tsp

Star Anise- 1 no

Garlic – 1 tsp chopped

Onion- 1 small chopped

Maida- 1 tbsp.

Water/veg stock-2-3 cups.

Salt and crushed black pepper to taste

Mixed herbs & chili flakes to taste

White wine- 30 ml optional

Fresh cream- 60ml

Grated parmesan cheese- 30gms/as per taste.

Parsley- 1 tbsp. chopped


Method: 

1. Prepare all the ingredients for the pasta.

2. Boil the pasta to just cooked stage and keep aside, apply a little oil to prevent sticking or boil it just when the sauce is getting ready and put it in immediately.

3. To prepare the mushroom cream sauce, heat oil and butter in a pan, add in the star anise – this is my additional choice of ingredient here since it goes well with the recipe, it may be avoided as well.

4. Add in the garlic, onions and saute for a few seconds, now add in the mushrooms and saute, add in the flour to thicken up the excess liquid, add in wine if desired.

5. Cook the mixture on a medium flame, add in little veg stock/water and mix, add in the fresh cream a little cheese blend it all well and finally add in the boiled pasta toss well, check for seasonings.

6. Finally serve the dish in a pasta plate, garnish with parsley, olives, cheese and micro greens and serve hot.

Chefs Variations: 

The same pasta can be made in a number of ways with a few alterations like adding an Indian style korma gravy with mushrooms, paneer and capsicums.

Try the similar option with boneless cubes of chicken, reshmi malai tikka, add in sliced cooked chicken seekh kababs as well.

For the vegetarians who avoid mushrooms can use colorful bell peppers, broccoli, zucchini, snow peas etc too with their pasta.


Recipe- 2] ORANGE MYSTIQ

[fusilli pasta tossed in a mix of herbs and spicy flavors tomato base with a dash of cream and hint of cheese]

Ingredients:

Fusilli pasta- 100 gms boiled

For the Sauce:

Oil/olive oil- 1 tbsp.

Butter- 1tsp

Garlic- 1 tsp chopped

Onions- 1 small chopped

Tomato puree- 1 cup fresh

Kashmiri red chili powder-1/2 tsp

Paprika/chili flakes- 1 tsp

Salt and pepper to taste

Mixed herbs- 1 tsp or fresh herbs like basil, thyme, oregano.

Refined flour- 1 tbsp.

Veg stock/water- 2 cups

Fresh cream- 2 tbsp.

Grated cheese- 30gms.

Herbs/olives to garnish- 10 gms.

Additional veggie add ons to the pasta- shredded capsicums, boiled corn, broccoli, asparagus, paneer cubes etc.

For non-veg variations: cooked chicken cubes, sliced tandoori chicken or cubes of chicken tikka, fish tikka, tandoori prawns, tandoori lamb chops sliced as well can be used.

Method:

1. Prepare all the ingredients for the pasta.

2. Heat oil and butter in a pan, saute the garlic, onion saute well until light pink, add in the tomato puree, seasonings, herbs, spices and cook well on medium flame, add little water or stock.

3. Once it starts leaving oil from the sides, add in the fresh cream and mix well, add in the boiled pasta, veggies or non-veg of your choice and cheese and toss well, cook for 2 mins.

4. Serve hot garnished with olives, cheese, fresh herbs and serve.

Chefs Variations:

Try the same recipe with a flavor of kasuri methi- dried fenugreek leaves adding them into the tomato sauce, with a little garam masala powder as well, to slightly Indianise the flavors.

For a denser flavor of fusion, can add a little schezuan sauce to the tomato base sauce and continue with it add spring onion greens as well.


Recipe-3] HARIYALI AUR PASTA

[a simple yet delectable spaghetti pasta tossed in a green sauce with flavors to entice the senses and a feeling of goodness all over]

Ingredients

Spaghetti pasta- 100gms boiled.

For the green sauce:

Fresh basil leaves- 2 cups, stems to be trimmed

Garlic- 1 tbsp. chopped

Chilled water- 2 tbsp.

Olive oil- 4-5 tbsp.

Salt and pepper to taste

Parmesan cheese- ¼ cup

Lime juice- 1 tbsp.

Nuts- cashew Tukda/ almonds/pista/ pinenuts- ¼ cup

To add on into the pasta:

Cherry tomatoes- 4- 5 no-cut 1x2

Sliced olives- 4-5 green/black.

Blanched snow peas- 10-12 nos.

Sliced roast chicken breast/ poached fish fillets/ sliced boiled eggs/ grilled paneer cubes or tofu/ cooked soy chunks/ butter garlic prawns/ malai paneer tikka etc can be combined with this.

Method:

1. Prepare all ingredients for the pasta.

2. Boil the spaghetti pasta and keep aside.

3. In a blender jar combine ingredients for the green chutney and mix well.

4. Remove into a bowl, keep in the fridge until used.

5. If serving immediately toss the sauce with the boiled pasta, add your choice of additional ingredients to add color/flavor and texture.

6. Serve at room temperature or chilled ideally garnish with cherry tomatoes, olives, parmesan or cheese shavings.

Chefs Variations:

To prepare the same green sauce differently I also use blanched spinach leaves with some fresh basil, add roasted peanuts, a bit of ginger, garlic and green chili as well to the chutney and blend it well.

For the pasta, we can toss it in the pan with some olive oil, burnt garlic and chili flakes a little white wine and then add it to the sauce.

Ingredient Ideology | DESI WAYS WITH ARANCINI – SNACKY BITES TO ENJOY By: Dr. Kaviraj Khialani:  Celebrity Master Chef.


Arancini a concept from Italian cooking, preparing snack bites using their rice preparation called risotto made with the classic Arborio rice has been a favorite of many of us around the globe by now and somehow it is one of those snacks which can suit the needs of almost all of us to deal with those hunger pangs! The authentic recipe however sticks to their basic recipe and mild flavors be it veg or non-veg it is easy to adapt it here to our taste to make it more Chatpata and interesting to please our palates.

The essential of a good Arancini concept is rice and cooking it right and seasoning it well, the stuffing in the center is an absolute delight to bite into and that feeling when the cheese comes oozing out being served fried piping hot is just too difficult to express in words. Here is an attempt to get that concoction fused in a desi innovative style for all of us to relish.


Recipe-1] CHEESY MUSHROOM ARANCINI

Ingredients:

For the rice and mushroom mixture:

Boiled starchy/cooked white rice- 1 and a half cup

Salt and pepper to taste

Oil-1 tsp

Butter-1 tsp

Garlic – 1 tsp chopped

Onion-1 small chopped

Green chilies-1/2 tsp

Fresh mushrooms-4-6 med sized, sliced.

Capsicum- ½ no, chopped.

Red chili powder-1/4 tsp

Garam masala powder-1/4 tsp

Parsley/coriander-1 tbsp. chopped

Mixed herbs-1/2 tsp

Cheese-1/2 cup, small cubes or grated/shavings

Fresh cream/ white sauce-1/2 cup

For coating and frying:

Maida – water batter-1 cup, thick to coat

Bread crumbs-1 and a half cup

Salt and pepper to taste

Oil to deep fry.

To serve with:

Chili- mayo dip, walnut coriander chili pesto, green mint and cucumber dip, hung curd and garlic dip, tomato ketchup, sweet chili and tamarind dip, hot garlic chutney, peanut butter dip, soy- pepper dip etc.

Method:

1. Prepare all the ingredients for the recipe as listed.

2. We can use leftover white/brown rice as well for these kind of snacks.

3.Heat oil and butter in a pan saute the onion and garlic for a few seconds, add in the mushrooms and capsicums, salt, pepper, herbs, spices as per taste and mix well.

4. Cook on a medium flame for 2-3 mins, add in little fresh cream, the cooked rice and mix well, continue cooking for 8-10 mins, turn off the flame, add in the fresh parsley/ coriander leaves, mix and allow to cool.

5. Apply oil on the hands/fingers and divide the mixture into 10-12 equal portions and turn them into lemon sized balls.

6. Flatten each portion and place a small portion of cheese cube/grated cheese/ shavings and seal it up, chill for 30 mins.

7. Prepare the batter and dip each portion in it, coat it well then give it a coat of bread crumbs and dust off the excess. Heat up oil in a kadai and fry them on a medium flame for 4-5 mins, until nice and golden color, remove on a kitchen paper, drain off excess oil. Arrange them on a serving platter with a dip of your choice and serve hot.

Recipe-2] CORN AND COCONUT ARANCINI

Ingredients

For the rice – corn & coconut mixture:

Boiled starchy/cooked white rice- 1 and a half cup

Salt and pepper to taste

Oil-1 tsp

Butter-1 tsp

Garlic – 1 tsp chopped

Onion-1 small chopped

Green chilies-1/2 tsp

Boiled sweet corn- 1 cup, crushed.

Tender coconut flesh/malai- ½ cup shred.

Red Capsicum- ½ no, chopped.

Red chili powder-1/4 tsp

Garam masala powder-1/4 tsp

Chaat masala-1/4 tsp

Parsley/coriander-1 tbsp. chopped

Mixed herbs-1/2 tsp

Cheese-1/2 cup, small cubes or grated/shavings

Fresh cream/ white sauce-1/2 cup

For coating and frying:

Maida – water batter-1 cup, thick to coat

Bread crumbs-1 and a half cup

Salt and pepper to taste

Oil to deep fry.

To serve with:

Chili- mayo dip, walnut coriander chili pesto, green mint and cucumber dip, hung curd and garlic dip, tomato ketchup, sweet chili and tamarind dip, hot garlic chutney, peanut butter dip, soy- pepper dip etc.

Method:

1. Prepare all the ingredients as listed for the recipe.

2. We can use leftover white/brown rice as well for these kind of snacks.

3.Heat oil and butter in a pan saute the onion and garlic for a few seconds, add in the boiled crushed sweet corn and red capsicums, salt, pepper, herbs, spices as per taste and mix well.

4. Cook on a medium flame for 2-3 mins, add in little fresh cream, the cooked rice and mix well, continue cooking for 8-10 mins, turn off the flame, add in the fresh parsley/ coriander leaves, tender coconut flesh mix and allow to cool.

5. Apply oil on the hands/fingers and divide the mixture into 10-12 equal portions and turn them into lemon sized balls.

6. Flatten each portion and place a small portion of cheese cube/grated cheese/ shavings and seal it up, chill for 30 mins.

7. Prepare the batter and dip each portion in it, coat it well then give it a coat of bread crumbs and dust off the excess. Heat up oil in a kadai and fry them on a medium flame for 4-5 mins, until nice and golden color, remove on a kitchen paper, drain off excess oil. Arrange them on a serving platter with a dip of your choice and serve hot.

Recipe-3] DESI COTTAGE CHEESE ARANCINI

Ingredients

For the rice and cottage cheese mixture:

Boiled starchy/cooked white rice- 1 and a half cup

Salt and pepper to taste

Oil-1 tsp

Butter-1 tsp

Garlic – 1 tsp chopped

Onion-1 small chopped

Green chilies-1/2 tsp

Paneer-1/2 cup grated

green Capsicum- ½ no, chopped.

Red chili powder-1/4 tsp

Garam masala powder-1/4 tsp

Chaat masala-1/4 tsp

Parsley/coriander-1 tbsp. chopped

Mixed herbs-1/2 tsp

Cheese-1/2 cup, small cubes or grated/shavings

Fresh cream/ white sauce-1/2 cup

For coating and frying:

Maida – water batter-1 cup, thick to coat

Bread crumbs-1 and a half cup

Salt and pepper to taste

Oil to deep fry.

To serve with:

Chili- mayo dip, walnut coriander chili pesto, green mint and cucumber dip, hung curd and garlic dip, tomato ketchup, sweet chili and tamarind dip, hot garlic chutney, peanut butter dip, soy- pepper dip etc.

Method:

1. Prepare all the ingredients as listed for the recipe.

2. We can use leftover white/brown rice as well for these kind of snacks.

3.Heat oil and butter in a pan saute the onion and garlic for a few seconds, add in the paneer and green capsicums, salt, pepper, herbs, spices as per taste and mix well.

4. Cook on a medium flame for 2-3 mins, add in little fresh cream, the cooked rice and mix well, continue cooking for 8-10 mins, turn off the flame, add in the fresh parsley/ coriander leaves mix and allow to cool.

5. Apply oil on the hands/fingers and divide the mixture into 10-12 equal portions and turn them into lemon sized balls.

6. Flatten each portion and place a small portion of cheese cube/grated cheese/ shavings and seal it up, chill for 30 mins.

7. Prepare the batter and dip each portion in it, coat it well then give it a coat of bread crumbs and dust off the excess. Heat up oil in a kadai and fry them on a medium flame for 4-5 mins, until nice and golden color, remove on a kitchen paper, drain off excess oil. Arrange them on a serving platter with a dip of your choice and serve hot.


Recipe-4] ACHARI POTATO & SAUSAGE ARANCINI

Ingredients

For the rice – potato and sausage mixture:

Boiled starchy/cooked white rice- 1 and a half cup

Salt and pepper to taste

Oil-1 tsp

Butter-1 tsp

Garlic – 1 tsp chopped

Onion-1 small chopped

Green chilies-1/2 tsp

Potato boiled- 1/2 cup grated

Chicken sausages-2 no, chopped.

Mango pickle masala- 1 and a half tsp

Red chili powder-1/4 tsp

Garam masala powder-1/4 tsp

Chaat masala-1/4 tsp

Parsley/coriander-1 tbsp. chopped

Mixed herbs-1/2 tsp

Cheese-1/2 cup, small cubes or grated/shavings

Fresh cream/ white sauce-1/2 cup

For coating and frying:

Maida – water batter-1 cup, thick to coat

Bread crumbs-1 and a half cup

Salt and pepper to taste

Oil to deep fry.

To serve with:

Chili- mayo dip, walnut coriander chili pesto, green mint and cucumber dip, hung curd and garlic dip, tomato ketchup, sweet chili and tamarind dip, hot garlic chutney, peanut butter dip, soy- pepper dip etc.

Method:

1. Prepare all the ingredients as listed for the recipe.

2. We can use leftover white/brown rice as well for these kind of snacks.

3.Heat oil and butter in a pan saute the onion and garlic for a few seconds, add in the sausage and boiled mashed potatoes salt, pepper, herbs, spices as per taste and mix well.

4. Cook on a medium flame for 2-3 mins, add in little fresh cream, the cooked rice and mix well, continue cooking for 8-10 mins, turn off the flame, add in the fresh parsley/ coriander leaves, mango pickle masala and mix and allow to cool.

5. Apply oil on the hands/fingers and divide the mixture into 10-12 equal portions and turn them into lemon sized balls.

6. Flatten each portion and place a small portion of cheese cube/grated cheese/ shavings and seal it up, chill for 30 mins.

7. Prepare the batter and dip each portion in it, coat it well then give it a coat of bread crumbs and dust off the excess. Heat up oil in a kadai and fry them on a medium flame for 4-5 mins, until nice and golden color, remove on a kitchen paper, drain off excess oil. Arrange them on a serving platter with a dip of your choice and serve hot

Recipe-5] SPICED KEEMA MATTAR ARANCINI

Ingredients

For the rice and spiced chicken mixture:

Boiled starchy/cooked white rice- 1 and a half cup

Salt and pepper to taste

Oil-1 tsp

Butter-1 tsp

Garlic – 1 tsp chopped

Onion-1 small chopped

Green chilies-1/2 tsp

Chicken keema-1 cup

Green peas-1/2 cup boiled.

Tomato puree-2 tsp

Tomato ketchup-2 tsp

Red chili powder-1/4 tsp

Garam masala powder-1/4 tsp

Chaat masala-1/4 tsp

Parsley/coriander-1 tbsp. chopped

Mixed herbs-1/2 tsp

Cheese-1/2 cup, small cubes or grated/shavings

Fresh cream/ white sauce-1/2 cup

For coating and frying:

Maida – water batter-1 cup, thick to coat

Bread crumbs-1 and a half cup

Salt and pepper to taste

Oil to deep fry.

To serve with:

Chili- mayo dip, walnut coriander chili pesto, green mint and cucumber dip, hung curd and garlic dip, tomato ketchup, sweet chili and tamarind dip, hot garlic chutney, peanut butter dip, soy- pepper dip etc.

Method:

1. Prepare all the ingredients as listed for the recipe.

2. We can use leftover white/brown rice as well for these kind of snacks.

3.Heat oil and butter in a pan saute the onion and garlic for a few seconds, add in the chicken keema and boiled peas, salt, pepper, herbs, spices as per taste and mix well add in the tomato puree, ketchup and mix.

4. Cook on a medium flame for 10-15 mins, add in little fresh cream, the cooked rice and mix well, continue cooking for 8-10 mins, turn off the flame, add in the fresh parsley/ coriander leaves, mix and allow to cool.

5. Apply oil on the hands/fingers and divide the mixture into 10-12 equal portions and turn them into lemon sized balls.

6. Flatten each portion and place a small portion of cheese cube/grated cheese/ shavings and seal it up, chill for 30 mins.

7. Prepare the batter and dip each portion in it, coat it well then give it a coat of bread crumbs and dust off the excess. Heat up oil in a kadai and fry them on a medium flame for 4-5 mins, until nice and golden color, remove on a kitchen paper, drain off excess oil. Arrange them on a serving platter with a dip of your choice and serve hot.

Recipe-6] TEMPERED TOFU ARANCINI

Ingredients:

For the rice and tempered tofu mixture:

Boiled starchy/cooked white rice- 1 and a half cup

Salt and pepper to taste

Oil-1 tsp

Butter-1 tsp

Cumin seeds-1/2 tsp

Curry leaves-5-6 no

Garlic – 1 tsp chopped

Onion-1 small chopped

Green chilies-1/2 tsp

Firm tofu- 1/2 cup, crumbled

Red/green/yellow capsicums-1/4 cup, chopped mix.

Red chili powder-1/4 tsp

Garam masala powder-1/4 tsp

Chaat masala-1/4 tsp

Parsley/coriander-1 tbsp. chopped

Mixed herbs-1/2 tsp

Cheese-1/2 cup, small cubes or grated/shavings

Fresh cream/ white sauce-1/2 cup

For coating and frying:

Maida – water batter-1 cup, thick to coat

Bread crumbs-1 and a half cup

Salt and pepper to taste

Oil to deep fry.

To serve with:

Chili- mayo dip, walnut coriander chili pesto, green mint and cucumber dip, hung curd and garlic dip, tomato ketchup, sweet chili and tamarind dip, hot garlic chutney, peanut butter dip, soy- pepper dip etc.

Method:

1. Prepare all the ingredients as listed for the recipe.

2. We can use leftover white/brown rice as well for these kind of snacks.

3.Heat oil and butter in a pan saute the cumin seeds, curry leaves and then add in the onion and garlic for a few seconds, add in the crumbled tofu and colorful capsicums, salt, pepper, herbs, spices as per taste and mix well.

4. Cook on a medium flame for 2-3 mins, add in little fresh cream, the cooked rice and mix well, continue cooking for 3-4 mins, turn off the flame, add in the fresh parsley/ coriander leaves and mix and allow to cool.

5. Apply oil on the hands/fingers and divide the mixture into 10-12 equal portions and turn them into lemon sized balls.

6. Flatten each portion and place a small portion of cheese cube/grated cheese/ shavings and seal it up, chill for 30 mins.

7. Prepare the batter and dip each portion in it, coat it well then give it a coat of bread crumbs and dust off the excess. Heat up oil in a kadai and fry them on a medium flame for 4-5 mins, until nice and golden color, remove on a kitchen paper, drain off excess oil. Arrange them on a serving platter with a dip of your choice and serve hot.

Ingredient Ideology | CULINARY DELIGHTS FROM THE PHILIPPINE ISLANDS BY: DR. KAVIRAJ KHIALANI- CELEBRITY MASTER CHEF

A Versatile- Varied & Wow Cuisine

A Basic Introduction: It is said that around the 16th century, Chinese traders & immigrants landed up in the Philippines not only with their silks and ceramics but also bringing their Cantonese specialties & Chinese cooking traditions like stir-frying and steaming methods of cooking and since then it has been having a very close connection with the influence of its adaptations into Filipino cooking. Besides this it has also been linked to Spanish and a bit of American flavors which have been slowly incorporated and seen this cuisine develop over the years. The Filipinos are very jovial, sociable people who love to enjoy life, party and their food is often at the center of attention at many celebrations & moments to cherish.

My personal connect with this cuisine goes back to the late 1970s when I saw myself living in the Philippines for a few years, also undergoing my schooling years there I recall having eaten this food ever since and the very first thing that comes to my mind is a steamed bun called siopao- a classic vow some Filipino recipe using a fermented steamed bun stuffed with a nice soy based chicken/pork filling served with dipping sauces! Memories take me back to then and learning this cuisine in my home kitchen over the years has been very interesting and dear to my heart, having done a study on this cuisine with over 120 plus recipes altering them to suit our Indian palate in one of authored cookery book collections is just mesmerising and a great guide to those who wish to explore this versatile and tasty cuisine further! 

One of the reasons why Filipino Food also called Pinoy Food is so popular the reason being it draws inspiration from several influences and one can definitely taste a blend of Spanish, Chinese, Asian and western influences in a well-designed & crafted to a perfect formula in most of the recipes in this cuisine.

The Basic Filipino Diet:

Philippines comprises of around 7000 islands and with so much water around it is no wonder that abundance of seafood is a main source of protein and their staple diet which is fish and rice. Besides this they also consume pork, mutton, lamb, prawns, chicken, luncheon meat, sausages, ham, bacon, eggs etc. this cuisine is well defined as a balance of salt, sweet, sour flavors in a perfect melange!

They normally have three meals a day including breakfast [almusal or agahan] lunch [tanghalian] and dinner[hapunan]plus an afternoon snack called meryenda.

A traditional breakfast usually includes pandesal these are small bread rolls to go along with the other dishes like eggs, ham, cheese, salami etc.

Leftover Rice is usually tossed with garlic to make a dish called Sinan gag, which is usually served at breakfast with egg preparations and cured meats, cold cuts etc.

Some basic condiments and flavors in this cuisine:

Soy sauce, fish sauce, vinegar, cream style shrimp paste, variety of herbs, garlic, Bayleaf, peppercorns, onions, tomato, cilantro and not to forget the lime called as Kalamansi, these bring out the basic taste in these foods to level next. A variety of dipping sauces go along with the meals as well especially with roast dishes etc.

SEAFOOD: some of the popular varieties include tilapia, catfish also called hito, milk fish also called bangus, grouper fish also called lapu lapu, prawns, mackerels, mussels, large and small crabs, tuna fish- fresh and canned. The most common way of having fish here is to lightly salt it and prepare it pan fried or deep fried and then eaten as a simple meal along with steamed rice and some veggies. Fish is also cooked in a light gravy with tomato or tamarind as well at times prepared with veggies and vinegar. Dried fish is also popular here adding them to egg omelettes as well.

Let’s take a note of a few popular Filipino Favorites:

Lechon- whole roasted pork a speciality during festivities and celebrations.

Tortas- made with pork/chicken mince with egg into mini bites or patties. 

Lumpia- these are fresh or fried spring rolls with veg/non-veg fillings with chicken/meat/sprouts/spring onions etc served with dipping sauces.

Pancit- noodles which are basically the rice variety type thin and translucent, cooked with soy, chicken or pork, colorful veggies, and served hot with steamed rice and a dash of tabasco.

Adobo- one of the most popular dish from this cuisine made with chicken or pork braised in garlic, vinegar, oil and soy sauce, well cooked and served on a bed of steamed rice.

Kaldereta- is a popular Filipino meat stew in tomato based gravy with assorted veggies and mildly spiced, served with rice.

Toyo Chicken- a popular chicken recipe in soy based marination with cloves of garlic, joints of curry cuts simmered and thickened up with corn-starch, served with garlic egg fried rice.

Hotcakes: these are also similar to pancakes made with a base of all purpose flour, eggs, vanilla essence, milk, butter and baking powder, allowed to rest for some time, spooned into a pan, cooked both sides, topping of honey and melted butter tastes yum!

Bola Bola- these are basically meat ball concepts which are made using minced pork/mutton/chicken or even fish and seafood, with eggs, cream, bread crumbs for binding they are usually fried and tossed in a sauce and eaten with rice.

Chow Mein- yet another favorite Filipino version influenced from Chinese cooking the Chow Mein uses boiled noodles, lightly pan fried at times and topped with a white color gravy thickened with corn starch with colorful vegetables, boiled shredded or cubes of chicken and spring onion greens enjoyed as a meal in itself.

Kababayan- popularly known as Filipino muffins, small gong shaped baked goodies which is moist in texture enjoyed with tea/coffee.

Leche flan: it is similar to caramel custard made with eggs and milk and is one of the most popular dessert here in the Philippines. It is made very much the same way like the French style of crème caramel, served cold.

Buko pie- is a nice sweet dish made with a filling of young tender coconut flesh and dairy including milk powder, condensed milk etc.

Sinipit- these are sweet pastries covered with a crunchy sugar glaze which looks like a length of rope. We also have churros here from the Spanish influence and served fried with variety of dipping sauces including chocolate.

Buko Salad: is a classic Filipino tropical fruit salad using canned fruit cocktail, cherries, pineapple dressed up in an immensely sweet condensed milk-based coconut cream and tender coconut shreds as a part of this served chilled.

Here are a few popular Filipino recipes worth trying in our kitchens and enjoying their aromas and flavors:

Recipe-1] Chicken Adobo with Rice

Ingredients:

Chicken legs/thighs/drumsticks- 500gms, cut into medium pieces.

For the marination:

Garlic cloves- 4-5 minced

Soy sauce- 2-3 tbsp.

White vinegar- 2 tbsp.

Bay leaves- 2-3 nos.

Peppercorns- 10-12nos.

For Cooking:

Oil- 1 tbsp.+ 1 tbsp.

Garlic minced- 2 tsp.

Onion- 1 medium sized chopped

Water/stock- 500- 700ml

Sugar/brown sugar-1 tsp

Black pepper powder-1/2tsp

Method:

1. Marinate chicken for around 30 mins.

2. Heat oil in a pan, add in the chicken pieces and place in the pan, fry them both sides until lightly browned, remove and keep aside.

3.Heat some more oil in the same pan, add garlic and onions, saute for a minute add in the marination, water, sugar, pepper and water or stock. Bring to a boil, simmer add in the chicken pieces let them cook well around 20 mins.

4. The sauce needs to reduce to a semi-thick texture while the chicken is cooking, add a little corn-starch if desired to thicken up and serve this on a bed of white rice or stir fried rice, serve hot.

Recipe-2] Filipino Pancit Noodles

Ingredients

Pancit noodles/rice/glass noodles- 1 packet

Oil- 2 tbsp.

Garlic cloves- 8-10 no.

Sliced spring onions- 3-4 no.

Shredded carrots- ½ cup

Shredded capsicum- 1 no

Shredded cabbage- ½ cup

Sliced French beans- 8-10 no.

Salt and pepper to taste

Hot water/stock- 500ml

Soy sauce- 2-3 tbsp.

White vinegar- 1 tbsp.

Lime juice- 2 tbsp.

Tabasco sauce- 1 tsp or as desired.

Spring onion greens- ¼ cup garnish.

For Non-Veg- add cooked chicken/roast meat/pork chops etc.

Method:

1. Prepare all the ingredients for the Pancit noodles.

2. Heat oil in a pan, add in the sliced or whole peeled cloves of garlic, add in the onions saute for 1 min.

3. Add in the vegetables and saute salt, pepper, and the cut glass noodles, mix well, add in hot water or stock and little soy sauce and allow to simmer, cover and cook on a low flame for 10-12 mins, stir and check for moisture.

4. Add in the vinegar, lime, greens, non-veg etc towards the end once the noodles are cooked. Serve hot.

Recipe-3] Lumpia- Filipino style spring rolls

Ingredients

Spring roll wrappers- 10-12 nos.

For the filling:

Authentically they use pork mince with soy, egg, cabbage and seasonings, ginger, garlic. Here we are using chicken mince.

Oil- 1 tbsp.

Garlic- 1 tsp chopped

Onion- 1 small chopped

Chicken mince- 1 cup

Salt and pepper to taste

Spring onion greens- 2 tbsp. chop

Soy sauce- 1 tbsp.

Ginger- 1 tsp chopped

Vinegar- 1 tsp

Boiled mashed potato if desired for binding the mince- ¼ cup

Shredded white cabbage-1/4 cup- optional

Scrambled eggs-2 no. optional.

Oil to deep fry

Dipping Sauces- soy, chili vinegar, tomato sauce, sweet chili dip.

Method:

1. Heat oil in a pan, add in the ginger, garlic, onions and saute for a minute, add in the chicken mince, salt, pepper saute on a medium flame for 2 mins.

2. Add a little water or stock and allow the mince to cook on a low flame for 12-15 mins, dry up the water content, add in the soy, vinegar, greens, potato, cabbage/egg if desired mix well turn off the flame allow the filling to cool down.

3. Arrange the wrappers on a work table, portion the filling evenly on all the wrappers, apply little maida-water paste on the edges and roll it up like a spring roll concept ensure the sides are well secured.

4. Heat oil for deep frying and fry the lumpia until golden browned on all sides, remove on a kitchen paper, and then arrange on a serving platter with dips and serve hot as a starter.

Recipe- 4] Filipino Sweet-N-Sour Fish

Ingredients

Boneless round fleshy fish of your choice- 500 gms cut into medium sized cubes.

For the Marination of the Fish:

Oil- 1 tbsp.

Chopped garlic- 1 tsp or garlic paste

Salt and pepper to taste

White wine- 2 tbsp. optional

White vinegar- 1 tsp

Sugar-1/2 tsp

Soy sauce- 1 tbsp.

Lime juice- 2 tbsp.

Add egg- 1 no + maida + cornflour as needed into the marinated fish and drop it in hot oil and deep fry until light golden remove and keep aside.

For the Sweet- N-Sour Sauce mix:

Water or stock- 2 cups

White vinegar- 1 tbsp.

Tomato ketchup- 2-3 tbsp.

Honey- 1 tbsp.

Sugar-1 tsp

Salt and pepper to taste

Corn-flour and water to thicken the sauce- 2-3 tbsp.

To cook the sauce:

Oil- 1 tbsp.

Garlic-1 tsp chopped

Celery- 1 tbsp. chopped

Onion- 1 small cubes

Capsicums- 1 small cubes

Pineapple cubes- ½ cup-fresh or tinned.

Salt and pepper to taste

Method:

1. Prepare the fish, fry and keep aside.

2. Prepare the sauce mix in a bowl and keep ready

3. Heat oil and saute the ingredients for a minute add in the sauce mix and bring to a boil, simmer for 2-3 mins and once the gravy starts getting thick add in the fried fish cubes into the sauce and cook for a minute, add pineapple cubes if desired and serve hot garnish with spring onion greens, serve with steamed white rice.


Recipe-5] Filipino Chicken Salad

Ingredients

For the base of the salad- iceberg lettuce- 1 small bunch

For the body of the salad- boiled chicken cubes- 1 cup

Hard boiled eggs- 2 no cubes

Pineapple- ½ cup cubes

Boiled potato-1 no cubes

Boiled macaroni- ½ cup

Salt and pepper to taste

Lime juice-1 tsp

For the dressing of the salad- mayonnaise sauce

For the garnish of the salad- parsley/cherry tomatoes.

Method:

1. Prepare all the parts of the salad.

2. In a mixing bowl combine together the body and dressing and mix well.

3. Prepare the base of the salad on a serving plate or bowl.

4. Portion the salad, garnish and serve chilled, add a dash of tabasco sauce before eating it.

Recipe- 6] Buko Salad – Filipino Coconut- Fruit Salad

Ingredients:

Fresh coconut flesh- ¼ cup shredded

Coconut cream- ½ cup or sweet cream-1/2 cup

Condensed milk- ½ cup

Litchi crush- 2 tbsp. optional.

Assorted fruit cocktail tin- 1 cup tinned fruits

Fresh tropical/citrus fruits- strawberry/kiwi/lychees- ½ cup

Cherries- ½ cup

Pineapple cubes- ½ cup

Pomegranate/cherries/mint for garnish

Method:

1. Prepare all the ingredients for the coconut fruit salad.

2. In a mixing bowl combine together the ingredients for the dressing of the salad, mix well and add in the tinned and fresh fruits, mix and chill.

3. Serve the chilled salad on a bed of crushed ice in a coconut shell and garnish as desired.

On a Concluding Note: Filipino Cooking is one which anyone of us can easily try and indulge into and the results are bound to be positive for the simple fact that a little bit of awareness, ease of preparation, and sharing of concepts and information can go a long way making this food well accepted by us. An attempt to impart the outline and basic structure of this cuisine can help many students of culinary arts & foodies to add this to their favorite lists and it gives me a sense of contentment doing this little bit from my end!


Happy Cooking!


Ingredient Ideology | THE WAFFLE MANTRA TO TRY OUT & CHERISH By: Dr Kaviraj Khialani- Celebrity Master Chef.

Article and Recipes for HOSPEMAG- MONDAY- 12TH JUNE 2023.

Waffle is a dish made from leavened batter or dough that is cooked between two plates that are patterned to give a characteristic size, shape, and surface impression. 1869 – Cornelius Swarthout of Troy, New York, a Dutch-American, receives a patent for the first waffle iron in the U.S., on August 24th.There are many variations based on the type of waffle iron and recipe used. Waffle-making made its way to America with Dutch colonists in the 1620s. It was one hundred years later, in Robert Smith's Court Cookery, that the English language saw the appearance of the word "waffle" for the first time. 

Waffles were enjoyed sweet, with butter, syrup, or fruit, or savory, with kidney stew. Pancakes and waffles are bread, the type known as 'quick bread' - bread leavened with baking soda or baking powder. Waffles are almost identical to pancakes, only having a little fatter in the batter, and cooked on a grid-shaped pan (waffle maker). A soft, bread-like cake with a surface of uniform indentations similar to a honeycomb. Waffles are made with a pourable batter that usually consists of flour, milk, oil, sugar, eggs, salt, and baking powder.

In many places, waffles are served and eaten with a knife and fork. Pierce the corner of the waffle with your fork, and use the knife to cut off a small, bite-sized piece. Use the fork to pick up the piece and bring it to your mouth. Wait until you chew and swallow before cutting another small piece. Serve them hot, warm, or chilled, depending on your toppings. Cooked waffles can be frozen and heated up in the toaster. Unused batter mixture can be kept in a container in the refrigerator for up to 2 days, though we always recommend to make them fresh and enjoying them without much wait and delay!

Here are a few Simple- Easy to make Waffle Recipes with a variety of savoury options to choose from.

Recipe-1] CRISPY CHICKEN WAFFLES

Ingredients:

For the waffle batter:

Refined flour / maida-2 cups

Melted butter- 2-3 tbsp.

Salt-1 pinch

Eggs- 2 no

Milk-1/2 cup

Water-1/4 cup

Sugar-1/4 tsp

Baking powder-1/4 tsp

For the waffle filling:

Boneless chicken breasts- 250 gms, thinly sliced

For the marination:

Salt and pepper to taste

Oil-2 tsp

Mustard paste-1/2 tsp

Mixed herbs-1/4 tsp

Lime juice-2 tsp

Apply on the chicken and keep aside for 20 mins

To coat and deep fry:

Maida- 1 cup

Eggs-2 no

Bread crumbs- 1 cup

Oil to fry

To assemble the waffle:

Butter-2-3 tsp

Cream cheese- 2-3 tsp

Parsley-2-3 tsp chopped

Peanut butter-1-2 tsp

Lettuce leaves- 1 cup

Tomato ketchup-2-3 tsp

Sliced tomatoes, cucumbers, onions

Mayonnaise-1/2 cup

Chili sauce-2-3 tsp

Method:

1. Prepare all the ingredients for the waffle recipe as listed.

2. Start with the waffle batter first, mix all the ingredients well and using a hand blender prepare a batter of a light coating texture and allow to rest for 20 mins.

3. Proceed with the marinated chicken pieces, coat them with dry maida, then beaten eggs and finally with bread crumbs and deep fry in medium hot oil until golden color, remove and drain excess oil.

4. Continue with the waffle maker, pour in the batter into the waffle maker as per prescriptions, allow to set and cook to a nice golden brown color.

5. Remove the waffle once cooked, and start the assembling of the waffle sandwich starting with butter, cream cheese, sliced veggies, some lettuce leaves, fried chicken pieces, and cover it, serve with assorted dips/ sauces.

Recipe-2] CHEESY BAKED WAFFLES 

Ingredients:

For the waffle batter:

Refined flour / maida-2 cups

Melted butter- 2-3 tbsp.

Salt-1 pinch

Eggs- 2 no

Milk-1/2 cup

Sugar-1/4 tsp

Baking powder-1/4 tsp

For the waffle topping:

Butter-2-3 tsp

Oil-1 tsp

Garlic- 1 tsp chopped

Onions-1 small chopped

Capsicum-1/2 chopped

Salt and pepper to taste

Mixed herbs-1/2 tsp

Chili flakes-1/2 tsp

Green olives- 3-4 no

Black olives- 3-4 no

Shredded roast/ grilled chicken- ½ cup

Tomato ketchup-2-3 tbsp.

Red chili sauce-1-2 tsp

Grated cheese-1 cup

Method:

1. Prepare all the ingredients for the waffle recipe as listed.

2. Start with the waffle batter first, mix all the ingredients well and using a hand blender prepare a batter of a light coating texture and allow to rest for 20 mins.

3. Proceed with the topping for the waffle heat up oil and butter in a pan, saute the garlic, onions, and capsicums add any other ingredients/veggies as well like mushrooms, corn, broccoli etc add in the seasonings, herbs, chili flakes and cook for 2-3 mins and keep aside.

4. Continue with the waffle maker, pour in the batter into the waffle maker as per prescriptions, allow to set and cook to a nice golden brown color.

5. Remove the waffle once cooked, and start the assembling of the waffle by placing the prepared toppings on it after applying sauce, placing the roast/grilled sliced chicken pieces, top with cheese, olives and bake in a pre-heated oven for 6-9 mins, remove serve with assorted dips/ sauces.

Recipe-3] HEALTHY WAFFLE BITES

Ingredients:

For the waffle batter:

Refined flour / maida-2 cups

Melted butter- 2-3 tbsp.

Salt-1 pinch

Eggs- 2 no

Milk-1/2 cup

Water-1/4 cup

Sugar-1/4 tsp

Baking powder-1/4 tsp

For the waffle toppings:

Oil- 2 tsp

Butter-1 tsp

Green chilies-1 tsp chopped

Garlic-1 tsp chopped

Onion-1 small chopped

Chicken liver- 250 gms, cleaned cut into 4 pieces each- boiled.

For veg options- use paneer cubes/ tofu/ zucchini/ mushrooms etc

Salt and pepper to taste

Mixed herbs-1/2 tsp

Chili flakes-1/2 tsp

Tomato ketchup-2-3 tsp

Red chili sauce-1-2 tsp

Water-1/2 cup

Soy sauce-1 tsp

Peanut butter-1-2 tsp

Coriander leaves-2-3 tsp chopped

Spring onion greens-2-3 tsp chopped

Lime juice-1-2 tsp

Poached eggs-2-3 no

Cheese slices-2-3 no

Method:

1. Prepare all the ingredients for the waffle recipe as listed.

2. Start with the waffle batter first, mix all the ingredients well and using a hand blender prepare a batter of a light coating texture and allow to rest for 20 mins.

3. Proceed with the topping for the waffle heat up oil and butter in a pan, saute the garlic, onions, chicken liver pieces add any other ingredients/ or as per the list of veggie options as well like mushrooms, corn, broccoli etc add in the seasonings, herbs, chili flakes, sauces and peanut butter etc and cook for 2-3 mins and keep aside.

4. Continue with the waffle maker, pour in the batter into the waffle maker as per prescriptions, allow to set and cook to a nice golden brown color.

5. Remove the waffle once cooked, and start the assembling of the waffle by placing the prepared toppings on a base of cheese slice on it and getting it ready for final presentation, place the poached egg at the end on top, garnish with the greens and serve with assorted dips/ sauces.

Recipe-4] BREAKFAST WAFFLE CHOICE

Ingredients:

For the waffle batter:

Refined flour / maida-2 cups

Melted butter- 2-3 tbsp.

Salt-1 pinch

Eggs- 2 no

Milk-1/2 cup

Water-1/4 cup

Sugar-1/4 tsp

Baking powder-1/4 tsp

For the waffle toppings:

Oil- 2 tsp

Butter-1 tsp

Shallots- 5- 8 no peeled and cut 1 x 2

Boiled eggs- 2-3 sliced

Ham/ salami slices- 2-3 no

Cheese slices-2-3 no

Salt and pepper to taste

Mixed herbs-1/2 tsp

Chili flakes-1/2 tsp

Tomato ketchup-2-3 tsp

Mustard paste-1 tsp

Mayonnaise/ cream cheese- 2-3 tsp

For the veg options:

Grilled tofu slices- 2-3 no

Tomato –cucumber slices 3-4 no

Peanut butter-2-3 tsp

Grilled pineapple slices- 2-3 no

Stewed peaches/ pears-2-3 no

Assorted nuts- 2-3 tsp 

Method:

1. Prepare all the ingredients for the waffle recipe as listed.

2. Start with the waffle batter first, mix all the ingredients well and using a hand blender prepare a batter of a light coating texture and allow to rest for 20 mins.

3. Proceed with the topping for the waffle heat up oil and butter in a pan, saute the shallots for a couple of mins, add in the pieces of ham/ salami/sausages etc and add a little seasoning, herbs, chili flakes and saute for a minute and remove. Keep aside.

4. Continue with the waffle maker, pour in the batter into the waffle maker as per prescriptions, allow to set and cook to a nice golden brown color.

5. Remove the waffle once cooked, and start the assembling of the waffle by placing the prepared toppings on a base of cheese slice on it and getting it ready for final plating, top it up with all the ingredient options as listed, drizzle a little of the sauces as per choice, place them under a hot salamander or in a hot oven for a couple of minutes, garnish with the greens and serve with assorted dips/ sauces.

Recipe-5] WAFFLE AND SALAD DUET

Ingredients:

Ingredients:

For the waffle batter:

Refined flour / maida-2 cups

Melted butter- 2-3 tbsp.

Salt-1 pinch

Eggs- 2 no

Milk-1/2 cup

Water-1/4 cup

Sugar-1/4 tsp

Baking powder-1/4 tsp

For the waffle toppings:

For the nutty cheesy crumble:

Butter- 2-3 tsp

Roasted crushed peanuts-1/4 cup

Grated cheese/ cheese powder- ¼ cup

Crushed pepper-1/2 tsp

Bread crumbs-1/4 cup

Mixed herbs-1/2 tsp

For the tossed green salad:

Assorted lettuce leaves-1 cup

Olive oil- 2-3 tsp

Cherry tomatoes-3-4 no cut 1 x 2

Cucumber slices- ½ cup

Shallots- 3-4 sliced

Feta cheese-1/2 cup

Mixed herbs-1-2 tsp

Sliced nuts- 2-3 tsp

Salt and pepper to taste

Mustard paste-1 tsp

Lime juice- 2-3 tsp

Olives- 4-5 no black/ green

Mint/ parsley/coriander/basil- ¼ cup

Method:

1. Prepare all the ingredients for the waffle recipe as listed.

2. Start with the waffle batter first, mix all the ingredients well and using a hand blender prepare a batter of a light coating texture and allow to rest for 20 mins.

3. Proceed with the topping for the waffle heat up oil and butter in a pan, saute the ingredients as listed for a couple of mins, etc and add a little seasoning, herbs, chili flakes and saute for a minute and remove. Keep aside.

4. To prepare the tossed green salad, in a mixing bowl combine together the ingredients for the dressing and add in the ingredients toss them well and assemble on the serving plate.

5. Assemble the cooked waffle on the serving plate with the green tossed salad and top it with the prepared crumble mixture and garnish with fresh herbs and serve it.

Recipe- 6] HERB & SPICE WAFFLE COMBO

Ingredients:

For the waffle batter:

Refined flour / maida-2 cups

Melted butter- 2-3 tbsp.

Salt-1 pinch

Eggs- 1 no

Milk-1/4 cup

Water-1/4 cup

Pesto sauce-2-3 tbsp.

Assorted fresh green herbs-1/4 cup fine chopped

Chili flakes-1/2 tsp

Sugar-1/4 tsp

Baking powder-1/4 tsp

For the waffle toppings:

Oil- 2 tsp

Butter-1 tsp

Onions- ½ cup sliced

Garlic-1 tsp chopped

Salt and pepper to taste

Hung curd-1 cup

Cream cheese-2 tsp

Mixed herbs-1/4 tsp

Chili flakes-1/4 tsp

Chaat masala-1/4 tsp

Spring onion greens- 2-3 tbsp. chopped

Honey-2-3 tsp

Chili sauce/ peanut butter/ as needed to serve alongside.

Method:

 1. Prepare all the ingredients for the waffle recipe as listed.

2. Start with the waffle batter first, mix all the ingredients well and using a hand blender prepare a batter of a light coating texture and allow to rest for 20 mins.

3. Proceed with the topping for the waffle heat up oil and butter in a pan, saute the ingredients as listed for a couple of mins, etc and add a little seasoning, herbs, chili flakes and saute for a minute and remove. Keep aside.

4. To prepare the waffles for presentation assemble the cooked waffle on a serving plate and top it up with the saute mix of ingredients and then spoon over the mixture of cream cheese and hung curd mix and garnish with assorted fresh greens. Serve immediately with choice of dips and sauces/ salads etc.

Ingredient Ideology | SUMMER SPECIAL: WATERMELON COOLER By: Dr. Kaviraj Khialani- Celebrity Master Chef.

HEALTHY- WHOLESOME & NUTRI-RICH

Watermelon & Summers seem to be indispensable and the mere appearance of its vibrant color and its mouthfeel and crunch is so very mesmerizing that it can keep away many fast foods and give us a feeling of contentment and satisfaction like none else. I often remember those summer times since childhood when watermelon was a must and had to be consumed as an important part of our daily needs and we somehow it was better having it wholesome rather than being juiced up.

It is one of those fruits which are highest in water content and have been with us supplementing our dietary requirements and adding nutritional benefits with its varied offerings which we all must take note of and should try and have as much of it this summer season to beat the heat and keep ourselves hydrated and light.

Let us have a look at the Top 10 Health Benefits of Watermelon:

1. Watermelon is rich in Vitamin A, Vitamin C, Iron and Calcium content.

2. Watermelon has good amounts of folic acid, phosphorus, and potassium to offer us as well.

3. Watermelon is considered to be a good Immunity boosting fruit and it also aids in digestion.

4. Watermelon benefits also include reducing insulin resistance, keeping us hydrated and is low in calories.

5. Watermelon is good for our skin and hair and is also rich in minerals and vitamins.

6. Watermelon helps to cleanse the kidneys and also improves liver functions.

7. Watermelon is also heart-healthy and cures muscle soreness.

8. Watermelon helps us detox the body as well and also helps to relieve acid reflux.

9. Watermelon is also regarded as a mood enhancer and also helps the metabolism of the body.

10. Watermelon prevents cell damage due to free radicals and also reduces risk of cardiovascular diseases.

Here are a couple of recipes with The Wow Some Watermelon for all of us to relish this season:

Recipe-1] WATERMELON DETOX & REFRESHER

Ingredients

Watermelon- 2 cups freshly cut

Water- 2 cups

Cucumber-1/2 no peeled and cut into cubes.

Mint leaves- 12-15 no.

Ginger juice- 1 tbsp.

Lime slices- 3-4 no.

Lime juice- 2 tbsp.

Salt- pink/sea salt/rock salt- ¼ tsp – optional

Fresh basil leaves- 5-6 no.

Method:

1. Prepare all the ingredients for the detox refresher.

2. In a blender jar combine together the fresh watermelon, with cucumber, little water and churn it.

3. Remove in a mixing bowl, add in the ginger juice, lime juice, Mint and basil leaves, a pinch of salt if desired.

4. Mix well and pour into glasses and serve immediately.

5. Have a couple of glasses of this detox refresher and feel fresh and light.

Recipe- 2] WATERMELON SALSA BOWL

Ingredients:

Watermelon- 2 cups fresh cut into small pieces

For the salsa:

Garlic-1 tsp chop

Onions/ spring onions -2 tbsp. chop

Fresh red ripe tomatoes- ½ cup chop.

Fresh basil/spring onion greens/ mint leaves- 2 tbsp. each

Rock salt/ pink salt/ black salt- 1 pinch

Olive oil- 2 tsp

Honey- 1 tsp

Ginger juice-1 tsp

Chopped green chilies- 1 tsp

Crushed black pepper-1/2 tsp

Flax seeds/ melon seeds/ pumpkin seeds-1 tsp

Fresh orange segments-1/4 cup

To serve with-  whole wheat/ multi-grain savoury crackers/nachos/tortilla chips as a snack!

Method:

1. Prepare all the ingredients for the recipe and keep aside.

2. This is an uncooked version of a watermelon salsa as its more nutritious when not cooked.

3. Using a mixing bowl, combine together all the ingredients and give it a good mix, add boiled sweet corn as well if desired for some color and crunch in the salsa, I usually use freshly roasted crushed corn kernels in this one.

4. Check for seasonings, adjust accordingly and chill the salsa until being served, allow a standing time of at least 20 mins before having it.

5. Arrange the savoury crackers/nachos/tortilla chips on a serving platter and spoon in the salsa into a bowl and serve along, add olives, gherkins etc as desired.

Recipe-3] WATERMELON & AVOCADO TOSS SALAD

Ingredients:

Watermelon- 2 cups freshly cut and cubed.

Ripe avocado- 1 no, peeled- stoned and cut into cubed

Iceberg lettuce/ any fresh greens of your choice- 1 cup

Cucumber- ½ cup cubed

Tomatoes-1/4 cup cubed

Dates- 3-4 no, without seeds, cut into pieces

Assorted nuts- 2-3 tbsp.- walnuts/cashews/ almonds/ peanuts.

For the dressing:

Honey- 1 tbsp.

Ginger juice-1 tsp

Lime juice- 2 tbsp.

Mint leaves- 4-5 no.

Melted jaggery- 2 tsp

Flax seeds/ melon seeds- 1 tsp

Olives- black/green- 3-4 no sliced.

Parsley/ coriander- 2 tbsp. for garnish.

Method:

1. Prepare all the ingredients for the salad and keep chilled.

2. Just before serving, in a mixing bowl combine together the ingredients for the dressing and mix them well.

3. Arrange the base of the salad greens on a serving salad plate or bowl, place the body of the salad on top and finally drizzle the dressing over and garnish.

4. Serve the salad instantly and enjoy it before or with a light meal for lunch/dinner.

Recipe- 4] NUTTY WATERMELON SUMMER SALAD

Ingredients:

Watermelon- 2 cups freshly cut into cubes

Iceberg or any greens of your choice/purple cabbage- 1 cup

Feta cheese/ cottage cheese- 2-3 tbsp. crumbled

Assorted nuts- 2 -3 tbsp.- pinenuts, peanuts, almonds 

Assorted fresh veggies which can also be added to this salad;

Babycorn, broccoli, carrots, French beans, green or yellow zucchini, asparagus, water chestnuts, boiled lotus stem slices.

For the dressing:

Olive oil-1 tbsp.

Watermelon pulp-1/4 cup

Sweet lime juice/orange segments -2 tbsp.

Melon seeds/ chia seeds-2 tsp

Salt and pepper to taste

Balsamic vinegar/ lime juice- 2 tsp.

Mustard paste-1/2 tsp

Mint and coriander leaves- 2 tbsp.

Date puree-1 tbsp.


Method:

1. Prepare all the ingredients for the salad.

2. In a serving bowl arrange the base of greens of your choice, cabbage, etc.

3. In a mixing bowl combine the dressing ingredients and blend them well.

4. Arrange the body of the salad on the base onto the serving plate and drizzle the dressing over and serve garnished with nuts/seeds/micro-greens etc.

Ingredient Ideology | MINCED TO PERFECTION By: Dr. Kaviraj Khialani- Celebrity Master Chef

Delicacies to relish using minced options

Keema is one of those words which entices the taste buds of quite a few of us and we love to try interesting dishes with keema which serves as a variety in between several meal plans and days of the week when we crave to have some varieties on our plates. Before working with any kind of keema be it mutton or chicken it is important to observe a few points of quality and freshness which is essential to end up making a tempting delicacy. 

Firstly, the keema should be fresh as far as possible, these days we indulge in frozen varieties due to lock downs etc therefore we need to check on the packing date and best before must be verified before online or offline purchases to prevent food borne issues and stomach upsets etc. 

secondly, we also need to store it at the right temperature since we are now into summer the raw meat or keema tends to go rancid very fast if not stored properly due to rise in temperatures, ensure you thaw it properly and gradually before cooking and at room temperature, never put the frozen keema into water or immerse it in water baths to melt away the ice.

Thirdly, the grain and texture of the keema should be looked at it shouldn’t be too dry or too overly moist or like a paste as well, it should be well minced and should be coarse when cooked as well. While it is always best to pick the fresh lot and use at the earliest cold storage facilities do make convenience cooking happen for most these days!

Here are a few simple-easy to make recipes with Chicken Keema:

Recipe-1] CHICKEN KEEMA PAO KA ZAIKA

Ingredients:

Chicken keema- 250 gms.

Green peas- ½ cup

Oil/ghee- 2 tbsp.

Ginger-garlic-chili paste- 1 tbsp. mix

Onion paste-1 cup –raw.

Salt to taste

Tomato puree-1/2 cup fresh.

Turmeric powder-1/2 tsp

Red chili powder-1/2 tsp

Coriander powder-1 tbsp.

Water-1/2 cup

Garam masala powder-1/2 tsp

Fresh coriander leaves- 2 tbsp. chopped

Lime slices and onion slices to serve with- as needed.

Pao- 4-6 pieces.

Method:

1. Prepare all the ingredients for the recipe.

2. Heat oil/ghee and add in the ginger-garlic-chili paste and onion paste and saute it on a medium flame for 4-5 mins, add little water as needed while it cooks.

3. Add in the tomatoes, salt and all powdered spices, add chicken keema and frozen- blanched green peas and saute it well with the masala.

4. Add little water and simmer for 10-12 mins and allow the chicken keema to cook well.

5. Finally garnish with coriander leaves and serve with buttered pao, lime and onion slices as a one meal dish.


Recipe-2] DUM DAAR KEEMA MATTAR KA PULAO

Ingredients:

Basmati rice-  1 and half cup soaked in 3 cups water for 15 mins.

Oil/ghee- 2 tbsp.

Chicken keema- 250 gms.

Green peas-1/4 cup blanched

Potatoes-1/2 cup cut into cubes.

Bayleaf and peppercorns- 4-5 mix.

Salt to taste

Kasuri methi- 1 tsp

Sliced onions- 1 cup

Chopped tomatoes-1/2 cup

Sliced green chilies- 2-3 no.

Turmeric powder-1/2 tsp

Dhaniya jeera powder- 1 tsp mix

Garam masala powder- ½ tsp

Water – as needed to cook the pulao.

To serve with: papad, raita, pickle.

Method:

1. Prepare all the ingredients for the pulao.

2. Heat oil/ghee in a thick bottomed pan, add in the sliced onions and slit green chilies and saute them until light brown, add little water as needed.

3. Add in the keema and peas, potatoes and saute well, add salt and tomato, kasuri methi, and bhunao it for 2-3 mins.

4. Add in double the amount of hot water and bring to a boil, simmer and cook the pulao on low flame, covered and in steam for 15-18 mins.

5. Open, mix well check for seasonings, add a little fresh mint and coriander, fried onions, nuts like cashews and raisins and little rose water, and serve hot.

Recipe-3] KEEMA MATTAR MASTANA

Ingredients:

Chicken keema- 250 gms.

Green peas- ½ cup.

Oil/ghee- 2 tbsp.

Cinnamon stick-1-inch piece.

Cloves- 3- 4 no.

Ginger- 1 tsp chopped

Dry red chili- 2 no.

Chopped onions- ½ cup

Chopped tomatoes-1/4 cup

Curd- ¼ cup

Roasted crushed peanut powder-2 tsp

Salt to taste

Coriander powder- 1 tsp

Red chili powder-1/2 tsp

Turmeric powder-1/2 tsp

Water-1/4 cup

Coriander and mint leaves- 2 tbsp. mix

To serve with: roti, phulkas, parathas, laccha parathas etc.

Method:

1. Prepare all the ingredients for the recipe.

2. Heat oil/ghee in a pan, add in the whole spices, and onions, ginger and saute well for 2 mins.

3. Add in the tomatoes saute well, add in the chicken keema and peas.

4. Add in the salt, powdered spices and bhunao the keema well for 2-3 mins.

5. Simmer and add in the thick beaten curd and peanut powder and mix well, cover and cook the keema on a low flame for 12-15 mins and check.

6. Add mint and coriander leaves towards the end and serve as a main course with lime, onions or kachumber, raita and papad.

Recipe-4] KEEMA GOTALA ROLL UPS

Ingredients:

Chicken keema- 250 gms

Oil/ghee- 2 tsp.

Jeera-1/2tsp

Chopped green chilies-2 tsp

Garam masala powder-1/2 tsp

Tomato puree-2 tbsp.

Chop onions- 1 no for cooking the keema

Boiled mashed potato-1/2 cup

Salt and pepper to taste

Leftover rotis- 4-5 no.

Schezuan sauce- 2 tbsp.

Sliced onions- ¼ cup for the rolls.

Shredded white cabbage-1/2 cup

Grated cheese-2 tbsp.

Lime juice- 1 tbsp.

Chaat masala-1 tsp

Coriander and mint leaves- 2 tbsp. mix

Method:

1. To prepare the keema mixture for the roll ups heat oil/ghee in a pan add in the jeera, and onions, chilies and saute for 2-3 mins add in the tomato puree, and salt to taste, cook the mixture for 2-3 mins on low flame.

2. Add in the keema into the masala and bhunao for 2 mins, add in garam masala powder and little water to cook the keema on low flame for 15-18 mins.

3. Once keema is cooked add in the boiled mashed potatoes and mix well.

4. To assemble the rolls ups, warm up the leftover rotis and apply little schezuan sauce on them, place cabbage and sliced onions and now place the keema potato mixture, add grated cheese, sprinkle lime juice, chat masala and coriander- mint leaves.

5. As an addition one can add little imli chutney as well if desired and roll up the content and secure it well. Serve immediately.

Ingredient Ideology | TEMPTING TURKISH TREATS By: Dr. Kaviraj Khialani- Celebrity Master Chef.


TEMPTING TURKISH TREATS

A Basic Introduction: One of my all-time favorite cuisines has been from Turkey, it is not only easy to prepare but has a lot of robust aromas and a great sense of satisfaction which is felt after cooking and serving it to food connoisseurs who not only relish the tempting delicacies but also appreciate it and share its goodness with loves ones and friends. Turkish Cuisine is one of the world’s top cuisines, joining the ranks of French, Chinese, Italian, and the like. Like the country’s cultural mosaic, the food of Turkey is very colorful and contains countless different influences and tastes. The cuisine of Turkey has continued to evolve over centuries, deriving influence from its rich history of lands that hosted first the Byzantine, and then the Ottoman Empires. Specific tastes in different regions of Turkey contribute to the complexity of the country’s cuisine. The availability of different Turkish food in some regions also helped to shape the foods common to that particular area. 

An Overview of Turkey and its Food Culture: Every country and or continent is known for a particular style of food, variety of ingredients available/ being grown or out-sources etc which have influenced the food and recipes as well of that particular diaspora. Eastern Black Sea region, for example, is not appropriate for wheat production due to heavy rainfall; therefore, the residents developed dishes that rely mostly on corn and corn flour. Likewise, the Southeastern Anatolian region is famous for kebabs as a result of its abundant livestock. The Aegean region, known for its olive production, is famous for its delicious olive oil vegetable dishes and herbs; while pastries are the monopoly of Thrace. Istanbul has always attracted a large number of migrants from other parts of Turkey, relocating to the city in search of work. Because of this, Istanbul has become the cultural heart of Turkey, sharing the most delicious Turkish foods from each region in its unique cuisine. The Ottoman Turks had two meals a day. The first meal, which they ate between morning and noon was more like brunch. They would have the second meal of the day anytime between late afternoon and evening; this meal consisted of meat dishes served with vegetable and legume accompaniments such as stuffed eggplant or bulgur pilaf with vegetables. In Turkey, nowadays most families enjoy 3 meals a day. Weekday breakfasts are basic and quick but weekend breakfasts where the family comes together are large and consist of many different foods.

Lunches in Turkey are usually made of seasonal dishes, soup, salad, etc. Dishes that require time and effort to prepare are not common at this meal. Meat-based dishes, as well as desserts, aren’t served at lunches. Dinners are usually a more elaborate and richer one because it’s the only time when family members have been working in fields or at another job all day come home together. In Turkey, there is another unofficial meal called “yatsilik” which is eaten after dinner around 9 or 10 pm. Nuts, dried, and fresh fruits are usually served with black Turkish tea. Some of the most common foods served for yatsilik are seasonal fresh fruits, dried plums, figs, dried fruit pulps (grape, apricot or mulberry), and nuts like pistachios, almonds, roasted chickpeas, roasted pumpkin seeds and sunflower seeds, walnuts, and hazelnuts. 

Turkish Bread:  Among the varied starch preparations, Bread is yet another indispensable part of every Turkish meal. This has been true for thousands of years, and it remains the most important component to every meal: breakfast or dinner, without bread your Turkish meal will lack that something special. It is eaten, whether it is particularly suited to the meal, or not. Turkey has the highest bread consumption per person in the world. Bread consumption a year is 199.6 kg (440 lb) per person. Turkish people eat more than three times their own body weight in bread annually.

A few of the key ingredients used in Turkish cooking include:

Vegetables: okra, pea, green peppers, tomato, mallow, artichoke, carrot, cucumber, chicory, spinach, zucchini, cauliflower, celery, asparagus, cabbage, mushrooms, parsley, lettuce, potatoes, beets, eggplant, leek, arugula, garlic, purslane, onion, radish, Legumes: broad beans, beans, chickpeas, lentils, Meats: lamb, beef, chicken, fish

Spices: rosemary, red pepper, nigella seeds, thyme, cumin, mint, cinnamon, coriander, turmeric, sumac, black pepper, clove, poppy seeds, saffron, sesame seeds, Nuts: pistachios, chestnuts, almonds, hazelnuts, walnuts, Grains: rice, bulgur, Oils: Sunflower oil, olive oil, hazelnut oil.

Turkish Cuisine has a wide variety of foods, including cereals, pastries, vegetables, and self-growing herbs mixed with meat. There are also many soups and other traditional Turkish foods that incorporate butter, sunflower oil, and olive oil as an ingredient. Turkish cuisine has also its own unique types of healthy food, such as grape molasses, yogurt, bulgur, etc. Rice is used extensively in Turkish cuisine. It is featured in many of the stuffed meat and vegetable dishes as well as being served as pilaf, and Turkish people have very high standards for its preparation. A great-tasting pilav is proof of a Turkish housewife’s good cooking skills.

Pilaf’s in Turkey are usually cooked plain only with butter but there are also those exotic rice dishes flavoured with spice, nuts, and fruits—others made with meat, fish, and vegetables, are known as sultan pilavı. Pilaf’s are usually served as an accompaniment to the main course of meat or fish, but some more substantial pilaf’s, like yufkalı pilav and safranlı midyeli pilav can be served with a salad to make a full meal, iç pilavı, with currants, pine nuts, and calves liver, is served all over Turkey, especially on special occasions. Acılı Bulgur Pilavı is actually made with bulgur, or cracked wheat, which has a nutty flavor. Rice with chickpeas is a popular and nutritious type of rice dish in Turkey. In the summer, some pilafs are served cold with plain yogurt.

The preparation of pilaf is as much an art today in Turkey as it was in the sultan’s kitchen in Ottoman times.

Vegetarian in Turkish cooking: Turkey is no stranger to vegetable-based and vegetarian cuisine. The country’s cooking culture often uses vegetables and wild-grown greens, cooked as vegetarian dishes or with meat for the protein hit that can stretch precious supplies of food items like beans and rice. Aegean and Mediterranean regions are well known for their warm and sunny climate which allows growing vegetables year-round. Some of the most common vegetables grown and eaten in Turkey are zucchinis, eggplants, cauliflower, bell pepper, green beans, spinach, artichokes, carrots, and celery. Fresh vegetables are cooked in many ways, but they mostly fall into one of these categories: meatless vegetable dishes (including vegetables with olive oil), boiled, fried, and roasted veggies. Fried vegetables are usually served with garlic yogurt sauce. 

A typical vegetable dish is prepared with a base of olive oil, chopped onions, pepper paste or tomato paste (concentrated tomato sauce), and fresh tomatoes. Usually, the vegetables and hot water is added to this base and prepared as a pot dish. Minced meat can be added to most vegetable dishes except the ones cooked with olive oil. Olive oil dishes are also eaten cold and having meat in them is not a great idea.

Here are a few popular Vegetarian dishes from Turkish Kitchens:

Karniyarik: Large eggplant stuffed with ground beef, chopped-up onions, garlic, tomatoes, and green peppers and cooked in oven.

Kizartma: Deep-fried vegetables (usually eggplant, zucchini, potatoes, green peppers) served with yogurt sauce.

Mücver: Graded vegetable (the most popular one is zucchini) mixed with egg and flour and deep-fried.

Lahana Sarmasi: Rolled white cabbage, stuffing is usually with onions and rice and may have minced beef if preferred with meat.

Kapuska: Thin sliced white cabbage cooked with onions and tomato sauce. Can be cooked with minced beef or lamb.

Ispanak Yemegi: Onions, spinach, and rice cooked with tomato sauce (tomato paste). Usually eaten with garlic yogurt.

Türlü: A vegetable dish made with eggplant, zucchini, potatoes, tomatoes, and onion.

Meat Cookery in Turkish kitchens: From the delicious chicken dishes to beef and lamb, Turkish cuisine is definitely a carnivore’s paradise. The meat cooking methods are also varied – from roasted meats cooked in spiced sauces or stews with vegetables to skewered kebabs grilled over slow-burning coals. The kebabs and meatballs are two other very popular ways of preparing meats in Turkey.Almost every city in Turkey has its own style of kofte and kebab which consists of spiced chicken, lamb, or beef. Cooking lamb meat with bulgur, (cracked wheat) and legumes is also a common way of preparing main meals in Turkey. If the dish has lentils, beans, or chickpeas, as the dish is already very nutritious and can be made quickly, a small amount of meat is used just to give the dish a meat flavor.

Lamb was the most popular meat in Ottoman cuisine. The beef was only used to make sausages and dried meat (pastirma). In today’s Turkish cuisine, besides lamb, beef and chicken meat are also used in abundance. Especially chicken meat has become the most popular meat in Turkey in recent years due to its cheap price compared to red meat. 

Kebabs in Turkish cuisine:

In Turkey, kebab is cooked at home as well as in restaurants. It is either cooked on skewers over an open flame but it may also be prepared in pots drily without any water. The pot style kebabs are a more common type of kebabs cooked at home as it’s an easier way to prepare kebabs. Skewered kebabs often dined at restaurants, but they are also the quintessential dish for any family picnic where a mangal (barbeque) is ready with charcoal open flame. Kofte made with ground beef or lamb, grilled meats, skewered meats, and grilled tomato, peppers, and eggplant are also cooked for family picnics. Kebab generally refers to any dish of meat, fish, or vegetables, which are grilled on a skewer or roasted using a rotisserie. In Turkey, the word kebab extends to include any of these dishes cooked over, or next to, a flame. It consists of both small and large cuts of meat, as well as ground meat. Kebab in Turkey can be served on plates (known as porsiyon), in sandwiches, or even in wraps (known as durum).

1. Shish Kabab- A traditional and familiar Turkish kebab of meat and vegetables, generally cubed and threaded onto a skewer before being grilled and served with bread and rice with salads. Çöp şiş is a variety of this popular kebab, made with smaller pieces of meat and generally cooked on wooden skewers, as opposed to iron.

2. Adana Kabab- Hailing from the South-Eastern Turkish province of the same name, Adana kebab is a spicy (read: hot) kebab made from ground mince formed over a wide skewer and grilled over charcoals. A milder version originates from a nearby town and is known as Urfa kebab. Both kebabs are served with grilled vegetables and bulgur pilaf.

3. Iskendar Kabab- This kebab inspired Iskender Efendi to invent the vertically cooking kebab and originates from his seaside hometown of Bursa. Iskender kebab is essentially döner kebab, served with a slathering of melted butter over a bed of bread, with yogurt on the side.

4. Doner Kabab- The World-famous Turkish kebab means ‘rotating’ kebab in Turkish. It is made from lamb, chicken, or beef, slowly roasted on a vertical spit, and then thinly sliced off. Döner is served on a plate with salad and rice or potatoes; in bread like a sandwich; or in a wrap known as durum.

Mezze and salads: Vegetables are a very important part of the Turkish diet, and fresh salads are an essential part of most meals. They are served with the main course. Most salads are simply made with leafy greens, tomatoes, cucumbers, green peppers, onions, and whatever other vegetables are in season. Salads made with beans, grains, and vegetables are frequently a part of a winter meze. Edible wild greens such as dandelions are often cooked and served cold with a drizzle of extra-virgin olive oil or lemon juice.

Olive oil in Turkish cuisine. Today, meze culture is very common in Turkish taverns and restaurants. Hot and cold Turkish mezes ordered to the table in small plates and are shared by everyone at the table. Turkish meze can be served with any kind of beverage. Turkish wines and Turkish raki, make great accompaniments to appetizer mezes. Wild herbs with yogurt sauce, pickles, ezine cheese, melon, vegetable dishes with olive oil, stuffed grape leaves, Haidari, lakerda, arugula salad, tomato and onion salad, roasted eggplant salad, marinated fish, octopus’ salad, shrimp cuts, sautéed wild herbs, pilaki, fava, olives, şakşuka, celery salad, artichokes with olive oil, ezme salad are the best examples of mezes in Turkey. Turkish people give careful consideration to the acid, fat, and salt ratio of the different mezes when ordering many of them together. Some of these mezes mentioned above are dipping mezes and usually served with toasted bread.

Turkish Sweets & Desserts: Baklava and kadayif, those sweet, nutty, flaky pastries, are the most familiar Turkish desserts to the rest of the world. The most famous baklava types are from the southeastern Turkish cities of Gaziantep and Urfa. They prepare it with painstaking care from rolling the thinnest possible sheets of fresh filo dough to selecting and grinding the nuts. Baklava, until the 1990s, was a celebration dessert in Turkey only served during the religious holidays of Ramadan and Sacrifice feast. 

There are 3 main types of Turkish desserts: Syrupy desserts: Syrupy desserts are desserts made with dough and usually by pouring sugar syrup on them. Baklava, tulumba, kadayif, sekerpare, lokum (Turkish delight), revani, irmik tatlisi, tas kadayif, lokma, and Burma are some of the popular syrupy deserts. Milky desserts: Milk desserts, which are lighter compared to syrupy desserts, are both easy to eat and easy to digest. Keokuk, sakizli muhallebi, sutlac, tavukgogsu, kazandibi, dondurma (Turkish ice cream), and gullac are some of the popular milk based desserts in Turkey. Fruit desserts: hosaf, komposto, kabak tatlisi, ayva tatlisi, pestil are among the popular fruit-based Turkish sweets. 

Turkish Beverages: It is common to think that as the majority of Turks are Islamic, alcoholic beverages wouldn’t be common. However, they’re just about equally available in Turkey as anywhere in Europe. Rakı and beer make up a large portion of alcohol consumption in Turkey. The country has long been producing great wines in a number of regions and wine production in Turkey also goes back thousands of years ago. In Turkey, there are two dominant types of non-alcoholic drinks: black tea and Turkish coffee. Turkish people also love to drink herbal tea as well, especially on cold winter days. Mint, sage, ginger, thyme, chamomile, rosehip teas are some of the popular ones.


Turkish Tea:

Turks love tea, and most Turks drink many cups a day. Turkish tea is always offered first to visitors and guests to all homes and businesses. Turks prepare tea by brewing it in a teapot (not with ‘tea bags’), preferably porcelain, over a kettle, and a perfectly brewed Turkish tea should be a deep red color. Although tea can be found served in porcelain cups at the major hotels and cafes, Turks prefer to have their tea served in glass cups. Although instant coffee (which Turks call ‘Nescafe’) is quite common, nothing can take the place of a good cup of tea. Tea gardens abound in Istanbul. These open-air gardens, usually located in areas with stunning panoramic views, also serve fruit juice, colas, and some Turkish food like sandwiches and ‘tost’ (grilled sandwiches). More traditional tea gardens serve their tea with a semaver (a metal teapot), and in some tea gardens, you’ll even find nargile (water pipe) for smoking an array of fruit-flavoured tobacco. The tea gardens of Moda and Emirgan are popular choices among café-goers.

Turkish coffee- Turkish coffee is served in small porcelain cups (resembling espresso cups) and always with a glass of water. It is not usually consumed with breakfast; but, more commonly, it is enjoyed after meals with something sweet, usually Turkish delight or chocolate. Turkish coffee is traditionally prepared in a small copper pot called a cezve, and is made by boiling an extremely finely ground coffee together with water and sugar. The coffee is served according to your taste – sade (without sugar) or sekerli (sweet). While drinking you should sip the coffee lightly, to leave the coffee grounds at the bottom of the cup. Afterward, you can perhaps find someone who can read your future from the coffee grounds, which is still very popular in Turkey among both the older and younger residents.

On a Concluding Note & A Few Notes to know of on a Turkish Table: Before eating the food in Turkey it is common for the chef and others at the table to wish each other ‘afiyet olsun’, which is essentially the same as saying bon appetite. As a complement to the chef, the diners at the table will also say ‘elinize saglik’, which literally means ‘health to your hands’ but is interpreted as a sign of endearment or ‘very delicious, well done’. Finally, before drinking, everyone will shout ‘serefe’, meaning cheers! As we all know India too has been widely open to accepting culinary heritage and recipes from across the globe and we do find a few restaurants/ outlets too in various parts of our country who serve a few of the well-known Turkish delicacies under various categories to relish at their very best!

Happy Cooking:

Chef Kaviraj Khialani.

Creative Cuisine International- Mumbai.

Ingredient Ideology | Winter Season Special: Amaranth in Daily Cooking & Beyond! BY: Dr. Kaviraj Khialani – Celebrity Master Chef


Amaranth is a highly nutritious leafy vegetable and grain as well which has been consumed by mankind for centuries all over the world. It is a gluten-free ancient grain that has been compared with rice due to its various qualities and offerings in the culinary world. The green leaf varieties are very popular in India while the chinese prefer the amaranth with the red leaf varieties. Amaranth is an upright moderately tall, broad, leafed annual plant. It comes in variety of sizes, shapes and colors as well. the leaves can be roundish or lance shaped, light, dark green or even with a tinge of red in them.

While the youngish leaves have a milder flavour and a great to be getting tossed in summer salads, the matured leaves are better going into the pan or wok and getting cooked a bit like spinach. Amaranth leaves also called as chaulai in the desi terms are nutritionally similar to beetroot and spinach but with a little edge over them and said to be superior. They also contain three times more amount of calcium and three times more amount of vitamin B3 also called niacin as compared to spinach leaves. Amaranth seeds are also known as ramdana in India in the dried form is used in a number of ways in our kitchens and baked products from seeds, to flour and more.

Let us have a look at a few health benefits of Amaranth:

  • It is a gluten free ingredient which makes it more versatile in adaptability and also high in calcium content for our body.

  • It is considered to be a heart healthy food and also easy to be digested by our system.

  • Amaranth is good for our eyes, hair and also a great source of protein in our diets and recipes.

  • It is full of antioxidants and mineral contents and also plays an important role in maintaining healthy body weight.

  • It is regarded as a great immunity-boosting ingredient and also reduces signs of aging.

  • Amaranth reduces risk of cardio-vascular diseases, helps to prevent and control diabetes as well.

  • Its consumption also helps to eliminate diarrhoea, bloating and cramping in our body.

Here are a few of my favorite ways with amaranth when it comes to cooking some easy and yummy recipes with this superfood ingredient:

Recipe-1] Dal Amaranth

Ingredients:

 Toor/ Arhar ki dal- 1 and a half cup

Amaranth leaves – 1 and a half cup

Garlic- 2-3 cloves, chopped

Ginger-1 tsp chopped

Green chilies-2-3 slit

Curry leaves- 8-10 no

Cumin seeds-1/2 tsp

Mustard seeds-1/2 tsp

Hing-1/4 tsp

Onion-1 small chopped

Tomato-1 med chopped

Coriander powder-1 tsp

Oil-1 tsp

Ghee-1 tsp

Salt to taste

Sugar-1/2 tsp

Tamarind pulp-2-3 tsp


Method:

1. Clean, wash, and soak the Toor dal for 20 mins.

2. heat oil and ghee add in the ingredients for the tadka one by one and allow them to crackle and splutter and then add in the onions, saute them to a light brown, add in chilies, tomatoes and cook for 1-2 mins.

3. Now add in the drained dal, cleaned and roughly cut amaranth leaves, salt to taste, coriander powder, sugar and 2-3 cups of water.

4. Allow to come to a boil, simmer and cook on a low flame for 20-25 mins, add water as needed. Allow dal to get soft.

5. Now add in the tamarind pulp for a little tart flavor and allow to simmer for another 3—4 mins.  the same recipe can be made using a pressure cooker as well and 3-4 whistles can be given to the same.

6. Serve the dal amaranth hot with phulkas, rotis, parathas, salad and pickle/ raita.


Recipe-2] Amaranth ka Saag

Ingredients:

Amaranth greens-1 large bunch, cleaned

Spinach-1 medium bunch, cleaned

Dill leaves- ½ cup, cleaned

Methi leaves-1 cup, cleaned

Onion-2 med sized chopped

Tomatoes-2 med sized chopped

Green chilies- 3-4 no chopped

Ginger- 2 tsp chopped

Garlic- 2-3 tsp chopped

Cumin seeds-1 tsp

Coriander powder- 1 tsp

Besan-1 and a half tbsp.

Oil- 2 tsp

Ghee-1 tsp

Salt to taste

Water-1/2 cup

For the tempering:

Butter/ ghee-1 tbsp.

Garlic-1 tsp sliced

Red chili powder-1/2 tsp

Hing-1/4 tsp


Method:

1. Clean and thoroughly wash all the greens and keep them aside, roughly cut them or tear them.

2. Using a pressure cooker or an open container add in all the greens, green chilies, ginger, garlic, 1 onion, tomatoes, salt, and 1 cup water and cook/ pressure cook for a whistle or 5-7 mins.

3. Cool down, puree or using a hand blender grind to a coarse-textured paste.

4. In a pan, heat oil and add in the rest of the chopped onion saute until light brown, add the puree of the greens and salt, coriander powder, and cook for 2-3 mins.

5. Combine besan into the mixture and saute, allow to cook on a low flame for 2-3 mins.

6. Now heat up butter/ ghee and prepare the tempering for the saag, once it is already adding it into the saag and mix well, and serve hot with makki di roti, parathas, phulkas.

Recipe-3] Amaranth ki Subzi

Ingredients:

Oil- 2 tsp

Ghee- 1 tsp

Cumin seeds-1/2 tsp

Ginger-1 tsp sliced

Garlic-1 tsp chopped

Green chilies-2-3 tsp chopped

Hing-1/4 tsp

Dry red chilies- 2-3 slit

Amaranth leaves- 1 big bunch, cleaned and washed

Methi leaves-1/2 cup, cleaned

Coriander leaves-1 cup, cleaned

Spinach leaves- 1 bunch, cleaned

Tomato -1 cup chopped

Salt to taste

Turmeric powder- ¼ tsp

Coriander powder-1 tsp

Cumin powder-1/2 tsp

Red chili powder-1/2 tsp

Aamchur powder-1/2 tsp

Assorted vegetables- peas/potatoes can also be added

Boiled lentils/ pulses may also be added.

Roasted crushed peanuts-2-3 tbsp.

Fresh coconut-3-4 tbsp. grated

Method:

1. Prepare all the greens, clean, wash, and roughly cut them up.

2. Heat oil and ghee in a pan add in the ingredients for the tempering to start with, hing to ginger, garlic, and chilies, add in cumin seeds, red chilies and saute for a few seconds.

3. Add in the onions cook them until light brown, add in the tomatoes, salt and all powdered spices, add in the greens and veggies/lentils etc as desired and mix well.

4. Reduce the flame and allow to simmer as the green wilt up and get cooked in the spices the aromas and flavours get developed. Adding a little water is fine as well in case the mixture gets too dry in the pan.

5.Cook for around 12-15 mins, check for seasonings and adjust accordingly. Finally add in the coconut and peanuts for the crunch effect and taste. Serve the subzi hot garnished with fried red chili/ ginger juliennes and enjoy it with rotis and a bowl of curd or raita/papad.

Recipe-4] AMARANTH ONION FRITTERS

Ingredients:

Amaranth seeds- 1 cup

Water-2 cups

Oil-1 tbsp. + for frying as needed

Garlic- 3-4 cloves chopped

Onion-1 med sized, chopped

Zucchini-1/2 cup finely chopped

Red capsicum-1/2 finely chopped

Aamchur powder-1/2 tsp

Chili powder-1/2 tsp

Coriander powder-1/2 tsp

Salt to taste

Garam masala powder-1/2 tsp

Black pepper powder-1/4 tsp

Lemon juice-1 tsp

Breadcrumbs-1/2 cup for binding/coating

Flour-2-3 tbsp. for binding/coating

Can also add mixed herbs/ chili flakes/ cheese as well.

To serve with:

Dips/ chutneys/ sauces of your choice.


Method:

1. Boil water in a pan, add in the amaranth seeds and stir well. bring to a boil, simmer for 20 mins. once it is done add salt and pepper and keep aside.

2. In a pan add oil saute the garlic and onion for a few seconds, add in the red capsicum and zucchini and stir fry for a few minutes. Now add in the powdered spices as per taste and turn off the flame, keep aside. Any choice of veggies like green peas, carrots, beetroot, sweet potato etc can also be added into the fritter mix for a more nutri-rich option.

3. Add this mixture to the cooked amaranth and also add some lime juice, mix well and apply oil on the hands and divide the mixture into 12-16 portions and shape them into fritters/ tikki shapes.

4. Heat oil in a pan add oil and shallow fry the fritters to a nice golden brown color on both sides, use medium flame to cook this. Serve these amaranth fritters with hung curd- mint and garlic dressing, or a mayonnaise with chili and coriander.


Recipe- 5] FRUITY AMARANTH PUDDING

Ingredients:

Amaranth seeds-1 cup

Coconut milk- 3 cups

Coconut- grated-1/2 cup

Honey-1/4 cup

Salt-1/4 tsp

Cinnamon stick- 1 piece

Vanilla essence-1/2 tsp

Raisins-2-3 tbsp.

Cashews-2-3 tbsp.

Almond powder-1-2 tsp

Condensed milk-1/4 cup

Brown sugar- 2-3 tsp

Dates- 2-3 chopped

For the options of fresh fruits in the pudding:

Assorted berries- ¼ cup

Fresh kiwi- ½ cup

Banana-1-2 sliced

Mango-1/2 cup cubes

Method:

1. Using a thick-bottomed pan, add in the coconut milk and cinnamon stick, simmer for 2-3 mins, add in the amaranth seeds, mix, and stir well, cook for 6- 8 mins.

2. Add in the condensed milk, nuts, and almond powder and simmer, continue stirring, and allow the mixture to cook for 3-4 mins more.

3. Once the mixture starts to thicken up and the amaranth seeds get cooked, check for sweeteners as per taste, add dates and turn off the flame, add in the grated coconut.

4. Allow the pudding mix to come to room temperature, add in the vanilla essence, and remove the cinnamon stick. Mix well and chill for 30 mins.

5. Using dessert cups/ dessert bowls, start setting the pudding, layer the pudding with fresh fruits, dry fruits, fruit crush etc can also be used.

6. Allow the dessert to now set and chill in the fridge for around 1-2 hours and serve it cold as a dessert. We can also add praline or crushed dry fruit chikki into the same recipe to add some crunch into the pudding as well. garnish with assorted fresh fruits and relish the sweet.


Recipe-6] AMARANTH PANCAKES

Ingredients:

Eggs-2 no

Amaranth flour- 1 and half cup

Milk-1 and ¼ cup

Melted butter- 3 tbsp.

Sugar-2-3 tsp powdered.

Salt-1/2 tsp

Baking powder-1 and a half tsp

Vanilla essence- ½ tsp

Options for plating the amaranth pancakes:

Melted butter

honey

Peanut butter

Nutella

Fresh cream

Chocolate sauce

Vegan fruit toppings/ sauces

Assorted fresh fruits:

Banana/ strawberries/ kiwi/ chickoo/ berries/ cherries

Assorted dry fruits:

Dates/ walnuts/ apricots/ almonds/ cashews etc.

Method:

1. In a bowl beat up the eggs until light and fluffy. Add in the milk and melted butter, add in vanilla essence.

2. Sieve the dry ingredients together and add this mixture into the egg, milk and butter mixture, mix well and allow to rest for 15-20 mins.

3. Using a non-stick pan for preparing the pancakes, grease the pan first, allow to heat up, spoon in the pancake batter into the pan and allow to set a little on one side for 1-2 mins, carefully turn the pancakes over on the other side and continue cooking on a low flame.

3. Once a golden brown color has been achieved on both sides, remove the amaranth pancakes and get ready for plating them.

4. Using the various options as listed above we can present these pancakes loaded with a number of goodies, colors, tastes and flavours topped, layered and garnished to perfection.

5. Enjoy these amaranth pancakes with a cup of coffee/ tea/milkshakes etc, these are a perfect choice to enjoy for a brunch as well.

Recipe-7] MUSHROOM AMARANTH CUPPA SOUP

Ingredients:

Oil- 2 tsp

Butter-1 tsp

Garlic-1 tsp chopped

Onion-1 small chopped

Amaranth leaves- 1 cup

Celery- 2 stalks, chopped

Mushrooms- 1 cup sliced

Green chilies- 1 tsp chopped

Salt to taste

Black pepper powder-1/4 tsp

Water/veg stock- 2-3 cups

Coconut milk-1 cup thick

Mixed herbs-1/2 tsp

Chili flakes-1/2 tsp

Cheese-1-2 tsp grated

Peanut butter-1 -2 tsp

Coriander leaves- 2 tsp chopped

Method:

1. Prepare all the ingredients for the soup as listed.

2. Heat oil and butter in a pan, add in the garlic and onions and saute for a few seconds.

3. Add in the celery and chilies, mushrooms, amaranth leaves and saute for a few seconds. Add in the salt, pepper, herbs, chili flakes.

4. Now add in the veg stock/ water, boil, simmer for 4-5 mins. turn off the flame, cool and puree the soup.

5. Bring it back to a boil, simmer and add in the coconut milk, allow to cook for 2-3 mins, blend in the peanut butter, add in the coriander leaves and cheese and dish out the soup.

6. The soup can be garnished with a number of options from saute sliced mushrooms, golden fried onions, fresh micro-greens, caramelised garlic and fried red chilies etc. the soup can also be made using non-veg ingredients like chicken which can go along with mushrooms as an option.

Ingredient Ideology | SHAKHARKHANDI DELIGHTS THIS WINTER BY: CELEBRITY MASTER CHEF DR. KAVIRAJ KHIALANI- CELEBRITY MASTER CHEF

SHAKHARKHANDI DELIGHTS THIS WINTER!

Potato is one such inviting word upon hearing which most of us feel tempted to grab into but not to forget the carb into it as well. The need of the hour today is to somewhere modify a little and twist and turn slightly towards a better outcome on our plates and also to tickle the palate with something interesting and worthy.

To me it has always been one of the top most preferred ingredients in my kitchen which has not only assisted in many ways from basic recipes to fillers in some dishes, to add texture and volume, to help thicken up gravies, etc as well.

From a very young age we all have indulged in this simple and satisfying commodity from enjoying our all-time favorite French Fries, Finger Chips to our Desi hit Vada Pao, to the breakfast special hot and appetizing Aloo Parathas with a bowl of Curd and Papad. I know while reading this most of us are getting those cravings of going for a quick potato bite and relishing ourselves with something delectable and enjoying a quick filler in between those meals. But guess what, today we have an even more interesting ingredient to speak about and that’s Sweet Potato- also called Shakarkhandi in India.

We do agree that not many of us have really tried too many varieties with sweet potatoes so far, while some of us have easily adapted to it but most of us need a little practical ideas and easy tips at times to make that shift from the regular to the not so regular cooking styles in our kitchens, hence this write up for all you foodies, to create that bit of open minded approach and shift from potato to sweet potato once in a while for a change and loads of healthy offerings too.

Top 10 Health Benefits of Sweet Potato:

1. Sweet Potatoes help prevent Vitamin-A a deficiency.

2. They have been considered fairly good to be eaten in moderation while managing diabetes.

3. Good for Managing stress, helps improve the shine and gloss on hair and our skin as well.

4. A great ingredient to be eaten for good eye care and vision, it is also one of the popular memory enhancing foods.

5. sweet potatoes have a good offering in terms of Vitamin Besides it also gives us considerable amounts of iron and potassium.

6. It has also been believed that sweet potato consumption helps minimise sugar absorption.

7. A few studies also suggest that sweet potatoes help in issues related to arthritis too.

8. They are considered to be healthier alternatives to the regular potatoes in many ways.

9. They offer much lesser calories as compared to having our regular potatoes, they are also considered anti-bacterial, anti –inflammatory.

10. Sweet potatoes are packed with anti-oxidants, vitamins, and essential minerals.


10 Ways how to Adapt to Sweet Potatoes in 

Cooking & Baking:

1. Sweet potatoes are a staple food of many parts of the world and they are slightly naturally sweet, starchy and a perfect treat to have in our recipes. Try adding them into your regular Tikkis, Cutlets, Koftas and Quick Bite Recipes from a Sesame Toast to the Hara Bhara Kababs and the like.

2. I enjoyed using sweet potatoes in soups with mix vegetable options with carrots, celery, beans, peas, capsicums and even spinach. It kind of blends itself so well into soups and with its natural starch content, it also offered a decent texture and mouthfeel to the soup variants. Try a sweet potato and pea soup, carrot – mint and sweet potato soup – serve it chilled like shots, Bottlegourd and sweet potato creamy textured soup a great one for a warm summer afternoon!

3. Indian gravies and curries too accept the indigenous composition of sweet potatoes and they naturally add a creamy texture to many variations by which the content of cashew paste, fresh cream, charmagaz also can be reduced considerably along with calories as well.

4. Sweet Potato Fries, can do it baked as well, a light dusting of sea salt, some fresh herbs, a drizzle of coconut oil or even olive oil works fine, add a little roasted crushed cumin powder for an added taste, not to forget a splash of lime juice and coriander leaves to garnish. They are also considered to be a great choice for fasting foods in the Indian sub-continent since they help us manage the hunger pangs.

5. Sweet Potato Frankie, a popular fast food concept can be re-devised into a health wrap and roll concept. Use chapattis made with a combination of flours like soy with whole-wheat, millets and oat meal with multi-grain flour with a touch of kasuri methi in the dough, roll them cook them both sides, apply a little sauce or spread of your choice I liked peanut butter here with some shredded cabbage, a nice patty of boiled mashed mildly spiced sweet potato with carrots and peas, shredded onions, chaat masala and wrap-ready to go!

6. Talking about continental variations, a sweet potato mash with crushed pepper, dash of mixed herbs, a little milk to add to the texture is just great to go with a main course. A nice stir fry recipe with sweet potato fingers along with carrot sticks, snow peas, red and yellow capsicums with a little stir fry sauce is a good choice to offer for a side dish. Asian-style stir fried sweet potatoes with star anise and soy sauce goes well too as a Chinese side dish, crispy wafers/chips made from sweet potato help garnish salads and dips as well. Try using it as a base as well to replace bread for a pizza concept or mini canapes. Sweet potato starch is also available easily to use for binding in our recipes, replace Maida, cornflour and bread.

7. Baked Sweet Potato Cups, stuffed with some cooked soy keema, the pulp itself along with some roasted crushed peanuts, some white sauce and parsley, a pinch of all spice powder, top it with a little cheese, quickly brown it, serve hot with garlic bread.

8. Try doing a Casserole concept with Sweet Potatoes, Chicken or Meat of your choice, or just some fresh garden veggies like zucchini, broccoli, baby carrots, red capsicums, mushrooms etc and cook them in a mild gravy or tomato sauce and serve it with brown rice.

9. Sweet Potato Samosas, Baked Kachories, Parathas, Kulchas, fillings for Sandwiches and Dosas, Dips and Spreads for Sandwiches works wonders. Try a sandwich spread with boiled mashed sweet potato with a little salt, pepper chopped parsley, peanut butter and little tomato ketchup, mix well apply on bread and place your fillings and relish!

1O. Baked Sweet Potato Pies, Fillings for Veg Puffs, add them boiled and mashed into a Bread dough as well with a little Pumpkin seeds or Sunflower seeds, add them to a Brownie mix as well to add to the goey texture upon baking. A vegan sweet potato pie or pudding also is a good option. For some Indian twist I used sweet potatoes in a Halwa, Sheera, Shahi Tukda, double ka meetha, barfi, and in stuffed Sweet Potato Gulab Jamuns as well with Chocolate Gulkhand Rabdi.

Here are a few recipes with Shakharkhandi for all our readers to try out:

Recipe-1] Shakarkhandi Ka Desi Salad

Ingredients.

For the Body of the Salad:

Sweet potato/Shakarkhandi- 300 gms, peeled, cut into cubes & boiled until just cooked or even can be baked or roasted.

Boiled sweet corn- 1/2cup

Capsicum-1/2 no, green cut into small cubes.

Tomatoes-1 small cut into cubes

Cucumber-1/2 no. peeled and cut into cubes

Onions/shallots-  2 to 3 tbsp., cut into small cubes.

Green chilies- 1-2 nos. chopped

Coriander leaves- 2-3 tbsp. chopped

Mint leaves- 8 to 10 no. for garnish

Roasted crushed peanuts- 2 to 3 tbsp.

For the Dressing of the Desi Salad:

Olive oil- 2 -3 tbsp.

Mustard paste-1 tsp

Chat masala-1/2 tsp & salt to taste

Roasted crushed cumin powder- ½ tsp

Mayonnaise or hung curd-1/2 cup

Tomato ketchup-2 tsp

Chili sauce-1 tsp

For the Base of the Salad:

Assorted lettuce/salad leaves/purple cabbage- 1 cup

Method:

1. Prepare all the ingredients for the salad.

2. In a mixing bowl, combine together the ingredients for the dressing and stir well.

3. Add in the ingredients for the body of the salad from boiled sweet potato cubes to everything else and give it a quick toss.

4. Arrange the base of the salad on a plate and top with the fresh salad, sprinkle the peanuts, fresh herbs, coriander, mint etc and serve it immediately.


Chefs Variations:

  • Try the same salad concept with a twist of Indo-Chinese fusion combine tamarind chutney with little schezuan chutney and toss the sweet potato in combination with non-veg like roast/grilled sliced chicken, tandoori chicken tikka, or sliced mutton seekh kababs, tava fry prawns!

  • To add some more fillers, choose to add some boiled healthy options like whole-wheat pasta, vermicelli, grilled or pan fried egg plant cubes, a little pesto mayo or hung curd for the dressing.

Recipe-2] Pan Baked Spiced Soy & Sweet Potatoes.

Ingredients

Sweet potatoes- 350gms.peeled, cut into small cubes.

Soy keema/granules- 100 gms. Soaked in warm water for 10 mins.

Oil- 2 tsp

Butter-1 tsp

Garlic- 1tsp.chopped

Onions- 1 small. Chopped

Tomato puree- ½ cup

Peanut butter- 2 tbsp.

Warm water- 1 cup for cooking

Salt to taste

Black pepper powder-1/4 tsp

Garam masala powder- ½ tsp

Chili flakes and mixed herbs to taste

Grated paneer/ crumbled tofu- ½ cup

Cheese- ¼ cup grated

Chopped parsley/cilantro- 2 tsp

Method:

1. Prepare all the ingredients for the recipe.

2. Heat oil and butter in a pan, add in the garlic, onions and saute for 15 seconds.

3. Add in the soy and sweet potatoes and saute, add all spices, tomato puree, little water along with peanut butter and allow the mixture to cook on a low flame for 8 to 10 mins.

4. Add paneer/tofu and mix lightly, top with little grated cheese and place the pan in a pre-heated oven at 150 degrees Celsius for 8 to 10 mins, serve hot with herbed garlic toasties.

Chefs Variations:

  • Try the same recipe with sweet potatoes in combination with boiled diced eggs, ham, salami or chicken sausages with little white sauce and cheese for a change

  • For a more desi option, I prefer adding soy chunks with sliced mushrooms and sweet potato in combination with little makhani gravy with little added fresh cream and cheese to skip the peanut butter.


Recipe- 3] SWEET POTATO CURRY

Ingredients:

Sweet potato- 400gms, cleaned and cubed

Oil- 2 tsp 

Ghee- 1 tsp

Cumin seeds-1 tsp

Hing-1/4 tsp

Dry red chili- 1 no

Mustard seeds-1/2 tsp

Fennel seeds-1/2 tsp

Ginger-garlic paste-1 tsp

Onion paste- 1 cup

Tomato puree-1/2 cup

Cashew paste- 1 tbsp.

Salt to taste

Turmeric powder- ½ tsp

Coriander powder-1 tsp

Cumin powder-1/2 tsp

Garam masala powder-1/4 tsp

Water-1/2 cup

Fresh coriander leaves- 2 tbsp. chopped

Method:

1. prepare all the ingredients as per the listed recipe.

2. heat oil and ghee in a pan, add in the hing, cumin, mustard seeds and chili etc and give it all a nice stir.

3. add in the onion paste, ginger-garlic paste and cook for 3-4 mins, add little water. Add in the tomato puree, salt and all powdered spices add in the cashew paste and a little curd as well if desired.

4. allow the masala to cook for a few mins now add in the diced sweet potato cubes and mix, cover and simmer and allow to cook for 10-12 mins.

5. check for seasonings, and turn off the flame once the potato is cooked just on the bite, do not overcook. Add some fresh chopped coriander leaves and serve hot with phulkas, rotis etc.


Recipe-4] SWEET POTATO & CAULIFLOWER CURRY

Ingredients:

Sweet potato- 400gms, peeled and cubed

Cauliflower- 400 gms, cut into med florets.

Oil-2 tbsp.

Ghee-1 tbsp.

Garlic-1 tsp chopped

Curry leaves- 8-10 no

Slit green chiles-1-2 no

Ginger-garlic- red chili paste- 1 tbsp. mix

Onion paste- 1 cup- fried, browned and then made into paste

Tomato puree-1/2 cup

Salt to taste

Red chili powder-1/2 tsp

Coriander powder-1 tbsp.

Water-1/2 cup

Cashew paste-2 tsp

Fresh cream-1 cup

Kasuri methi- 1 tsp

Fresh coriander leaves- 2 tbsp. chopped

Ginger juliennes- 2 tsp for garnish.

Method:

1. prepare all the ingredients for the recipe as per the list.

2. heat oil and ghee in a pan and add in the chilies and then add in the prepared paste with onion paste and others.

3. ensure to mix all well, cook for 2 mins, add salt, tomato puree and all the powdered spices, add in some water as needed some cashew paste/ fresh cream and allow to simmer for a few mins.

4. now add in the sweet potato cubes and cauliflower and mix well. place the mixture on a low flame and allow to cook in steam for around 15-20 mins.

5. finally add in the fresh coriander and mix well, serve the recipe hot with phulkas, rotis, kachumber, dahi and papad.


Recipe- 5] SWEET POTATO CURRIED COCONUT BITES

Ingredients:

Sweet potato- 400 gms, peeled and cubed

Oil-2 tsp

Ghee-1 tsp

Salt to taste

Curry leaves- 8-10 no

Cumin seeds-1/2 tsp

Mustard seeds- ½ tsp

Hing-1/4 tsp

Dry red chilies-1 no slit

Green chilies-1 no slit

Water-1/2 cup

Fresh grated coconut-1 cup

Cumin powder-1/4 tsp

Chaat masala-1/2 tsp

Fresh coriander leaves- 3-4 tbsp. chopped

Coriander powder- 1 tsp

Cumin powder-1/2 tsp

Lime juice-2 tsp

Method:

1. prepare all the ingredients for the recipe as per the list.

2. cut the sweet potato after peeling and washing it into uniform pieces.

3. blanch the sweet potato in water and a little salt for a few mins and refresh the mixture. Use the liquid for cooking purposes.

4. now to stir fry the recipe, heat oil and ghee in a pan, add in the spices one by one and allow to splutter and crackle.

5. add in the blanched sweet potato, salt, and all powdered spices, little water, and cover and cook the sweet potato for 8-10 mins.

6. finally add in fresh coriander, lime juice, few drops of lime juice. Serve this recipe with steaming hot rice, dal fry and papad.

Ingredient Ideology | THE MORINGA MANTRA Healthy & Tasty – Loaded with Nutrients BY: DR. KAVIRAJ KHIALANI- CELEBRITY MASTER CHEF

THE MORINGA MANTRA

Healthy & Tasty – Loaded with Nutrients

If you are someone who is having an elevated blood pressure level, then a regular intake of this super-powerful vegetable can help in keeping heart diseases at bay. Consumption of Moringa or drumstick has also proven results in improving bone health due to the presence of an adequate amount of calcium and iron.  Moringa or Drumstick is one of those rare plant species whose seeds, flowers, leaves, and stems are edible and extremely nutritious. Moringa commonly referred to as drumstick is treated as a ‘super plant’ for its unique yet powerful properties that combat different ailments in our system. This nutrient-dense plant has its roots in Ayurveda and was used as a medicine by our ancestors. The stems of the moringa plant are mostly used in Indian kitchens to prepare scrumptious delicacies, must include them in our diets and menus this summer season. 

Drumstick is an easily available vegetable that is cultivated mostly in Asian and African regions. It is a staple vegetable in Southern India and is also widely consumed in other states. The leaves are packed with polyphenols and bioactive compounds like isothiocyanates, which also play a role in preventing cancer and heart diseases, as well as lowering blood pressure. Body heat - Regular intake of drumsticks 2 to 3 times a week will reduce body heat. Mother's milk - Drumstick green is good for mothers with infants as it would help a generation of more milk. Even after pregnancy, it will help the proper blood condition. (It can be sautéed in ghee and taken) Drumstick benefits for male sperm production are attributed to its antioxidant properties. 

Moringa seeds repair the oxidative damage that can consequently reduce sperm quality. Also, these antioxidant properties kick out the stress that boosts your sexual drive and enhances your sexual desires. Drumsticks also offer the benefits of vitamin A, like eye health and skin rejuvenation. This vital ingredient is great for liver health, and also treats stomach issues like constipation, acidity, gastritis, colitis and so on.

Here are a few important health benefits of Moringa:

1. Moringa are considered good for managing diabetes
The various vitamins and minerals present in drumstick stem help in maintaining an optimum blood-glucose level and hence it is highly recommended for people with diabetes.

2. Moringa also help to manage acne issues & fights pimples.
Moringa is known for preventing acne and other skin issues. It is a blood purifier which helps in flushing out all the impurities present in your blood.

3. Moringa are regarded as good for hair and skin health.
It is rich in vitamin B, vitamin A, folic acid and other essential nutrients which will help you in achieving a flawless skin and lustrous hair.

4. Moringa is also believed to prevent the outburst of chickenpox.
Moringa or drumsticks are mostly advised to consume during the month of March- April, as due to its medical properties it can provide immunity against chicken pox.

5. Moringa help to keep our heart healthy.

If you are someone who is having an elevated blood pressure level, then a regular intake of this super-powerful vegetable can help in keeping heart diseases at bay.


6. Moringa also assists our body giving us stronger bones.

Consumption of drumsticks has also proven results in improving bone health due to the presence of an adequate amount of calcium and iron.

Here are a few of my all-time favorite ways with Drumsticks:

Recipe-1] MORINGA LENTIL CURRY

Ingredients:

Drumsticks-3-4 no, cleaned, cut into 4 to 5 pieces each, washed.

Ladyfingers- 150 gms, cleaned and cut 1 x 2

Potatoes- 1 cup medium cubes

Brinjal- 1 cup, medium cubes

Carrots-1/2 cup medium cubes

Oil- 2 tsp

Ghee-1 tsp

Hing-1/4 tsp

Curry leaves- 8-10 no

Slit green chilies-2-3 no

Dry red chili-1-2 no

Cumin seeds-1/2 tsp

Mustard seeds-1/4 tsp

Methi seeds-1/2 tsp

Ginger-1 tsp chopped

Besan-2 tbsp.

Hot Water- 2 cups

Boiled mashed Tovar dal- 2 cups

Salt to taste

Turmeric powder-1/2 tsp

Red chili powder-1/2 tsp

Tamarind pulp- ½ cup

Coriander leaves- 2-3 tbsp. chopped

Method:

1. Prepare all the ingredients for the recipe as listed.

2. Heat oil and ghee in a pan and add in the ingredients for the tempering one by one and allow them to splutter and crackle for a few seconds.

3. Add in the besan and reduce the flame a little, saute it for a few seconds, add in turmeric powder and red chili powder and mix, now add in the hot water and mix well to prevent any lumps due to the besan.

4. Allow to come to a little boil, add in the boiled and mashed Tovar dal, simmer and continue cooking, add in the drumsticks and all other vegetables as well, the ladyfingers however can be added a little later as they cook faster.

5. Add in salt, sugar to balance, tamarind pulp and mix well. cook for 15-20 mins, stirring occasionally. Once the mixture comes to a nice thickness, check for cooking stage of all vegetables especially drumsticks, add in freshly chopped coriander and serve hot with jeera rice/ steamed white rice/ brown rice etc.


Recipe- 2] MATTAR AUR MORINGA KI SUBZI

Ingredients:

Drumsticks-3-4 no, cleaned, cut into 4 to 5 pieces each, washed.

Oil-2 tsp

Ghee-1 tsp

Hing-1/4 tsp

Curry leaves- 8-10 no

Cumin seeds- 1 tsp

Chopped green chilies- 1 tsp

Chopped ginger-1 tsp

Onions-1/2 cup chopped

Tomatoes- ½ cup chopped

Salt to taste

Turmeric powder-1/2 tsp

Coriander powder-1 tsp

Cumin powder-1/2 tsp

Garam masala powder-1/2 tsp

Water-1 cup

Green peas-3/4 cup

Fresh coriander leaves- 2 tbsp. chopped

Kasuri methi-1 tsp

Curd- 2 tbsp. beaten

Fried red chili- 1-2 no for garnish.

Method:

1. Prepare all the ingredients for the recipe as listed.

2. Heat oil and ghee in a pan add in hing, cumin seeds, curry leaves, ginger, chilies and saute for a few seconds.

3. Add in the onions and saute them until light browned, add in tomatoes, salt, all the powdered spices and bhunao for a few minutes, add in curd, kasuri methi and mix well.

4. Add in the drumsticks, peas and saute for a couple of minutes. Add in water and either cover and cook on a low flame for 15-20 mins or allow 3-4 whistles using a pressure cooker and simmer for 4-5 mins.

5. Once the subzi is nicely cooked and ready, we can finally garnish it with fresh coriander leaves and add some fried red chili on top and serve it hot with phulkas, rotis, etc.


Recipe-3] MORINGA COCONUT CURRY

Ingredients:

Drumsticks-3-4 no, cleaned, cut into 4 to 5 pieces each, washed.

Carrots/ beans/ cauliflower/ peas/ potatoes/ yellow or white pumpkin/ baby brinjal etc can also be added as per choice.

Oil/ Coconut oil - 2 tsp

Ghee-1 tsp

Mustard seeds- 1 tsp

Cumin seeds-1/2 tsp

Fennel seeds-1/2 tsp

Curry leaves- 10-12 no

Slit green chilies- 2-3 no

Slit red chilies- 2-3 no

Coconut milk- 2 cups, thick

Salt to taste

Turmeric powder-1/2 tsp

Red chili powder-1/2 tsp

Coriander powder-1 tsp

Fresh coriander -2 tbsp. chopped

Method:

1. Prepare all the ingredients for the recipe as listed.

2. Heat oil and ghee in a pan add in the ingredients for the tempering one by one and allow to flavour up the pan.

3. Add in the assorted vegetables along with drumsticks or chicken with bones in case of non-veg options.

4. Add in salt and all the powdered spices as per taste and mix well. now add in 2 cups of water and bring to a boil, simmer for 6- 8 mins.

5. Now add in the thick coconut milk and allow to simmer for 10-12 mins and until all veggies/ non-veg gets well cooked.

6. Finally add some fresh coriander leaves, a splash of lime juice before having the curry with some steamed white rice goes well, some fried papad and pickle.


Recipe-4] PRAWNS AND MORINGA MELANGE

Ingredients:

Drumsticks-3-4 no, cleaned, cut into 4 to 5 pieces each, washed.

Medium/ large prawns- 750 gms, cleaned and washed

Oil- 2 tsp

Butter-1 tsp

Salt to taste

Turmeric powder-1/2 tsp

Red chili powder-1/2 tsp

Lime juice-2 tsp

Ginger-garlic paste-1 tsp

Thai yellow/ red/ green curry paste- 2-3 tbsp.

Water-1-2 cups

Thick coconut milk- 2 cups

Thai ginger/ galangal- 2- inch piece

Lime leaves- 3-4 no

Lemon grass- 4-5 pieces

Fresh basil leaves - 6- 8 no

Fresh coriander leaves- 2 tbsp. chopped

To serve with: jasmine rice/ lemongrass rice/ steamed white rice

Assorted vegetables- sweet potato/ brinjal/ pumpkin etc may also be added into the prawn curry to add more texture/ value as well.

Method:

1. Prepare all the ingredients for the recipe as listed.

2. Clean, wash the prawns and marinate them with salt, turmeric, red chili powder, lime juice, ginger-garlic paste, mix well and keep aside for 20 mins in the fridge.

3. To start cooking with the recipe, heat oil and butter in a pan add in the thai ingredients from the lemongrass to the lime leaves, galangal etc and flavour the pan well, add in the thai curry paste.

4. Add in the marinated prawns and 3/4th boiled drumsticks and saute them for a couple of minutes. Add little water, and coconut milk and bring a light boil, simmer and cook for 10-12 mins.

5. Finally add in some fresh basil leaves/ coriander leaves etc and serve the curried prawns and drumsticks with jasmine rice/ steamed rice etc.

Recipe- 5] MORIGNA KA MASALEDAAR PULAO

Ingredients:

Drumsticks-5-6 no, cleaned, cut into 4 to 5 pieces each, washed.

Oil-2 tsp

Ghee-1 tsp

Bay leaf- 2 no

Peppercorns- 4-5 no

Cinnamon stick- 2 pieces

Sliced onions- 1 cup

Tomatoes- 1 cup chopped

Ginger- 1 tsp chopped

Garlic- 1 tsp chopped

Slit green chilies- 2-3 no

Salt to taste

Basmati rice- 2 cups

Baby potatoes- 6- 8 no cut 1 x 2

Carrots-1 cup, cut into cubes

Coriander powder-1 tsp

Cumin powder-1/2 tsp

Turmeric powder-1/2 tsp

Red chili powder-1/2 tsp

Garam masala powder-1/2 tsp

Water- as needed to cook the pulao

Dried Kasuri methi- 1 tsp

Fried cashews and raisins- 2-3 tbsp.

Fried brown onions- ½ cup

Rose water-2-3 tsp

Method:

1. Prepare all the ingredients for the sheng ka pulao.

2. To start with cut and chop all the vegetables, soak the rice, and prepare all the other elements of the recipe.

3. To start cooking, heat oil and ghee in a pan add in the whole spices to start with and add in the sliced onions, ginger, garlic, chilies, etc and saute for a few minutes.

4. Add in tomatoes, salt, and all the powdered spices add in little water to prevent burning. Now add in the drained rice, the cut drumsticks and baby potatoes, carrots etc and bhunao well, add kasuri methi and coriander as well.

5. Now add double quantity of water as compared to the rice and bring to a boil, simmer and cover, cook the rice until well done. And add in the fried onions, nuts, rose water towards the end just before serving, enjoy the pulao with some raita, papad.

Recipe-6] SINDHI STYLE MORINGA ALOO

Ingredients:

Drumsticks – 6-8 no, cleaned, cut and washed.

Potatoes- 2-3 medium sized, cut 1 x 4

Oil-2 tsp

Ghee-1 tsp

Cumin seeds-1/2 tsp

Ginger-1 tsp chopped

Onions-1 cup chopped

Tomato puree-1 and a half cup, freshly made

Slit green chilies- 2-3 no

Salt to taste

Turmeric powder-1/2 tsp

Red chili powder-1 tsp

Coriander powder-1 and a half tsp

Cumin powder-1/2 tsp

Water- 1 and a half cup

Fresh coriander leaves- 2 -3 tbsp. chopped

Method:

1. Prepare all the ingredients for the recipe as listed.

2. Heat oil and ghee in a pan add in the cumin seeds, chilies, and ginger and saute for a few seconds, add in the onions and saute them well until pink, add a little water as needed gradually.

3. Now add in tomatoes, salt, and all the powdered spices, add in the cut drumstick pieces and potatoes and bhunao them well in the masala.

4. One of the options is to cover and cook in a pan on low flame for 20-25 mins with enough water in the pan to allow cooking. the second option is to use a pressure cooker and allow 3-4 whistles, cook on a low flame for 6- 8 mins.

5. Finally add in fresh coriander leaves and garnish the subzi, serve it hot with phulkas, rotis etc and some fried papad, and pickle to go alongside.

Ingredient Ideology | Passion for Pea to Good Health By: Dr. Kaviraj Khialani: Celebrity Master Chef


Passion for Pea to Good Health

It is commonly known as Kabuli Chana in Hindi and garbanzo in Spanish is a well-known high protein belonging to the legume family. They are one of the earliest cultivated legumes and originally found in the middle-east chickpeas have since become popular across the globe.

It is one of the most popular ingredients and is included as a part of our regular diets in the Indian sub-continent. Chhole as we fondly call commonly is made in a number of ways in various parts of India, while it is more popular in the north some of my favorites include the aloo tikki chhole chaat, the street side popular and dhaba style chhole kulche especially in Amritsar is out of the world. Besides we also use chickpeas in a number of ways too from dips to salads and even baked dishes and in stews too.

Health Benefits of Chickpeas:

  • They are a good source of fiber in our diets.

  • Chickpeas boost the immunity in our body.

  • They are rich in calcium and iron content.

  • Chickpeas are heart healthy food.

  • Helps in regulating hormonal changes.

  • Provides a healthy glowing skin.

  • Is good to have in order to keep blood pressure in control.

  • Chickpeas increase satiety value in our body

  • They are also considered good for a weight loss diet.

  • Chickpeas are an excellent source of vegetarian proteins.

  • They are widely used in vegan diets and are energizing as well.

  • Chickpeas are very rich in minerals as well and are nourishing for our system.

Culinary Uses of Chickpeas:

  • Also known as Kabuli chana it is significant in our Indian cuisine and very popular in our homes when it comes to chhole Chawal or Chhole Kulche or Bhature are an all-time favorite.

  • Chana is also very popular to make cutlets, tikkis for snacks and koftas as well in rich creamy gravies.

  • Kabuli chane wala pulao, chhole aur makhane ki biryani, chickpea pilaf rice, stir fried rice with chickpeas and greens are also some ways of using it.

  • Chickpeas are also used to make dips like the most famous one being hummus from middle-eastern cuisine it is now also modified in several colors and flavors as well but the best one classic taste still remains.

  • They are also good to add into salads as they make you feel full and add a good filler value as well into the bowl.

  • Using it in the famous Indian Chaats has ever since been a weakness of many of us, the StreetSide stalls, food counters are so very mesmerizing with varieties of chickpeas being used, must try some nice mashed chick pea dahi bhallas for a change from the regulars.

  • The Moroccan and Turkish cuisines also boast of chickpeas in their world-famous delicacies called tajine with couscous in which chickpeas are a part of the stew in the tajine with meat/chicken and vegetables.

  • Chickpeas mashed up spiced and added as stuffing into a paratha also creates variety in parathas and is a feel-good experience too.

  • In some of the cuisines, we also use them in stir-fried forms as well a little olive oil, garlic, mint and some light seasonings toss the boiled chickpeas in it and add a splash of lime juice and a few crushed roasted peanuts have it like a in between meal snack.

  • Kabuli chane with palak gravy, methi Lasooni chhole, and the famous Bengali puries called loochies also go well with some nice chana masala.

  • It is also grounded and its flour form also is useful in a number of recipes from thickening agents to adding binding and also taste and flavor in dough concepts where gluten can’t find its way.

Here are a few recipes with this charismatic ingredient:

Recipe-1] NUTTY CHICKPEA DIP

Ingredients:

Boiled chickpeas- 1 cup

Garlic- 1 tsp chop

Olive oil- 2 tbsp.

Peanut butter-1 tbsp.

Salt and crushed black pepper to taste

Lime juice- 1 tbsp.

Chilled water- 2 -3 tbsp.

Tahini paste- 2 tbsp.

Mint leaves- 8-10 no.

Paprika powder- ¼ tsp

Chaat masala powder- ½ tsp

To serve with: crackers/ sticks of vegetables/ grilled skewers of chicken/ cottage cheese.

Method:

1. Prepare all the ingredients for the dip.

2. In a food processor combine together all the ingredients and adding olive oil and chilled water blend to a smooth paste.

3. Remove into a serving bowl, drizzle little olive oil, sprinkle a little paprika powder, chaat masala powder and few whole boiled chickpeas and some greens for garnish. Serve chilled with varieties as per choice.


Recipe-2] FUSION CHICKPEA CHAAT

Ingredients:

Boiled chickpeas- 1 cup

Boiled groundnuts- ¼ cup

Blanched moong sprouts-1/2 cup

For the chaat:

Onions + tomatoes+ green chilies+ mint + coriander as desired.

Chaat masala- to taste

Salt to taste

Roasted crushed jeera powder-1/4 tsp

Lime juice- 1 tbsp.

Imli chutney- 2 tbsp.

Green mint and coriander chutney- 1 tbsp.

Mayonnaise- ¼ cup + chili sauce- 1 tsp + tomato ketchup -1 tsp- mix well.

Fried/roasted peanuts- 2 tbsp. for garnish.

Method:

1. Prepare all the ingredients for the fusion chana chaat.

2. In a mixing bowl combine all the ingredients and toss the chana chaat.

3. Arrange on a serving plate and top with a drizzling of the mayo mixture and serve chilled.

4. As an additional variety add slices of chicken tikka, seekh kababs, boiled eggs, sliced chicken sausages etc.

Recipe-3] ASIAN CHICKPEA STEW

Ingredients:

Boiled chickpeas- 1 cup

Boiled rajma-1/4 cup

Oil- 1 tbsp.

Butter-1 tsp

Bayleaf-2 no

Peppercorns-4-5

Garlic- 1 tsp chop

Onion- 1 med size chop

Tomato puree-1 cup

Salt and pepper to taste

Mixed herbs- ½ tsp

Chili flakes-1/2 tsp

Potato cubes- ½ cup

Carrots-1/4 cup cubes

Green peas/ French beans/capsicums/corn as desired.

Peanut butter- 1 tbsp. mixed with ¼ cup warm water + 1 tsp soy sauce.

Water/veg stock- 2-3 cups

Raisins/cashews/almonds- 2 tbsp. 

Coriander and mint leave- 1 tbsp. chop for garnish.

For non-veg- chicken cubes/ mutton pieces/ prawns.

Method:

1. Prepare all the ingredients for the stew.

2. Heat oil and butter and add in the Bayleaf, peppercorns, garlic and onion and saute for 15-30 seconds.

3. Add in the tomato and all seasonings and herbs, add a little all spice or garam masala powder if desired.

4. Add in the vegetables of our choice and chickpeas and rajma and saute all well add water or stock, allow to simmer for 10-15 mins, finally add in the peanut butter mixture and stir well, cook for 5 mins.

5. Serve hot garnished with greens and serve along with brown rice or assorted breads.


Recipe-4] MARINATED CHICKPEA AND QUINOA SALAD

Ingredients:

Boiled chickpeas- 1 cup

Cooked quinoa-1/2 cup

For the marination:

Olive oil-2 tbsp.

Mustard paste-1/2 tsp

Chili sauce-1 tsp

Salt and crushed black pepper to taste

Herbs like fresh basil/oregano/thyme/parsley- 1 tsp

Chaat masala-1/2 tsp

Roasted crushed cumin powder-1/4 tsp

Lime juice- 2 tbsp.

White vinegar-1 tsp

Sugar-1/2 tsp

To Add to the Salad: sliced chicken sausages/ boiled cubes of eggs/ saute prawns/ cucumber dices/ cherry tomatoes/ cubes of bell peppers/ saute sliced mushrooms/ boiled American corn/ blanched broccoli/Babycorn etc. [ any choice to be used]

For the base of the salad:

Iceberg lettuce/ assorted greens for the base of the salad.

For the garnish of the salad:

Feta cheese/ black /green olives/ fresh micro greens/ parsley/ cherry tomatoes/ sunflower seeds/ flaxseeds.

Method:

1. Prepare the ingredients for the salad as listed.

2. Marinate the chickpeas and keep them aside for 15-20 mins.

3. Toss the salad with the other choice of ingredients as per the list above and adjust the seasonings.

4. Create a base of the leaves on a serving plate or bowl, place the body and garnish appropriately and serve the salad chilled.

INGREDIENT IDEOLOGY | POWER-PACKED SALADS INTO THE NEW YEAR BY: DR. KAVIRAJ KHIALANI- CELEBRITY MASTER CHEF

POWER-PACKED SALADS INTO THE NEW YEAR

Indulge in the crunch & freshness of salads this season & stay rejuvenated!

A Salad is a dish consisting of mixed, mostly natural ingredients with at least one raw ingredient. They are often dressed, and typically served at room temperature or chilled, though some can be served warm. Garden salads use a base of leafy greens such as lettuce, arugula/rocket, kale or spinach; they are common enough that the word salad alone often refers specifically to garden salads. Other types include bean salad, tuna salad, bread salad (e.g. fattoush, Panzanella), vegetable salads without leafy greens (e.g. Greek salad, potato salad, coleslaw), sōmen salad (a noodle-based salad), fruit salad, and desserts like jello salad.

Salads may be served at any point during a meal:

  • Appetizer salads- light, smaller-portion salads served as the first course of the meal

  • Side salads- to accompany the main course as a side dish; examples include potato salad and coleslaw

  • Main course salads- usually containing a portion of one or more high-protein foods, such as meat, fish, eggs, legumes, or cheese

  • Dessert salads- sweet salads containing fruit, gelatin, sweeteners or whipped cream.

When a sauce is used to flavor a salad, it is generally called a salad dressing; most salad dressings are based on either a mixture of oil and vinegar or a creamy dairy base.

Bound salads are assembled with thick sauces such as mayonnaise. One portion of a bound salad will hold its shape when placed on a plate with a scoop. Examples of bound salad include tuna salad, chicken salad, egg salad, coleslaw, and potato salad. Some bound salads are used as sandwich fillings. Some pasta salads, e.g. macaroni salad, are bound salads. They are popular at picnics and barbecues.

Dessert salads rarely include leafy greens and are often sweet. Common variants are made with gelatin or whipped cream; e.g. jello salad, pistachio salad, and ambrosia. Other forms of dessert salads include regional dishes such as Midwestern America's ambrosia-like glorified rice and cookie salad, which contains crumbled cookies as an ingredient. 

Here are a few simple, easy to make & Nutritious Salad Recipes to start up the new year with positivity and hope in a bowl tossed with health and nutrition:

Recipe-1] TIC TAC TOE SALAD

Ingredients:

For the base of the salad:

Assorted lettuce leaves- 1 cup- iceberg, romaine, cos lettuce.

For the body of the salad:

Boiled sweet corn- 1 cup

Sliced green cucumber- ½ cup

Sliced red onions- ¼ cup

Red radish- 2-3 no sliced

Green capsicum/ red capsicum- ¼ no cubed

Tomatoes-3-4 cherry variety sliced

For the dressing of the salad:

Olive oil- 2 tbsp.

Lime juice- 2 tbsp.

Mustard paste-1 tsp

Rock salt/sea salt- 1/4 tsp

Crushed black pepper- ½ tsp

Roasted crushed cumin-1 /2 tsp

Honey-1 tbsp.

Mint leaves-10-12 no

For the garnish of the salad:

Pomegranate seeds/ flax seeds/ sunflower seeds- 1 tbsp.

Micro greens/ mint/ coriander/parsley- 1 tbsp.

Method:

1. Prepare all the ingredients for the salad.

2. In a mixing bowl combine together the ingredients for the dressing.

3. Add in the body of the salad just before serving.

4. Arrange the lettuce leaves at the base of your serving bowl/ plate.

5. Place the tossed salad on top and garnish it appropriately.

6. Serve immediately.


Recipe-2] BOWL OF FASCINATION

Ingredients:

For the base of the salad:

Assorted lettuce leaves- 1 cup- iceberg, romaine, Lollorosso lettuce

For the body of the salad:

Sweet potato- 400 gms, peeled and cubed.

Boiled chickpeas- ½ cup

Shallots/madras onions- ½ cup cut 1 x 2

To saute the sweet potato for 8-10 mins in the following:

Oil- 1 tbsp. + garlic- 1 tsp chop + ginger – 1 tsp chop + salt and pepper to taste + water- ½ cup + garam masala powder- ¼ tsp + chopped coriander- 1 tbsp.

For the dressing of the salad:

Lime juice- 2 tbsp.

Tahini paste- 2 tbsp.

Hung curd-1/2 cup.

Peanut butter- 2 tbsp. blended in 1/4 cup warm water.

Crushed black pepper- ½ tsp

Mint leaves- 2 tbsp.

Chat masala-1/2 tsp

For the garnish of the salad:

Roasted crushed peanuts/roasted almonds/ melon seeds- as desired.

Fresh herbs- basil/ oregano/ thyme- as available can be added.

Method:

1. Prepare all the ingredients for the salad.

2. In a mixing bowl combine together the lime, peanut butter mixture, pepper, salt, and mint leaves, and mix well.

3. Add in the body of the salad- cook the sweet potato separately and add it here along with the shallots and chickpeas toss well.

4. Arrange the base of the salad in a serving bowl, and arrange the salad over it.

5. In another mixing bowl combine the hung curd + tahini + chat masala mix well and add that on top of the salad like a drizzle topping and garnish, and serve.


Recipe-3] TRUE TO LIFE TOSS 

Ingredients:

For the base of the salad:

White and purple cabbage- 1 cup shredded

For the body of the salad:

Sprouted moong – 2 cups

Cucumber-1/2 cup cubed

Tomatoes-1/4 cup cubed

Green chilies- 1 tsp chop

Onions-2 tbsp. chop

Pomegranate seeds- ¼ cup

Grapes- black/green-1/2 cup

Chickoo-2 no peel and cubed.

For the dressing:

Olive oil- 2 tsp

Lime juice- 2 tbsp.

Honey-1 tsp

Jeera powder-1/2 tsp

Chat masala-1/2 tsp

Ginger juice- 1 tsp

Mango pickle masala- 1 tsp from your mango pickle jar.

Mint leaves-1 tbsp. + 1 tbsp. coriander/basil leaves

For the garnish of the salad:

Chia seeds/ sunflower seeds/ sesame seeds- 1 tsp

Method:

1. Prepare the ingredients for the salad.

2. In a mixing bowl combine together the ingredients for the dressing.

3. Just before serving add in the body of the salad and toss well.

4. Arrange the base on a serving plate/bowl top it up with the tossed salad.

5. Garnish appropriately as desired and serve chilled.


Recipe-4] LA VOILA SALATA

Ingredients:

For the base of the salad:

Assorted lettuce leaves- 1 cup – Lollorosso, chicory, cos lettuce

For the body of the salad:

Fusilli pasta- 2 cups or any pasta of your choice- boiled.

Tofu/ Paneer-1/2 cup cubes grilled/pan fried.

Cherry tomatoes- 5-6 no cut 1x 2

Red/green/yellow peppers-1/2 cup cubed

Broccoli florets- 1 cup blanched.

For the dressing of the salad:

Olive oil- 2 tsp

Garlic- 1 tsp chop/burnt garlic flakes- 1 tsp.

Tomato ketchup- 2 tsp

Lime juice- 2 tsp

Chili flakes- ½ tsp

Mixed herbs-1/2 tsp

Salt and crushed black pepper-to taste

Parsley- 1 tbsp.

Chat masala-1/2 tsp

For the garnish of the salad:

Black and green olives- 3-4 no sliced.

Fresh basil/rosemary- 2 tbsp.

Shavings of parmesan/ cheese- 2 tbsp.

Method:

1. Prepare all the ingredients for the salad.

2. In a mixing bowl combine together the ingredients for the body and the dressing and toss well.

3. Arrange the base of the salad on a salad plate or bowl, place the tossed salad on the base, garnish it well and serve it immediately along with a portion of crispy garlic bread.


Recipe-5] FRUITY PARADISE

Ingredients:

For the base of the salad:

Banana leaf- 1 no cut it as per the size of the serving plate/platter.

For the body of the salad: use your choice of fruits.

Watermelon- 1 cup cubes

Musk melon-1/2 cup cubes

Green apple- ½ no cubed

Chickoo- ½ cup cubed

Papaya-1 cup cubed.

For the dressing of the salad:

Orange segments- ½ cup from fresh orange

Ginger juice- 1 tbsp.

Mint leaves- 10-12 no 

Honey-1 tbsp.

Chat masala-1/2 tsp

Mustard paste- ½ tsp

Lime juice- 2 tbsp.

Sunflower seeds/ melon seeds- 2 tsp

For the garnish of the salad:

Pomegranate seeds- ½ cup/ olives/ grapes/ fresh herbs/ micro greens 

Method:

1.Prepare all the ingredients for the salad.

2. Use choice of fruits as per seasonal availability.

3. Combine the dressing ingredients in a mixing bowl.

4. Add in the fruits to the dressing bowl just before serving, toss well.

5. Arrange the banana leaf on a serving plate/platter top it with the tossed salad, garnish appropriately and serve use assorted nuts like walnuts/ apricots/pine nuts etc on this salad.