Ingredient Ideology | Turning Out Turnip Treats By: Dr. Kaviraj Khialani- Celebrity Master Chef.

Turning Out Turnip Treats

The turnip or white turnip is a root vegetable commonly grown in temperate climates worldwide for its white, fleshy taproot. The word turnip is derived from a Latin word called Napus, the word used for the plant. The turnip or white turnip is a root vegetable. It is commonly grown in temperate climates worldwide for its white, fleshy taproot. There are over 30 varieties of turnips that differ in size, color, flavor, and usage. Purple-top turnips are the most common type. Smaller kinds of turnip are grown for human food. Larger ones are grown to feed livestock.


The most common type of turnip is mostly white-skinned apart from the upper part which protrudes above the ground and is purple or red or greenish where the sun has hit. The turnip is a hardy biennial plant in the mustard family. which they are closely related) in flavor. The turnip is a cool-season crop but does not require a long growing season. In mild climates, turnips are sown either in early spring or in late summer and develop rapidly enough to produce a crop before extremes of summer or late fall weather occur.


Young turnip roots are eaten raw in salads or pickled, they are also cooked and served whole or mashed and are used in stews Turnip greens are a common side dish in southeastern U.S. cooking, primarily during late fall and winter. Turnip roots are an excellent source of dietary fiber, vitamin C and vitamin B6, folate, calcium, potassium, and copper. The greens are an excellent source of vitamins A and C, as well as a good source of calcium, iron, and riboflavin. Some evidence shows the turnip was domesticated before the 15th century BC; it was grown in India at this time for its oil-bearing seeds.

The turnip was a well-established crop in Hellenistic and Roman times, which leads to the assumption that it was brought into cultivation earlier. In Roman times, the turnip was the weapon of choice to hurl at unpopular public figures.


What are the 3 health benefits of turnips? Turnips are loaded with fiber and vitamins K, A, C, E, B1, B3, B5, B6, B2, and folate (one of the B vitamins), as well as minerals like manganese, potassium, magnesium, iron, calcium, and copper. They are also a good source of phosphorus, omega-3 fatty acids, and protein.


What are turnips grown for? -Fast-maturing and easy to grow, turnips always emerge as stars in the autumn garden. Sown after summer crops of onions, squash, beans or sweet corn, turnip seeds germinate within days, and tender greens are ready to pick within a month. Juicy roots come later, and you can grow turnips for greens, roots, or both.


Storing Turnips- Turnips store very well, which is one of the reasons you see them long into the winter season. Once its green top is removed, the root will keep for a few months in a dry, sealed container, much like the potato and other root vegetables.


Cooking with Turnips- Pro tips: If you’re put off by the sometimes bitter flavor of turnips, make sure you generously peel them before cooking. When you slice a turnip in half, you’ll notice a yellow line about a quarter of an inch into the root. Peeling beyond that line is a way to prevent a bitter batch of turnips. Some also claim that boiling turnips with a potato will decrease bitterness.


Preserving Turnips- Turnips’ peppery flavor makes them perfect for pickling. You can also freeze your winter haul of by peeling, slicing and blanching the turnips. After a plunge in an ice bath to stop the cooking process, you can vacuum seal or transfer to in sealable containers and store in your freezer for months.


Turnips Nutrition- Turnips are rich in Vitamin C and contain good amounts of Vitamins B-6, A, and K in addition to trace minerals. But it’s the greens that pack a nutritional punch with a hefty dose of Vitamins A, C, K, calcium, folic acid, and manganese. Turnips are also low in calories as they are mostly fiber and water. A very good source of dietary fiber, vitamin C, and manganese. The turnip greens are a superfood and packed with nutrients. They are a good source of protein, thiamine, riboflavin, pantothenic acid, iron, and phosphorus.


Here are a few Health Benefits of Turnips:


1. Turnips are considered good for boosting immunity levels in our body, and is also good for heart health.


2. Turnips are good for the health of our lungs and also help treat 

Common ailments.


3. Turnips improve metabolism and also help indigestion.


4. Turnips are common anti-oxidants and anti-cancer.


5. Turnips have a high quality of Vitamin – C and lowers high blood pressure.


6. Turnips are rich in beta carotene and dietary fiber which is beneficial for our health and diets.


7. Turnips are rich in potassium, calcium, manganese, etc which add value to our foods.


8. Turnips are helpful in curing asthma and also help in weight loss.


9. Turnips are rich in minerals for our body development and prevent body odor.


10. Turnips are good for detoxifying our blood, and also good for cardiovascular health.


Here are a few easy-to-make recipes using Turnips!


Recipe-1] TURNIP TOSSED SALAD

Ingredients:

For the base of the salad:

Iceberg lettuce/ Lollorosso lettuce/ mixed greens- 1 cup

For the body of the salad:

Turnips- 250 gms, peeled and cut/sliced/shredded/ cut into strips

Barley- 1 cup boiled/ cooked.

Carrots- ½ cup peeled, cut

Cucumber-1 small, peeled, and sliced

Assorted nuts-2-3 tbsp.

Dates- 2-3 tbsp. sliced

Celery- ½ cup sliced

For the dressing for the salad:

Olive oil- 2-3 tbsp.

Honey- 2-3 tbsp.

Lime juice- 2-3 tbsp.

Salt and pepper to taste

Flax seeds/ sunflower seeds- 2-3 tsp

Toasted white sesame seeds- 2-3 tsp

Chickoo/orange segments-1/2 cup

For the garnish of the salad:

Micro-greens/ cherry tomatoes/ assorted nuts and seeds

Parsley/coriander/mint leaves


Method:

1. Prepare all the ingredients for the salad as per the recipe.

2. Clean, wash, and place the salad greens in chilled water.

3. Prepare the ingredients for the dressing of the salad and mix it up well.

4. Arrange the lettuce leaves on a salad plate, in a mixing bowl combine together the body of the salad with turnips, cooked barley along with other ingredients and add the dressing, toss the salad.

5. Place the tossed salad on the bed of crispy lettuce and garnish as desired, serve the salad instantly, the same salad can also be done in non-veg options by adding boiled shredded chicken/ roasted sliced meat, etc, we can also add grilled tofu as well.


Recipe-2] MINCED DUMPLINGS IN TURNIP SAUCE

Ingredients:

For the minced dumplings:

Ginger-garlic paste-1 tsp

Chicken mince- 1 cup

Salt and pepper to taste

Cornflour-1-2 tsp

Maida-1-2 tsp

Garam masala powder-1/2 tsp

Egg-1/2 no

Water/chicken stock to poach the chicken dumplings

For the turnip sauce:

Oil- 2 tsp

Butter-1 tsp

Garlic- 1 tsp chopped

Onion-1 small chopped

Turnips- 200 gms, peeled and cut

Salt and pepper to taste

Stock/ water- 3-4 cups

Maida- 1-2 tsp

Bay leaf- 1-2 no

Peppercorns- 3-4 no

White sauce-2-3 cups

Cream- 2-3 tsp

Cream cheese-2-3 tsp

Parsley- 1 tsp chopped

Method:

1. Prepare the mixture for the dumplings combine them all into the mixer jar and blend it all together to make it into a nice smooth textured mix.

2. Using wet hands or a spoon drop the mixture into simmering water/chicken stock cook the dumplings for 6- 8 mins and remove and carefully keep them aside.

3. To prepare the turnip sauce, heat oil and butter in a pan add in the Bayleaf, peppercorns, onion, garlic, and saute for 1-2 mins, add in the turnips, maida, and mix it all up for 1 min.

4. Now add in the water/stock into the pan and allow to cook for 12-16 mins and turn off, cool and grind it to a puree, strain and bring it back to a boil, add a little white sauce, cream and cheese and mix it well.

5. Finally add the cooked dumplings into the sauce check for seasoning and serve it hot, garnish with parsley and enjoy the delicacy.


Recipe-3] MASALEDAAR SHALGAM KI SUBZI

Ingredients:

Oil- 2 tsp

Ghee- 2 tsp

Cinnamon- 1-inch piece

Peppercorns- 4-5 no

Hing-1/2 tsp

Onion- 1 medium sized, chopped

Green chilies- 2-3 slit

Ginger- 2 tsp chopped

Tomatoes- 1 cup puree/chop

Turnips- 200 gms, peeled and cut

Sweet potatoes- 150 gms, peeled and cut

Salt to taste

Turmeric powder-1/4 tsp

Coriander powder- 2 tsp

Red chili powder- 1 tsp

Cumin powder-1/4 tsp

Garam masala powder-1/4 tsp

Water-1/2 cup

Aamchur powder-1/4 tsp

Coriander leaves- 2 tbsp.


Method:

1. Prepare all the ingredients for the recipe as per the list.

2. Heat oil and ghee in a pan add in the hing, onions, ginger, green chilies and saute for a few seconds.

3. Add in the tomatoes and salt, all powdered spices, little water and allow to cook the masala for 1-2 mins.

4. Now add in the turnips, potatoes and bhunofy for 1 minute, add a little water and mix, cover, simmer and cook the subzi for 12-20 mins, stir in between and check for seasonings, add in aamchur and fresh coriander leaves and serve hot with phulkas, rotis and parathas etc.


Recipe- 4] MARINATED TURNIP RELISH

Ingredients:

Oil-2 tsp

Mustard seeds- 1 tsp

Cumin seeds- 1 tsp

Hing-1/2 tsp

Curry leaves- 10-12 no

Slit green chilies- 2-4 slit

Carrots- 1 cup shredded

Turnips- 150 gms, peeled and shredded

Celery- ½ cup shredded

Black sesame seeds- ½ tsp

For the dressing of the relish:

Honey-2-3 tsp

Lime juice- 2-3 tsp

Jaggery- 2-3 tsp

Red chili flakes-1/2 tsp

White vinegar- 2-3 tsp

Salt and pepper to taste

Dates- 2-3 tsp chopped

Flax seeds / pumpkin seeds- 1 tsp

Sugar- 1 tsp

For the garnish of the relish:

Roasted crushed peanuts/ micro-greens/ parsley/ mint/ coriander.


Method:

1. Prepare all the ingredients for the relish recipe as listed.

2. In a pan add a little oil add in the seeds, chilies, curry leaves, allow to splutter for a few seconds.

3. Add in the celery, turnips and carrots and saute them all for a few seconds and turn off the flame.

4. Allow the mixture to cool and come to room temperature. In a separate bowl combine together the ingredients for the dressing in a bowl and mix well, add it to the turnip mixture.

5. Mix well and place the turnip and dressing mixture into a glass jar and keep it refrigerated for a day.

6. Next day we can serve the relish along with some starters/snacks etc garnish the relish with greens/ nuts/ seeds as desired.


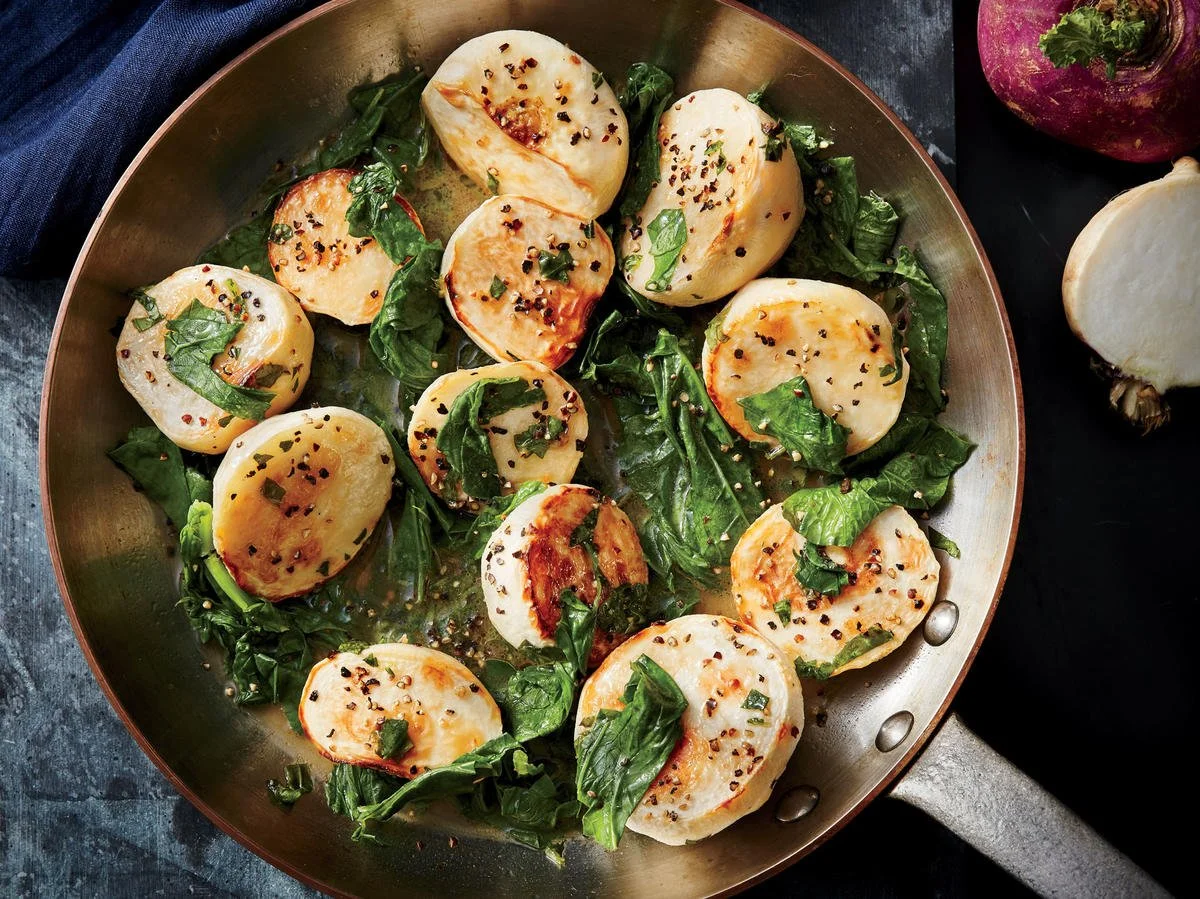
Recipe-5] HERBED TURNIPS AND GREENS

Ingredients:

Oil- 2 tsp

Butter-1 tsp

Cumin seeds- 1 tsp

Black sesame seeds- 1 tsp

Ginger- 1-2 tsp shredded

Slit green/red chilies- 2-3 no

Spring onions-1/2 cup sliced with greens

Turnips- 150 gms, peeled and cut 1 x 4, blanched.

Spinach leaves- 2-3 cups

Salt and pepper to taste

Mustard paste-1 tsp

White vinegar-1-2 tsp

Sugar-1-2 tsp

For the accompanying sauce:

Peanut butter- ¼ cup

Water-1/4 cup

Tomato ketchup-2 tsp

Tabasco sauce- 1 tsp

Crushed black pepper- ¼ tsp

Soy sauce- 1-2 tsp


Method:

1. Prepare all the ingredients for the stir fry recipe as listed above.

2. Heat oil and butter in a pan, add in the cumin etc for tempering the pan, allow to splutter for a few seconds.

3. Add in the ginger, chilies, onions, and saute for a few seconds.

Add in the blanched turnips, salt, pepper to taste and add a little water or stock and allow to cook for 4-5 mins.

4. Add in the blanched spinach leaves, spring onion greens and continue cooking for 1-2 mins more.

5.Turn off the flame now and in a separate pan combine together the ingredients for the sauce with peanut butter and other elements which need to be cooked together for 2 mins.

6. Now serve the saute turnips and spinach along with the nutty peppery sauce, this goes well with toasted bread/ garlic bread etc.


Recipe- 6] LENTIL TURNIP SOUP 

Ingredients:

oil- 2 tsp

butter- 1 tsp

bay leaf-1-2 no

peppercorns- 4-5 no

onion- 1 small sliced

garlic- 1 tsp chopped

turnips- 150 gms, peeled and cut

potato- 1 medium sized, peeled and cut

assorted lentils- ½ cup, split yellow lentils

salt and pepper to taste

mixed herbs- ½ tsp

chili flakes-1/2 tsp

maida- 1 tsp

tomato-1 small chopped

water/ stock- 3-4 cups

cream- ¼ cup

assorted nuts- 2-3 tbsp. cashews/ walnuts

parsley-2-3 tsp chopped

lime juice a dash to add and serve hot.


Method:

1. Prepare all the ingredients for the turnip and lentil soup and keep it all ready.

2. Heat oil and butter in a pan add in the bay leaf, peppercorns, onion, garlic and saute for a few seconds.

3. Add in the turnips, potatoes and other veggies as well like some carrots, celery, peas etc to add more flavor into the soup.

4. we can add in the salt, pepper, herbs, maida, chili flakes, tomato, soaked yellow lentil and mix well.

5. Now we can add in the water/ stock and bring to a boil and simmer for 12-18 mins and allow to cool, puree the soup and bring it back to a boil, add in little cream, stock/water and adjust the texture of the soup.

6. Lastly, add in the chopped nuts, lime juice and parsley and serve the soup hot, we can also add boiled chicken cubes/ chopped boiled eggs, saute prawns etc to make it in a non-veg variation.

RECIPES | Republic Day Culinary Delicacies By Dr. Kaviraj Khialani- Celebrity Master Chef

Republic Day Culinary Delicacies

Republic Day has been celebrated every year in India on January 26, since 1950 to honour the date on which the Constitution of India came into effect. India was a colony of the British for over 200 years and became independent from the rule of the British Raj following the Indian independence movement. While India became independent on August 14, 1947, it still didn’t have a permanent constitution, and Indian laws were based on a modified version of the British established, Government of India Act 1935. 


However, two weeks later on 29 August 1947, a Drafting Committee was appointed for the drafting of a permanent Indian Constitution, with Dr B R Ambedkar as chairman. After a lot of hard work, the Constitution was finally drafted, and January 26 was chosen as the day to declare India as the Sovereign Republic. 

The significance of January 26 is that on that day in 1929, the Indian National Congress made the well-known Declaration of Indian Independence (Purna Swaraj) as opposed to British rule. And though the Constitution came into force in 1950 with a democratic government system, it was adopted by the Indian Constituent Assembly on 26 November 1949. 


This completed the country’s transition into becoming a sovereign republic. The draft of the constitution was submitted to the Indian Constituent Assembly on 4 November 1947. Over the course of 166 days, that were spread over two years, the 308 members of the Assembly met in sessions that were open to the public and made some modifications. Finally, on January 24, 1950, the Assembly members signed two handwritten copies of the Constitution, one in English and one in Hindi. And two days’ later history was made. On that day began Dr. Rajendra Prasad’s first term of office as President of the Indian Union. The Constituent Assembly became the Parliament of India under the transitional provisions of the new Constitution. January 26 is celebrated to commemorate the Indian Constitution replacing the Government of India Act (1935) as the governing document of India. And now it is celebrated across India with a lot of fervour. In Delhi, at Raj Path magnificent parades by regiments of the Indian Army, Navy, Air Force, police and paramilitary forces march and there is also a display India’s defence prowess is on display with latest missiles, aircraft, and weapon systems. Beautiful tableaus, representing the beauty of all the states of India are also showcased during the parade. There are also sky shows by the Air Force, though we are still fighting the pandemic bravely all across the country, India will be celebrating its Republic Day this year as well.


The Food and Hospitality Industry has always stepped up on a very positive note when it comes to making moments and occasions like these special for our valued guests and food lovers! A lot of hotels and restaurants plan up special menus with the tri-coloured theme attached to suit the republic day! There is a décor and ambience created in the outlets to add that look and feel experience to make the auspicious day all the more patriotic and the feeling of pride which every indian carries on this day is just incomparable. Republic day theme related welcome drinks, display pieces from fruit and vegetable carvings, spice and salt displays, margarine carvings etc have also been spotted as a part of presenting the menu for the day in a very appealing and impressive manner.


Buffets, special a la carte offers, table promotions, tent card delights, live counters, chefs special offerings, mocktail bar specials are some of the attractions which see a houseful of food lovers visiting the food outlets to celebrate the day with family and friends. In India, the term "tricolour" refers to the Indian national flag. The National flag of India is a horizontal tricolour of deep saffron (kesari) at the top, white in the middle and dark green at the bottom in equal proportion. The design of the flag of India that was first presented in 1921 to Late Shri. Mahatma Gandhi, leader of the All-India Congress, was created by Pingali Venkayya. 

The Chakra or the wheel also symbolizes the Power of the State governed by Dharma. It is also called the tiranga or tricolour. The National Flag is a horizontal tricolour of India saffron (kesari) at the top, white in the middle and India green at the bottom in equal proportion.

 The ratio of width of the flag to its length is two to three. In the centre of the white band is a navy-blue wheel which represents the chakra. The top saffron colour, indicates the strength and courage of the country. The white middle band indicates peace and truth with Dharma Chakra. The green shows the fertility, growth and auspiciousness of the land.

Food is also one of the important elements associated with the tricolour and as we represent various meanings and values via colors it not only pleases the senses and whets the appetite but also creates wonderful concoctions and makes our culinary diaspora more rich and varied from indian cooking to international it gives a sense of brotherhood and togetherness creating a melange of flavours, tastes and balance.

Here are a few of my favorite easy to make recipes with a mix-n-match touch of twist on this auspicious occasion of 26th January.


Recipe-1] TIRANGA MASALA PULAO

Ingredients:

Basmati rice- 2 cups boiled, divided into 3 parts.

Makhani gravy- for the orange layer- 1 and a half cup

White onion- cashew- coconut gravy- 1 cup for white layer

Green spinach gravy- 1 cup for the green layer

Star anise-1 no for the center garnish.

To assemble the pulao:

Edible food colors which are safe to use may be used to color the rice lightly or just lightly toss them in the respective gravies as well with a little butter.

Fried onions/ birishta- 1 cup

Fried cashews and raisins-1/2 cup

Rose water-2-3 tbsp.

Kewra essence-2-3 tsp

Pure ghee-2-3 tsp

Coriander and mint leaves-1/2 cup chopped

Saffron and milk solution-1/4 cup

For adding into the makhani gravy:

 Saute some cubes of chicken tikka for non veg- or Paneer cubes/ mushroom quarters/ carrot cubes/ soya chunks etc and cook it in the gravy and keep aside.


For adding into the white gravy:

Fried makhanas, cubes of cooked potatoes, grated cheese or cream cheese can be used, for non-veg options use marinated fish or boneless chicken cubes in malai tikka marination.

For adding into the green gravy:

Boiled green peas, cubes of blanched green zucchini, blanched broccoli florets, blanched snow peas, methi paneer koftas, for non-vegetarian options use prawns or shrimps or pahadi chicken tikka sliced.

Method:

1. This recipe is more of a pre-prepared assembly recipe in which we are trying to combine together three different flavors of indian cuisine in one pulao recipe, we can choose veg or non-veg.

2. Once we have prepared the rice as per the divisions and also tossed the veg/non-veg in respective gravies we need to now assemble and layer the pulao in a flat thick bottomed kadai.

3. Spoon in a little ghee at the base of the kadai and then start placing the respective gravy tossed veggies/non-veggies in three sections in the kadai, sprinkle all the biryani garnishes and flavourings all over and then top with the respective coloured rice.

4. Place a tava below the kadai, cover with a tight fitting lid, apply atta on the side or aluminium foil and place some weight on the top and give dum to the tri-coloured pulao for 20-25 mins, serve hot.


Recipe-2] TRI- COLORED PANEER ON SKEWERS

Ingredients:

Paneer/ tofu – 400 gms, cut into cubes, divide into three parts.

For the orange marination:

Use a tandoori marinade as always and coat the paneer or tofu cubes and keep aside for 20-25 mins, arrange them on a skewer and cook either in a non-stick grill pan or using the oven/tandoor.

For the white marination:

Use a combination of little oil, curd, cream, cashew paste, salt, garam masala powder, ginger-garlic paste and apply on the paneer or tofu and keep aside for 20-25 mins, arrange them on a skewer and cook either in a non-stick grill pan or using the oven/ tandoor.

For the green marination:

Use a combination of little oil, curd and green mint and coriander chutney with a little blanched spinach puree as well, green chili-ginger-garlic paste and touch of spices, apply on the paneer or tofu and keep aside for 20-25 mins, arrange them on a skewer and cook either in a non-stick grill pan or using the oven/ tandoor.

To serve with:

Green mint and coriander chutney/ assorted dips.

Sliced onion & lemon slices/wedges.

Method:

1. The paneer or tofu preparation in this case also uses three different colors as marination and shall be assembled separately, cooked and then served on the same platter.

2. Being a starter category recipe, we can make this pre-preparation a day prior and keep it refrigerated as well, we can also use chicken or fish for non-veg variations for the same recipe.

3. Once we have cooked the paneer/ tofu skewers as per choice of method of cooking it, we need to assemble the platter to serve this colorful starter.

4. Place the cubes of paneer/tofu de-skewer them on the platter, sprinkle a little lime juice and dash of chaat masala over and arrange the chutneys and other accompaniments by the side and serve hot.


Recipe-3] TRI- COLOURED GRILLED SANDWICHES

Ingredients:

Sliced white/ brown/ multi-grain bread- 12-14 slices

For the orange layer:

Butter-1 tsp to spread on the bread slices

Tandoori mayonnaise/schezuan sauce-2-3 tsp to spread

Tomato slices- ½ cup de-seed and use them.

Salt- pepper- chaat masala to flavor.

For the white layer:

Butter-1 tsp to spread on the bread slices

Eggless mayonnaise-2-3 tsp to spread

Sliced cucumbers-1/2 cup or boiled sliced potatoes-1/2 cup

Salt-pepper- chaat masala to flavor.

Grated cheese-1/2 cup to spread.

For the green layer:

Butter-1 tsp to spread

Mint mayonnaise-2-3 tsp to spread

Shredded green capsicums-1/2 cup

Salt-pepper- chaat masala to flavor.

Method:

1.Pre-prep all the ingredients as per the divisions to get the tri color effect in this bulky grilled sandwich concept, good for a brunch or evening snack.

2. Apply butter and then the flavoured spread on the bread slices, assemble the ingredients as listed and sandwich them.

3.Now the tri color layered sandwiches are ready and assembled, heat up a griller or grill pan and place it carefully to get nice grill marks on both sides turning them carefully and smearing a little melted butter as well when we do that.

4. Once we get a nice grilled effect and golden brown color on our sandwiches, remove them, cut them with a sharp knife into triangles/squares etc and assemble them on the serving platters and serve them with ketchup, hung curd- mint and cucumber dip, green pesto chutney etc and wafers/chips/french fries.


Recipe-4] TRIO SWEET TEMPTATIONS

Ingredients:

For the dessert mix:

Milk- 1 litre boiled

Sugar- to taste

Condensed milk may also be used if desired.

Green cardamom powder-1/2 tsp

Rice paste- ½ cup, raw rice and water to grind- fine paste

Rose water-2-3 tsp

Mava- 100 gms grated

For the orange flavor and color:

Use orange essence

Use orange crush

Use orange segments

For the white layer and flavor:

To be used the way it is add blanched sliced almonds

For the green flavor and color:

Use fresh kiwi fruit puree

Use kiwi crush

Use khus syrup 

For garnishing we can use many options:

praline/chikki can be crushed and used.

Glazed cherries

Meetha paan can be chopped and used

Method:

1. Prepare a basic mixture of the phirni concept by using a thick bottomed saucepan, combine together the milk, sugar to taste, elaichi powder, rice paste and keep stirring it carefully and cook the mixture for around 30-45 mins until nice and thick like custard and well cooked.

2. Turn off the flame and check for sweetness adjust and divide the mixture into three portions.

3. Mix in the ingredients as listed above to get the desired color contrasts in the prepared phirni.

4. Use dessert glasses/ cups and layer the tri-coloured phirni and garnish as desired accordingly.

5. We need to chill this dessert for 2-3 hours in the fridge and then relish the flavors from these layers one by one.


Recipe-5] THREE TONED DESI TEMPERED SNACK

Ingredients:

Semolina/rava-1 and a half cup

Curd- 1 cup sour curd to be used ideally

Salt to taste

Sugar -1/2 tsp

Ginger-1 tsp grated

Green chilies-1 tsp chopped

Water-1/2 cup

For the orange layer-1 carrot to be pureed and used

For the green layer-1/4 cup blanched spinach paste/chutney

baking soda- ¼ tsp for each layer for steaming to be added

we can also use ¼ tsp of eno as well in the layers in place of soda.

oil for greasing and tempering for the discs.

For the tempering:

Oil-2 -3 tsp

Hing-1/4 tsp

Curry leaves- 10-12 no

Mustard seeds-1-2 tsp

Green chilies-2-3 slit/shredded

White sesame seeds-1-2 tsp

Lime juice-2-3 tsp

Coriander and mint leaves- ¼ cup chopped

Water- 2-3 tbsp.

Sugar-1-2 tsp

Salt-1 pinch

Combine together and cook for 1-2 mins.

To serve with: assorted chutneys/ dips of your choice to go along with the snack.

Method:

1. Clean the semolina, add it to a bowl add in the sour curd and add little salt and 2 tbsp. water mix well, cover and keep aside for 20 mins.

2. Prepare the blanched carrot puree and blanched spinach paste as well and keep aside.

3. Now post resting we need to divide the semolina curd mixture into three equal parts.

4. Mix in the carrot puree and spinach puree respectively into their parts and keep one part as white itself.

5. Get the steamer ready meantime with water and slice of lime in the water, get the mould/thali ready and greased with little oil or ghee.

6. Add a little water to all the three parts of the semolina mixture to get it to right dropping texture and add in the baking soda and mix well and pour the mixture into the mould.

7. Start with the green layer first, place it in the hot steamer and cover, steam for 5-6 mins, remove and place the white layer and repeat the steaming process and finally the top layer with the orange semolina mixture and steam once again for 5-7 mins, using a toothpick check if it comes out clean, turn off the flame and let the mixture rest in the steamer for 5 mins.

8. Remove the steamed preparation and loosen the edges with a oiled knife and de-mould it and cut into discs using a round cutter and place it on your serving platter.

9. The last step is to prepare the tempering and once it all comes together and cooks for a couple of minutes, pour the hot tempering over the discs and serve it immediately with assorted dips/chutneys of your choice.


Ingredient Ideology | Snacky Treats with Savoury Tarts By: Dr. Kaviraj Khialani- Celebrity Master Chef.

Snacky Treats with Savoury Tarts

A tart is a baked dish consisting of a filling over a pastry base with an open-top not covered with pastry. The pastry is usually shortcrust pastry; the filling may be sweet or savory, though modern tarts are usually fruit-based, sometimes with custard. A tart is also referred to as a baked dish consisting of a filling over a pastry base with an open-top not covered with pastry. The pastry is usually shortcrust pastry; the filling may be sweet or savory, though modern tarts are usually fruit-based, sometimes with custard. Tartlet refers to a miniature tart; an example would be egg tarts. The categories of 'tart', 'flan', 'quiche', and 'pie' overlap, with no sharp distinctions. 

the French word tarte can be translated to mean either pie or tart, as both are mainly the same with the exception of a pie usually covering the filling in pastry, while flans and tarts leave it open. Tarts are thought to have either come from a tradition of layering food or to be a product of Medieval pie-making. Enriched dough (i.e. shortcrust) is thought to have been first commonly used in 1550, approximately 200 years after pies. In this period, they were viewed as high-cuisine, popular with nobility, in contrast to the view of a commoner’s pie. While originally savory, with meat fillings, culinary tastes led to sweet tarts to prevail, filling tarts instead with fruit and custard. Early medieval tarts generally had meat fillings, but later ones were often based on fruit and custard/cream, etc.

there are a number of ways in which we can use tarts/ tartlets in both sweet and savoury ways in our recipes/ cuisines and kitchens. Some of the common characteristics of a good tart include that a Tart is a dessert or savory preparation which has a bottom crust and shallow sides. The crusts are made from pastry dough, which is usually made using flour, sugar, unsalted butter, and ice-cold water. The goal is to get a thick, firm, and crumbly crust. The filling is directly added to the crust, which is later baked to make it settle down. One of the most common tart bases used for a long time now is shortcrust pastry, while a Shortcrust pastry dough is a simple recipe used for pies, tarts, and quiche. It calls for just four ingredients—flour, fat, salt, and water—and the ratio of flour to fat is usually 4-to-1 [ has also been modified and or redesigned by many bakers as well] Shortcrust pastry is easy to make and can be prepared either by hand or with a food processor.

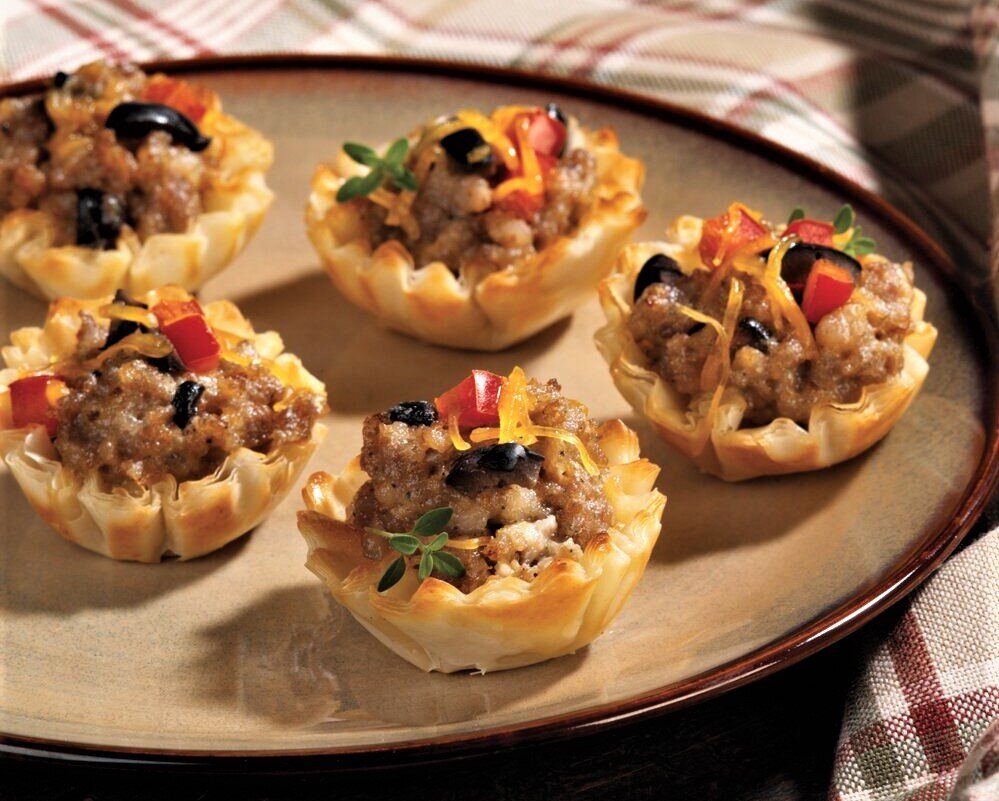
We also come across products made with a base of puff pastry/ flaky pastry tarts/ filo pastry sheets can also be used to prepare small tarts shells/ cup like shapes to fill with savoury delicacies and more. The best option today we all look for is the ready to use tarts which are available in a nearby market place. We prefer to avoid doing lengthy steps and time-consuming recipes sometimes in that case this convenience cooking concept really works well for parties / get together etc.

Here are a few interesting and easy to dress up canape concepts that work well as snacks/ starters/ appetizers and more!


Recipe-1] BEET AND WALNUT TARTS

Ingredients:

Tart shells /short crust/ canape cups- 12- 16 pieces

For the stuffing:

Oil- 1 tsp

Butter-1 tsp

Garlic-1 tsp chopped

Shallots- 5-6 no sliced

Boiled beetroot- 2 medium-sized, peeled, small dices

Boiled sweet corn-1/2 cup

Feta cheese- 2-3 tbsp.

Salt and pepper to taste

Fresh parsley- 2 tsp chopped

Chaat masala-1/2 tsp

For the final dressing:

Lime juice- 2 tsp

Honey- 2 tsp

Chili flakes- ½ tsp

Spring onion greens- 2 tbsp. chopped

Walnuts-2 tbsp. chopped

For non- veg options:

Boiled chopped chicken- ½ cup

Boiled eggs- 1-2 no cut into small pieces

Method:

1. Prepare all the ingredients for the tarts as per the recipe.

2. The tart shells need to be kept ready to use.

3. To prepare the stuffing for the tarts, heat oil and butter in a pan, add in garlic and shallots and saute them for a few seconds.

4. Add in the corn, beetroot, seasonings, herbs and cook it for 2 mins, turn off the flame and allow to cool a little.

5. Now add in the final dressing ingredients along with feta cheese and walnuts into the mixture, keep the mixture at room temperature.

6. Just before serving the tarts the prepared filling can be stuffed or spooned into the tart shells and can be garnished appropriately and arranged on a platter.


Recipe- 2] CHICKEN CHEESE TARTS

Ingredients:

Short crust tart shells/ filo tarts/ canape cups- 12- 16 pieces

For the stuffing:

Oil-1 tsp 

Butter- 1 tsp

Maida- 2 tsp

Milk- ¾ cup

Cheese- 2-3 tbsp. grated

Boiled chopped chicken-1 cup

Salt and pepper to taste

Red/yellow/ green capsicums- 2-3 tbsp. chopped

Mixed herbs- ¼ tsp

Chili flakes- ½ tsp

Tomato ketchup-2 tsp

Capsico sauce-1/2 tsp

Parsley- 2 tsp chopped

Sliced black/ green olives- 2 tsp

Method:

1. Prepare all the basic ingredients needed for the filling as per recipe.

2. Heat oil and butter in a pan add in the maida and cook it for 5- 7 seconds add in hot milk and stir well, add in the chicken pieces, a little fresh cream as well to enrich the filling, add salt, pepper, herbs, chili flakes.

3. Cook the mixture for 2-3 mins, add capsicums/ olives etc as per choice and mix well, turn off the flame and allow to cool a little.

4. Just before serving place the prepared filling into the tart cups or shells, top with a little grated cheese and place under a hot oven/ salamander to lightly melt the cheese, serve warm.


Recipe- 3] ITALIANO TARTS

Ingredients:

Short crust tarts/ canape cups/ filo tarts – 12-18 pieces

For the stuffing:

Oil-1 tsp

Butter-1 tsp

Garlic-1 tsp chopped

Onion-1 small chopped

Ham/ salami- ½ cup chopped

Boiled macaroni pasta-1/2 cup

Green/red/yellow capsicums-2-3 tbsp.

Fresh cream-1/4 cup

Cheese-2-3 tbsp. grated

Capsico sauce- 1 tsp

Salt and pepper to taste

Fresh basil/ mixed dried herbs- 6- 8 no/ ½ tsp

Chili flakes-1/2 tsp

Parsley-2-3 tsp chopped

For veg options:

Crumbled paneer/tofu- ½ cup

Capsicums-2 -3 tbsp. chopped

Soya keema- ½ cup cooked

Boiled mashed potatoes-1/2 cup

Method:

1. Prepare all the ingredients as per the recipe.

2. Keep the tart shells ready to use and then start the filling.

3. Heat oil and butter in a pan, add in the garlic and onions and saute for a few seconds, add in the non-veg/ veg ingredients as per choice and add seasonings, herbs, chili flakes.

4. Cook the mixture for 2 mins, add in the pasta, capsicums, and fresh cream, little cheese and mix well, turn off the flame.

5. Place the filling into the tart shells top with a little more cheese and bake in a pre-heated oven at around 150 degrees celsius for 8-10 mins and garnish with fresh herbs and serve.


Recipe- 4] SPINACH AND EGG TARTS

Ingredients:

Canape cups/ short crust tart shells/ filo tarts- 12- 16 no

For the filling:

Oil-1 tsp 

Butter-1 tsp

Garlic- 1 tsp chopped

Onion-1 small chopped

Green chili-1 tsp chopped

Spinach-1 cup, blanched and chopped

Paneer/tofu for veg options-1/2 cup crumbled

Boiled chopped eggs- for non-veg- 2-3 no

Salt and pepper to taste

Mixed herbs- ½ tsp

Flax seeds/ pumpkin seeds- 2 tsp

Chili flakes-1/2 tsp

Capsico sauce- ½ tsp

Tomato ketchup-2-3 tsp

Cheese-2-3 tbsp. grated

Fresh cream-1/2 cup

Mixed fresh herbs for garnish

Method:

1. Prepare all the ingredients as per the listed ones in the recipe.

2. The tart shells to be kept ready to use beforehand.

3. Heat oil and butter in a pan saute the garlic and onion for a few seconds add in the spinach, salt, pepper, herbs, chili flakes.

4. If using paneer or tofu add them in or add in the eggs, mix well add fresh cream and little grated cheese or cream cheese and mix well.

5. Add in the tomato sauce, Capsico and turn off the flame, add in the choice of seeds as mentioned for a little crunch.

5. Now place the filling into the tart shells, top it with a little cheese and flash the tarts into a hot oven for a few mins, around 150 degrees celsius for 6- 8 mins.

6. Remove the tarts from the oven, place them on a serving platter and garnish them appropriately with olives, jalapenos, fresh herbs, micro-greens etc and serve.


Recipe- 5] TIC TAC TOE SPROUT TARTS

Ingredients:

Short crust tarts/ canape cups/ filo tart shells- 12- 16 no

For the filling:

Oil- 1 tsp

Butter-1 tsp

Garlic- 1 tsp

Onion-2 tbsp. chopped

Green chilies- 1 tsp chopped

Boiled/blanched sprouts- 1 cup

Cucumber-1 small, peeled and chopped

Tomato -1 small, chopped

Mint leaves- 12-15 no

Salt and pepper to taste

Roasted crushed cumin- ½ tsp

Chaat masala-1/2 tsp 

Tamarind chutney- 2-3 tsp

Schezuan sauce-1-2 tsp

Tomato sauce- 1-2 tsp

Chopped coriander-2 tsp

Anardana-2-3 tbsp. fresh

Salt and pepper to taste

Mixed herbs-1/4 tsp

Chili flakes-1/2 tsp

Nylon sev/ bhujia sev- 2-3 tbsp. for garnish

Method:

1. Prepare all the ingredients as listed for the recipe for the tarts.

2. Keep the tart shells ready to use and then start the filling.

3. Heat oil and butter in a pan saute the garlic and onions for a few seconds, add in the blanched sprouts or raw as well can be added for a better crunch.

3. Add in the salt, pepper, herbs, chili flakes, tomatoes, and cook for 2-3 mins, add in green chilies and turn off the flame.

4. Now add in the sauces, chutney as per taste and choice, add coriander, cucumber and toss it all up.

5. This filling can be served cold as well in ready to eat tarts/cups. Assemble them on a serving platter, garnish with fresh anardana and garnish with mint leaves etc and also add a dash of chaat masala, sev, bhujiya, grated cheese if desired and enjoy it.


Recipe- 6] ALOO BHUJIYA TARTS

Ingredients:

Canape cups/ ready to use tart shells- 12- 16 no

For the stuffing:

Boiled potatoes- peeled and diced

Boiled sweet potato-1/2 cup cubed

Oil-2 tsp

Garlic-1 tsp chopped

Ginger-1 tsp chopped

Green chilies -1 tsp chopped

Spring onion-2-3 tbsp. chopped

Salt and pepper to taste

Water-4-5 tbsp.

Soy sauce- 2 tsp

Red chili sauce-1 tsp

Green chili sauce- 2 tsp

Chaat masala-1/2 tsp

Tomato- 1 medium sized, chopped

Lime juice- 2 tsp

Aloo bhujia- ¼ cup for garnish

Mint and coriander leaves- 2 tbsp. chopped for garnish.

Method:

1. Prepare the tart shells/ canape cups in advance and keep them ready to use.

2. To start the recipe for the filling, heat oil in a pan add in the garlic, ginger, green chilies, onions and saute for 1 min.

3. Add in the potatoes, sauces, salt and pepper, herbs etc to taste and mix well. Add a little water if needed.

4. Cook the potato mixture for 2 mins, turn off the flame, add in the tomatoes, chaat masala, lime juice, mint and coriander and mix well.

5. Just before serving, place the aloo mixture into the canape cups and garnish with mint, coriander and aloo bhujiya and assemble on a serving plate, ready to go.


Ingredient Ideology | Festive Treats On A Platter By: Dr. Kaviraj Khialani- Celebrity Master Chef.

FESTIVE TREATS ON A PLATTER

With just around a fortnight into the new year 2022, carrying all rays of hope and positivity expecting the onset of the year bringing in all the best, best of health, work, and relationships for all of us. It also rings in one of the most auspicious festivals of Hindus which is Makar Sankranti.  The significance of Makar Sankranti is signified by the sun's entry into Capricorn. On this day, the sun turns Uttarayan and enters Capricorn. Hindus from different corners of the nation are observed bathing in holy rivers on Makar Sankranti. It is set by the solar cycle and corresponds to the exact time astronomical event of Sun Entering in Capricorn sign and is observed on a day that usually falls on 14 January of the Gregorian calendar, but on 15 January in Leap Years. 

Makar Sankranti follows Lohri by a day and is a popular festival in most parts of the country, but the festivity is at its prime, mainly in North India. The festival marks the advent of the harvest season and also signifies the end of Winter as the days start getting longer. Makar Sankranti marks the harvest season for Maharashtra, which is why it is celebrated throughout the state with great passion. A day before the festival begins, people clean their houses and make sure that everything is immaculate. 

Most also wear ethnic Maharashtrian clothing during the three days of the festival. According to the Hindu calendar, there are a total of twelve Sankranti in a year. Further is divided into four categories which are known as Ayaan, Vishuva, Vishnupadi, and Shadshitimukhi Sankranti. The tradition of kite flying is for a healthy exposure to the early morning sun. Every year, people celebrate Lohri and Makar Sankranti by making til (sesame seeds) laddoo. These laddoo are used in worship, and eating them also helps keep the body warm.

 The rays are very healthy and provide a rich source of Vitamin D. The sunlight also helps in getting rid of skin infections and diseases. The day of Makar Sankranti is considered very important for the people of this zodiac sign as the Sun moves to Capricorn on this day. They should donate Khichdi, blankets, clothes etc. On the day of Makar Sankranti, these people are advised to donate khichdi, oil and warm clothes. The scientific importance of these sweets is that sesame seeds help in keeping the body warm and provide good amount of oil that is essential to provide moisture during winter. Makar Sankranti is a festival famous for its sesame sweets and kite flying.

Some of the most popular foods prepared, served and eaten during makar Sankranti include Til ke Laddoo, Puran Poli, Khichdi, Payesh, Pinni, Gur ki Gajjak, Chikki and more. The combo of Til and Gur actually comes from Maharashtrian phrase “til gud ghya aani god god bola” This is a common expression used to greet family and guests in Marathi households during Sankranti celebrations. The expression literally means 'Eat til and Gur and speak sweet'.

While on the other hand, Lohri is the celebration of the arrival of longer days after the winter solstice. According to folklore, in ancient times Lohri was celebrated at the end of the traditional month when winter solstice occurs. It celebrates the days getting longer as the sun proceeds on its northward journey. It's a new year and now that January is almost half over, Lohri is close by. There is an excitement in the air as there has been little cause to celebrate in the past year due to the Coronavirus pandemic. But with a vaccines and boosters doing a great job, everyone is starting to feel hopeful and joyous again. This year Lohri is just around the corner people are preparing for the festivities earnestly. Lohri can be celebrated in a large way with the whole community or it can be done in a small scale, with one’s family or household. Considering the risk of spreading virus and its variants, it is best adviced to take celebrations keeping in mind all Covid appropriate behaviors as well.

Here are a few facts about Lohri – The Harvest Festival!

* From a less religious and more linguistic perspective, it has been said that since the consumption of til (sesame seeds) and (jaggery) is traditional at the festival, it could be that the words til and Gur merged to become tilorhi, which eventually got abbreviated to Lohri over the years. The word Lohri is also said to have its origins in the regional word ‘loh’ refers to the warmth and light of fire.

* The name of this festival has many variations and possible origins. It is said to be the name of the Goddess Lohri, the sister of Holika, who is celebrated on Holi. Meanwhile, in Punjab it is called Lohi. Lohi was the wife of Sant Kabir, an important figure in the Sikh religion.

* Lohri being a harvest festival, though those who live in rural areas of north India and those who work in agricultural fields would already know this, but those in Southern India and those who live in Urban areas might be unaware of the significance. The winter crop traditionally Rabi is harvested in the days up to Lohri and then on the festival day all those involved in the labour gather around big bonfires and socialise and celebrate the harvest.

* It is a Hindu religious festival, It’s hard to say if it started out as a religious festival or an agricultural one but in Hinduism, it is believed to celebrate the Goddess Lohri and the God Agni. But, Lohri is celebrated by farmers of other religions too.

* It is a Solstice festival Many religions worldwide have a winter solstice festival such as Christmas or Yuletide. Lohri is the Indian equivalent, though it takes place later due to seasonal differences in the place of origin. It marks the end of winter
Lohri is said to be on the last truly cold day of the season, after which every day will get longer and warmer easing into Spring. It is not to be confused with Holi, which marks the end of Spring and beginning of Summer or Basant Panchami which marks the beginning of Spring.

*It is the longest night of the year, Lohri has the shortest day and longest night, after which every day will get longer. It's no wonder then that all the festivities for Lohri take place after the Sun has set. It also marks a new financial year historically, the revenue for winter crops used to be collected on Lohri. This custom is still given importance in the Sikh community.


Besides, the family and friends coming together during this festive occasion, some of the most popular foods prepared, served and eaten on Lohri include Sarson ka Saag, Makkai di Roti, Pindi Chane, Gur ki Roti, Murmur Laddoo, Chironji aur Makhane ki kheer, til ki burfi, Dry Fruit wali Chikki, Gur ka Halwa, Gajjak, Golden Pinni, Coconut Chikki / Bars etc.


Extending festive greetings to one and all on the auspicious festivities, here are a few easy to make festive recipes on Makar Sankranti and Lohri for all our valued readers:

Recipe-1] TIL GUR LADOO

[ An all-time favourite sweet made during makar Sankranti in Maharashtra]

ingredients:

white sesame seeds-1 cup

ghee- 3-4 tsp

jaggery- 1 cup grated

roasted crushed peanuts-1/4 cup

green cardamom powder-1/4 tsp

Method:

1. Prepare all the ingredients to start with the recipe.

2. Using a dry pan, lightly roast the sesame seeds for 4-5 mins, remove and keep aside.

3. Now warm up ghee in a thick bottomed pan, add in the grated jaggery and mix, continue cooking on a low flame stirring it up in order to melt all the jaggery in the pan.

4. We can now add in the green cardamom powder, crushed peanuts and roasted cooled down sesame seeds to the mixture, turn off the flame.

5. Remove onto a greased thali and using a greased hand and finger tips divide the mixture while still warm into lemon sized balls and shape them up, allow to settle, cool and store in an air-tight jar and use as required.


Recipe-2] NOLEN GUR PAYESH

[A festive sweet made during Makar Sankranti in Bengal and parts of East India]

Ingredients:

Full fat milk- 750 ml

Jaggery/ palm jaggery- 1 cup grated

Green cardamom- ¼ tsp powder

Brown sugar/ sugar/ condensed milk to taste as needed

Aromatic rice/ basmati rice- ½ cup

Almonds- 2-3 tbsp. cut

Ghee- 2-3 tbsp.

Raisins- 2-3 tbsp. cut

Cashews- 2-3 tbsp. cut

Mava/ khoya- 2-3 tbsp. grated

Method:

1. In a pan add little ghee and roast the nuts for a few seconds, remove and keep aside.

2. In a thick bottomed pan, boil and simmer the milk for 15-20 mins, now add in the washed and soaked rice for 20 mins, cook the rice on a low flame, keep stirring, allow rice to cook.

3. Now add cardamom powder, mava/khoya, once rice gets mushy add jaggery, condensed milk or sugar as well and allow to thicken further to a nice creamy texture.

4. Finally add in the roasted nuts, mix well and serve the payesh warm or chilled.


Recipe-3] MAKKAR SANKRANTI FESTIVE KHICHDI

[A Classic recipe with the goodness of rice and lentils simmered to perfection, mildly spiced, a perfect must have on the auspicious occasion]

Ingredients:

Split black gram-1/2 cup

White rice-1 cup

Ghee-1/4 cup

Oil-2 tsp

Cloves- 4-5 no

Black peppercorns- 4-5 no

Cinnamon stick- 1 piece

Black cardamom- 2 pc

Dry red chilies- 2 no slit

Green chilies- 2 no slit

Hing-1/2 tsp

Jeera seeds- 1 tsp

Curry leaves- 10-12 no

Ginger- 1 tsp chopped

Onion-1 small chopped, optional

Turmeric powder-1/4 tsp

Red chili powder-1/4 tsp

Salt to taste

Garam masala powder-1/4 tsp

Water as needed

Assorted mixed veggies as desired can also be added.

Coriander leaves- 2 tbsp. chopped

Method:

1. Pick and clean, wash and soak the rice and the split lentil separately for around 20 mins.

2. Heat oil and ghee in a pan, add in the whole spices and flavor the pan with them for a few seconds, add in the hing, cumin seeds, onions, ginger, chilies, curry leaves and the aromatic ingredients to add value to the recipe.

3. Now add in the rice, lentils all drained well, also add salt and all powdered spices, give them all a nice stir, add double quantity of warm water and mix, add coriander leaves, any choice of veggies if desired.

4. Once the khichdi comes to a boil, simmer cover and cook on a low flame until the rice and lentils are well cooked, add assorted nuts for garnish and serve the khichdi with bowl of curd/ salad/ raita/ papad.


Recipe-4] KHOYA AUR MAKHANE KI KHEER

[ A delicately flavoured sweet made using lotus seeds, nuts, adequately sweetened and enriched just right for the season]

Ingredients:

Milk- 1 liter

Sugar- 1 cup

Ghee- 2-3 tsp

Lotus seeds/ makhana- 1 and ¼ cup

Green cardamom powder-1/4 tsp

Raisins- 2-3 tsp

Walnuts- 2-3 tsp sliced

Almonds- 2-3 tsp sliced

Cashews- 2-3 tsp sliced

Khoya/ mava-1/4 cup

Condensed milk- ¼ cup

Rose petals- ¼ cup

Saffron-1/2 gm- optional.

Method:

1. Prepare all the ingredients for the makhane wali kheer and keep ready.

2. Simmer and reduce the milk for 30 mins. now add in the sugar, green cardamom powder and mix well.

3. Add in the khoya and mix, cook for 4-5 mins. add in half the nuts and simmer for 4-5 mins.

4. As an option I prefer to saute the makhanas in a little ghee with green cardamom powder for a few mins and then add them into the simmering milk, cook them for 8-10 mins and turn off the flame.

5. Garnish the kheer with rest of the nuts, saffron if desired and serve it in dessert or sweet serving cups and offer it warm or chilled as preferred, decorate with rose petals.


Recipe- 5] ATTE KI PINNI

[ A famous home style sweet made with whole wheat flour blended with assorted nuts and delicately hand shaped with all the love for the festivity]

Ingredients:

Whole wheat flour- 4 cups

Ghee- 300 ml

Sugar- 400 gms

Green elaichi powder- ¼ tsp

Melon seeds-2-3 tsp

Gaund- 1 cup/ 100 gms

Almonds- 2 tbsp. chopped

Cashews-2 tbsp. chopped

Raisins-2 tbsp. chopped

Walnuts-2 tbsp. chopped

Black cardamom powder-1/4 tsp

Method:

1. Prepare all the ingredients and keep aside.

2. Heat a little ghee and saute the gaund for a few seconds and remove, keep aside, cool crush and keep it on the side for later use.

3. In the same pan with a little ghee fry the nuts and melon seeds, remove and keep aside.

4. Heat the final lot of ghee and now start bhunaoing the atta on a low flame until it gets a nice nutty brown color.

5. Remove from the flame, allow to cool down, now add in the cardamom powders and powdered sugar into the atta and mix well.

6. Add in the nuts and crushed gaund and shape equal portions of the mixture into pinnis getting the typical finger marks on it. Store in air-tight jars and use as required.


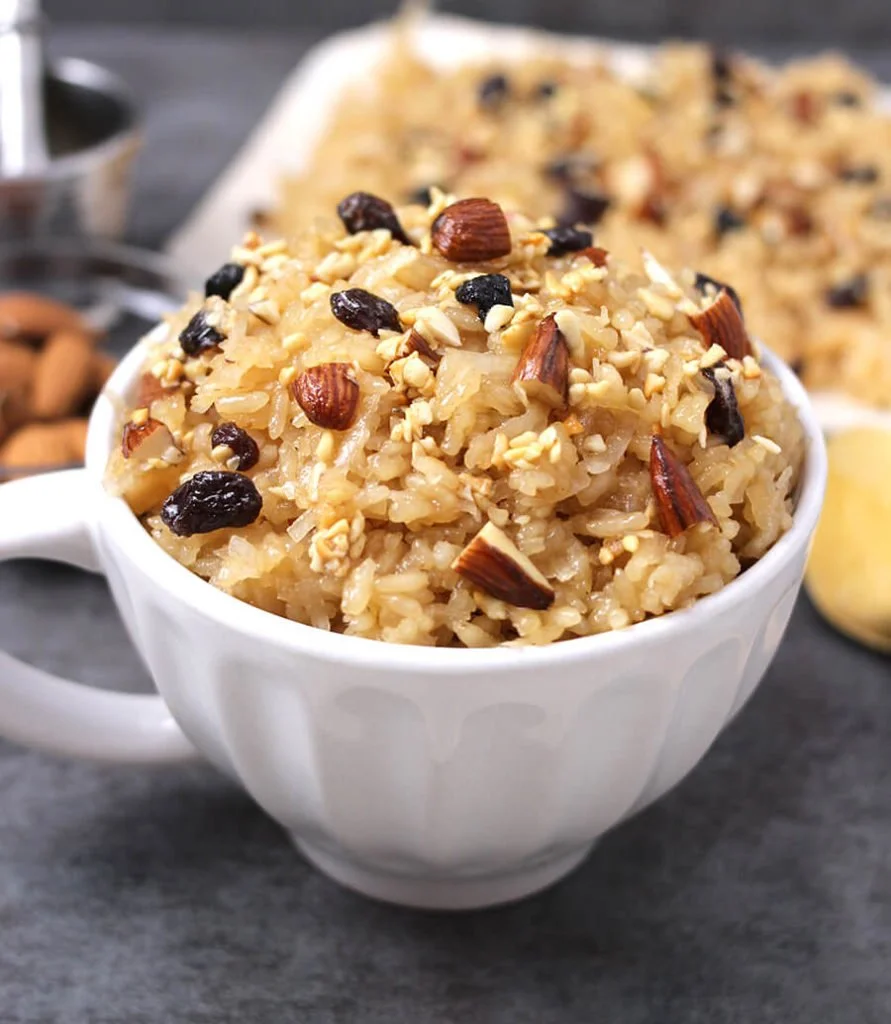
RECIPE- 6] GUR WALE CHAWAL

[ Meethe Chawal as we also address this as, one of the most awaited moment to enjoy the festivity with a hot portion of this mildly spiced, generously sweetened rice delicacy]

Ingredients:

Rice- 1 and a half cup

Ghee- 3-4 tbsp.

Cinnamon stick- 1-inch piece

Green cardamom- 3-4 no

Black cardamom- 1-2 no

Cloves -3 4 no

Jaggery- 1 and a half cup

Water-around 2-3 cups

Almonds- 2 tsp chopped

Pista- 2 tsp chopped 

Raisins- 2-3 tbsp.

Walnuts- 2-3 tsp chopped

Cashews- 2-3 tsp chopped

Saffron- ½ gm

Silver varq- ½ leaf

Dates- 2-3 tbsp. chopped

Method:

1. Prepare all the ingredients for the sweet rice delicacy.

2. Clean, wash and soak the rice for 20 mins.

3. Heat up ghee in a pan and saute the spices, add in the drained rice and saute for 1 min.

4. Add in the hot/ warm water and allow the rice to come to a boil, simmer until ¾ done and cooked.

5. Now add in the grated jaggery and half the amount of nuts, mix and cover the container, simmer for 12-15 mins until rice is nice and well done, using a fork lightly open up the rice, check for sweetness and add in some chopped dates, saffron soaked in a little warm milk towards the end.

6. Dish out the sweet rice into a serving bowl, dessert cups, garnish with rest of the nuts, some silver varq if desired and enjoy the festive sweet with family and friends.

++++++++++++++++++++++++++++++++++++++++++++++++++++++++++++++++++++++


Ingredient Ideology | Brown Bread To Good Health By: Dr. Kaviraj Khialani- Celebrity Master Chef.

Brown bread is bread made with significant amounts of whole grain flour, usually wheat, and sometimes dark-coloured ingredients such as molasses or coffee. In Canada, Ireland and South Africa, it is whole wheat bread, in the Maritimes and New England, it is bread made with molasses. Brown bread is made up of wheat flour at atta which makes it free of extra carbs and calories. This makes brown bread fit for the Keto diet as well. Also, it is rich in fiber and other nutrients. Brown bread has fibre, vitamins and minerals, making it a healthy choice. It helps keep blood sugar level in check, regulates bowel movements and helps in reducing cholesterol. It also reduces hypertension, risk of stroke, gastrointestinal disorder and obesity. Moreover, it's also low in calories.

Consuming wholemeal bread in moderation should not cause weight gain, but it will provide the necessary energy for the body. However, a person who wishes to manage their weight or lose weight should consider the following points: Taking in more calories than the body needs for energy will lead to weight gain. Brown bread is made up of the entire wheat grain which is high in vitamins, minerals and proteins whereas white bread is made up of only the endosperm which is rich in proteins and carbohydrates. Hence, brown bread is considered healthier than white bread.

In one study, people on a lower-calorie diet that included whole grains, such as whole wheat bread, lost more belly fat than those who ate only refined grains, such as white bread and white rice. Whole grains provide more vitamins, minerals, and fiber than refined. But overdoing whole wheat bread can add pounds, too. A fibre-rich diet helps to maintain bowel integrity and can also aid in reducing bad cholesterol. However, when choosing brown bread, make sure you read the label because contrary to belief, brown bread doesn't automatically mean it's 100 per cent whole wheat bread. A little awareness and eye for detail can help us go a long way when it comes to eating wise and choosing genuine stuff. Do check out a few of my interesting ideas using brown bread in sandwiches/ filling bites/ mini meal options.

Here are a few uses of Brown Bread which can be useful in our Kitchens:

  • Brown bread for breakfast: there are a number of ways in which brown bread can come handy for morning breakfasts from a brown bread toast, to toasted brown bread slices loaded with avocado, eggs and more. Brown bread upma with a touch of spice and nuts, seeds etc are a good way to start the day.

  • Brown bread for lunches and dinners: planning a light meal, a quick bite concept, sizzle it up with brown bread as a component which can add a varied touch and feel to the menu plan. From canapes to open sandwiches and lunchbox concepts, brown bread can be very useful when it comes to consuming wise meals.

  • Brown bread for snacky meals: an assortment of high tea, evening snack bites, toasts and treats are a good choice to dress up using brown bread. It is not only filling, nutritionally balanced but also adds a great satiety value when it comes to light bites.

  • Brown bread for sweet dishes/ desserts: a popular bread pudding, shahi tukda, double ka meetha and more can be easily dished out using brown bread in place of the regular white bread and making a few changes in the recipes with a healthy touch to it can create wonderful sweet delicacies to savour as well.


Here are a few of my all-time favorite recipes using Brown Bread.

Recipe-1] HEALTHY MASALA TOASTS

Ingredients:

Brown bread slices- 10-12 no

For the topping:

Oil- 2 tsp

Butter-1-2 tsp

Garlic- 1 tsp chopped

Onion-1 small chopped

Tomato- 1 small chopped

Green capsicum- ½ chopped

Boiled sweet corn- ½ cup

Celery-2 stalks, chopped

Salt to taste

Black pepper powder to taste

Mixed herbs- ¼ tsp

Chili flakes- ¼ tsp

Chaat masala-1/4 tsp

Tomato ketchup-2-3 tbsp.

Tabasco/Capsico sauce- ½ tsp

Peanut butter-2-3 tsp

Cheese-2-3 tbsp. grated


Method:

1. Prepare all the ingredients for the masala toasts as listed above.

2. Trim the sides/crusts of the bread a little and cut them into fancy shapes as desired. At times I do it in one piece and then after being toasted cut them into sharp triangles/squares or so and serve them.

3. While some prefer to toast the slices a little before placing the topping for final plating, we also at times do it without prior toasting as well.

4. Apply a little butter and peanut butter/ tomato ketchup in combination with a little chili sauce on the bread slices and keep aside.

5. In a pan saute the garlic, onion, capsicum, corn, tomatoes for a few mins, add in chopped green chilies if desired as well along with the seasonings, herbs, chili flakes and cook for 2 mins. remove and keep aside.

6. Spoon over the prepared topping on the bread pieces and sprinkle a little cheese over and place them on a baking tray in a pre-heated oven at 180 deg celsius for 3-4 mins or until nicely toasted and cheese melts on the top. Remove and serve hot with dips/sauces of your choice. Add non-veg toppings like boiled chopped chicken/ boiled eggs, sausages etc as well.


Recipe-2] COLD CUTS & VEGGIE SHEETS

Ingredients:

Brown bread – 10-12 slices

For the spread: any one or a combination.

Butter- 2-3 tbsp.

Cream cheese- 2-3 tbsp.

Mayonnaise sauce- 2-3 tbsp.

Pesto sauce- 2-3 tsp

Chili garlic mayonnaise-2-3 tsp

For the fillings: any 1 or more choices.

Cheese slices- 4-5 no

Sliced ham/ chicken ham- 2-3 slices

Sliced salami/ chicken salami-4-5 slices

Boiled chicken breasts- 3-4 slices

Double fried eggs – 2-3 no cooked

Boiled eggs- 2-3 no, sliced

Tomato slices- 4-6 no

Cucumber slices- 4-6 no

Onion slices- 4-6 no

Assorted lettuce leaves- 1 cup

Choose between iceberg lettuce, Lollorosso lettuce etc

Salt and pepper to taste

Sliced black olives/ green olives

Sliced jalapeno peppers

Fresh basil herb/ parsley etc.

Method:

1. Pre-prep all the ingredients for the loads between the sheets.

2. Pre-cook and prepare all the ingredients for the sandwich filling [ roasting/ boiling/ steaming/ panfrying etc can be done]

3. Slightly toast the brown bread slices and apply a choice of your spread individually or in a combination of spreads.

4. Place the lettuce leaves on the bread pieces, now arrange the cold cuts/ ham, salami slices and add ons like chicken and veggies.

5. Sprinkle light seasonings on the veggies, cheese slices etc and add the olives/ jalapenos etc as well in between the layers to add some tartness in the sandwich.

6. Close the sandwich and either cut and serve as it is or lightly toast/grill it and then serve with french fries, coleslaw etc.


Recipe-3] CORONATION SANDWICH TRIANGLES

Ingredients:

Brown bread- 10-12 slices

For the choice of spread:

Butter- 2-3 tsp

Cream cheese- 2-3 tsp

Mayonnaise-2-3 tsp

Pesto sauce- 2-3 tsp

Mustard mayonnaise- 2-3 tsp

Hung curd and mint spread-2-3 tsp

For the filling:

Veg options:

Lettuce leaves- 1 cup, assorted

Carrots- ½ cup small cubes, boiled

French beans-3-4 no, cut and boiled

Green peas-1/4 cup, boiled

Boiled potatoes-1/2 cup, cut into small cubes

Pineapple-1-2 slices, cut into small cubes

Cream cheese-1-2 tsp

Salt and pepper to taste

Veg mayonnaise- ½ cup or hung curd with pesto.

Sliced tomatoes- 3-4 no

Sliced cucumber-3-4 no

For the filling:

Non-veg options:

Assorted lettuce leaves- 1 cup, assorted

Boiled eggs-2-3 no, cut into small cubes

Boiled chicken- 1 cup, cut into small cubes

Sliced/chopped chicken sausages-1/4 cup

Salt and pepper to taste

Egg mayonnaise-1/2 cup

Pineapple -1-2 slices, cut into small pieces

Cream cheese-1-2 tsp

Sliced tomatoes- 3-4 no

Sliced cucumber-2-3 no

Method:

1. Prepare all the components of the brown bread loaded sandwich.

2. Assemble and pre-cook all the ingredients as listed for the various parts of the sandwich.

3. Veggies/non-veg options can go a long way when it comes to making a choice for example- soya keema tikkis, paneer Hariyali kabab slices etc can also be placed in between the bread slices. Similarly, for non-veg we can use tuna fish as well, sliced chicken tikka in a little schezuan mayonnaise also goes well.

4. Assemble all the parts of the sandwich starting from slightly toasting the bread slices, applying the spread and then layering.

5. Grill/toast before serving as well and offer it with tomato ketchup/ dips/ sauces and chips.


Recipe- 4] PEA & TOSSED SALAD SANDWICH

Ingredients:

Brown bread slices- 10-12 no

For the choice of spreads:

Almond butter- 2-3 tsp

Peanut butter- 2-3 tsp

Mustard butter- 2-3 tsp

Olive and parsley mayonnaise-2-3 tsp

Chili garlic mayonnaise-2-3 tsp

For the filling:

Assorted lettuce leaves- 1 cup, iceberg lettuce/ Lollorosso lettuce/ fresh salad leaves as per choice.

Chickpeas- ½ cup boiled

Black eye peas- ¼ cup boiled

Salt and pepper to taste

Shallots/onions- 2 tbsp. chopped

Green chilies- 1 tsp chopped

Boiled cubed potatoes-1/4 cup

Tomatoes-2-3 tbsp. chopped

Mint leaves- 10-12 no 

Parsley-1-2 tsp chopped

Lime juice-2 tsp

Hung curd- ½ cup

Mustard paste-1/4 tsp

Capsico/tabasco-1/2 tsp

Method:

1. Prepare all the ingredients for the sandwich recipe as listed.

2. Complete all tasks related to pre-cooking of the ingredients for the recipe before proceeding.

3. Slightly toast the bread slices a little and apply a choice of spread on the bread pieces.

4. In a mixing bowl, combine together the peas and all other ingredients for the tossed veggie option.

5. Add seasonings to taste, hung curd etc and bind it all up well into a sandwich filling.

6. Portion out the filling in between the bread slices and sandwich them cut them into smaller pieces and serve it immediately. For non-veg options, we can choose between reshmi malai chicken kababs, sliced tandoori fish, chinese style garlic pepper prawns and more.


Recipe-5] TUNA SALAD SANDWICH

Ingredients:

Brown bread slices- 6- 8 no

For the choice of spread:

Peanut butter- 2-3 tsp

Mustard butter- 2-3 tsp

Olive and parsley mayonnaise-2-3 tsp

Butter-2-3 tsp

Walnut – chili butter-2-3 tsp

For the filling of the sandwich:

Tuna fish- 1 cup, tinned/canned- drained

Onions/ shallots- 2-3 tsp chopped

Green chili-1 tsp chopped

Green capsicum-2-3 tsp chopped

Gherkins- 1-2 tsp chopped

Parsley/ coriander/ mint- 2-3 tsp chopped

Lime juice-1-2 tsp

Mayonnaise-1/2 cup

Grated cheese-2-3 tsp

Olives- 2-3 tsp sliced

Mustard paste-1/2 tsp

Sliced tomatoes- 3-4 no

Sliced cucumber-3-4 no

Add ons/ variations:

Boiled diced potatoes/ grilled paneer/ tofu for veg/ roasted sliced sweet potato slices/ assorted mixed veggies.

Method:

1. Prepare all the ingredients for the tuna salad sandwich recipe as listed above in order to assemble all in one.

2. Tuna fish is available in tinned/canned options preserved in brine solution/ oil preserve as well, ensure to remove all the liquid content from the fish before being mixed into the sandwich filling.

3. Slightly toast the bread slices and apply a little butter or spread of your choice on the pieces. Now in a mixing bowl, combine together the tuna fish with all other ingredients and give it a nice mix.

4. Place a few lettuce leaves on the brown bread slices and then spoon over the creamy tuna mixture and place a few sliced veggies as desired for color/ crunch and taste.

5.Close the sandwich and secure the filling well, cut into pieces as desired/ serve immediately with finger chips/ ketchup etc.


Recipe- 6] PEPPERED CORN CAPSICUM SANDWICH

Ingredients:

Brown bread slices- 10-12 no

For the choice of spread:

Butter-2-3 tsp

Cream cheese- 2-3 tsp

Minted mayonnaise- 2-3 tsp

Chutney mayonnaise- 2-4 tsp

Schezuan mayonnaise- 2-4 tsp

Hung curd with pepper- 2-3 tsp

For the filling/stuffing:

Oil-1 tsp

Butter-1 tsp

Garlic- 1 tsp chopped

Onion-1 small chopped

Sweet corn-1/2 cup boiled

Green capsicum-1/2 no chopped

Salt and pepper to taste

Mixed herbs-1/4 tsp

Chili flakes- ½ tsp

Cheese- 2-3 tbsp. grated

White sauce-1/4 cup

Parsley- 2-3 tsp, chopped

Other add on options:

Sliced cheese-2-3 no

Sliced roast chicken slices- 2-3 no

Sliced jalapenos/ olives- 2-4 no

Tofu/ paneer slices, grilled- 2-3 no

Aloo tikkis/ Hariyali chicken tikka- 4-5 pieces

Method:

1. Prepare all the ingredients for the yummy fix up brown bread sandwich.

2. Slightly toast the brown bread sandwiches and apply a little spread of your choice as per the list.

3. Heat oil and butter in a pan and saute the garlic, onion for a few seconds, add in the capsicum, corn and saute for 1-2 mins.

4. Add in the seasonings, herbs, chili flakes, and mix, add a little cream cheese/ white sauce if desired as well to make it a little binding up by itself.

5. Turn off the flame, remove the filling into a plate, slightly cool it down a little, add little cheese mix and place it in between the bread slices and cover them.

6. Place the sandwiches in between a hot grill/ toaster and cook it until lightly browned, apply a little butter if needed and cut into triangles/ squares and serve hot with chips/ potato wedges/ tossed salad/ coleslaw.


Ingredient Ideology | Being Proactive with Purple Cabbage By: Dr. Kaviraj Khialani- Celebrity Master Chef.

Being Proactive with Purple Cabbage

Purple cabbage is a great source of antioxidants and other beneficial plant compounds that help protect against cellular damage. Its antioxidants include vitamin C, carotenoids, and flavonoid antioxidants, such as anthocyanin’s and kaempferol. In fact, it often contains higher amounts of these than green cabbage. While it is also addressed as red cabbage, Red cabbage is a nutrient-rich, cruciferous, or Brassica vegetable that's related to cauliflower and kale. It's sometimes called purple cabbage since its leaves are a dark purple-reddish color. Red cabbage typically is a little smaller and denser than green cabbage, and has a more peppery taste.

Some people wonder what is so special about this cabbage? And the very prompt reply to that implies that It has an outstanding nutrient profile and is especially high in vitamins C and K. In addition, eating cabbage may even help lower the risk of certain diseases, improve digestion and combat inflammation. Plus, cabbage makes a tasty and inexpensive addition to a number of recipes, while The purple color in red cabbage comes from a class of pigment molecules called anthocyanin’s. It turns out that anthocyanin’s are found in flower petals, leaves (it makes them turn red in the fall!) and some fruits such as blueberries.

Purple cabbage can also be roasted or sautéed with meats or beans, or it can be shredded and used as a nutrient-rich garnish for soups, salads, and warm dishes. It also offers an antioxidant-rich and visually appealing alternative to green cabbage in coleslaw or sauerkraut, or it can be fermented to make kimchi. While it remains easy to adapt into our diets and cooking in a number of ways Red cabbage is easy to incorporate into your diet. This versatile vegetable can be added to soups, stews, salads, and coleslaw. It's delicious raw, steamed, sautéed, and fermented. It retains the most nutrients when it's eaten raw, but is still highly nutritious when cooked.

Here are a few health benefits of Purple Cabbage:

1. Purple cabbage is regarded as good for our skin and it also protects us against radiation.

2. Purple cabbage is also good for the brain health and also takes good care of our bone health and wellness, hence it should be consumed.

3.Purple cabbage is helps in weight loss, in digestion as well. It is also considered beneficial since it regulates our blood pressure.

4.Purple cabbage is also good for us since it has a good quantity of water present in it, besides it also prevents constipation and also prevents acne.

5.Purple cabbage is also a good detoxifying ingredient in addition to that it is also good for eye health and vision.


Here are a few of my favorite ways with Purple Cabbage:

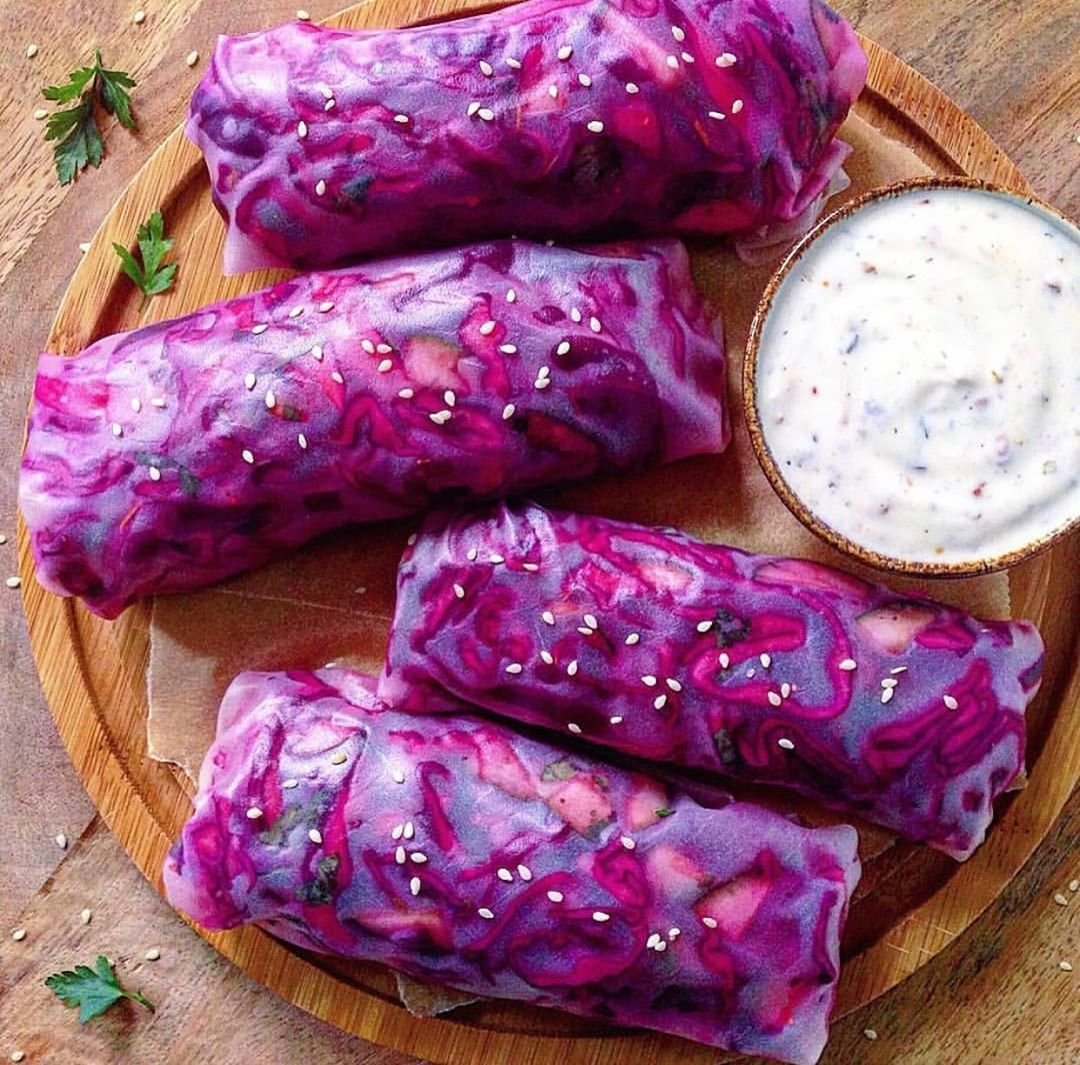
Recipe-1] VEGGIE SPROUT CABBAGE ROLLS

Ingredients:

Purple / red cabbage leaves- 150- 200 gms, cleaned.

For the stuffing:

Oil-2 tsp

Butter-1 tsp

Garlic- 1 tsp chopped

Onion-1 small chopped

Beansprouts-1 cup, steamed

Mushrooms- 1 cup, sliced

Boiled and crushed sweet corn-1/4 cup

Salt and pepper to taste

Mixed herbs-1/4 tsp

Chili flakes-1/4 tsp

Tomato sauce- 2-3 tsp

Grated cheese- 2-3 tbsp.

Chopped parsley-2-3 tsp

Schezuan sauce- 2-3 tsp

Method:

1. Prepare all the ingredients for the cabbage rolls.

2. Clean up the leaves, sort them out and wash them well, place them in a hot water steamer for 2-3 mins and remove, place them in chilled water, since we may need to trim the leaves a little before rolling.

3. Once the ingredients for the stuffing are ready, heat oil and butter in a pan saute the garlic, onions for a few seconds, add in the mushrooms, corn, beansprouts, saute them add in salt, pepper, herbs, chili flakes, cook for 2 mins.

4. Add in the tomato sauce, schezuan sauce, and cook the mixture for 2-3 mins, turn off add in the parsley, cheese and mix lightly. Place the stuffing in between the steamed cabbage rolls, secure them well and roll up, place them back into the steamer and steam them for 2-3 mins more.

5. Serve the stuffed purple cabbage leaves with an assortment of dips, sauces, chutneys, spreads etc and enjoy it like a starter/ snack.


Recipe-2] VITAMIN ENRICHED CABBAGE TOSSED SALAD

Ingredients:

For the base of the salad:

Iceberg lettuce/ Lollorosso lettuce/ cos lettuce- 2 cups

For the body of the dressing:

Purple cabbage-1 cup shredded

Orange segments- ½ cup cleaned

Apple/ pears- ½ cup cubed

California grapes- ½ cup

Shallots- 4-5 no, sliced

Boiled sweet potato cubes- ½ cup

For the dressing of the salad:

Olive oil- 2-3 tbsp.

Mustard paste-1 tsp

Honey-1 tsp

Chaat masala- ¼ tsp

Lime juice- 2 tbsp.

Fresh squeeze of orange-1/4 cup

Fresh parsley- 2 tsp chopped

Crushed black pepper-1/2 tsp

Flax seeds/ pumpkin seeds – 1 tsp

For the garnish of the salad:

Almond flakes- 2-3 tsp

Cashews- 2-3 tsp 

Fresh basil leaves- -5-6 no

Microgreens- ¼ cup

Cherry tomatoes-3-4 no cut 1 x 2

Pineapple cubes- ½ cup

Method:

1. Prepare all the four parts of the salad and keep them chilled.

2. Arrange the bed of lettuce leaves of your choice on a serving plate/ platter and proceed with the next step.

3. In a mixing jar combine together the ingredients for the dressing as listed and give it a nice shake and stir well.

4. Just before serving toss the salad and dressing together and place it on the base of the lettuce leaves, decide the garnish and do so appropriately, at times we also use chopped dates, walnuts, pine nuts etc as well to garnish the salad, for non-veg we can also add shredded boiled chicken or chicken sausages etc.

Recipe-3] BEAN AND CABBAGE TACO SHELLS

Ingredients

For the taco filling:

Purple cabbage-150 gms, shredded

Bean sprouts-1/4 cup

Baked beans/ chickpeas/ black eyed beans/peas- 1 cup cooked

Salt and pepper to taste

For non-veg filling:

Boiled shredded chicken/ roast chicken with makhani salsa etc

For veg filling options:

Capsicum/ paneer tikka/ paneer bhurji/ mix veggies tossed in cheesy white sauce etc

For the sauces to go along in the tacos:

Mexican peri chili salsa sauce/ pesto peri spice spread/ hung curd and re-fried bean hummus in the form of a spread.

For the toppings and garnishes:

Grated cheese/ fresh herbs like parsley/thyme/ coriander etc

Jalapeno peppers/ olives – black /green etc can be added.

Method:

1. Prepare and assemble all the ingredients for the taco shells.

2. This recipe works well If we do like a live counter or a live taco counter where the guests can choose between the assortment of fillings, spreads, sauce etc.

3. Add in the purple cabbage shreds towards the end and place an assortment of garnishes of your own choice and color.

Recipe-4] QUINOA CABBAGE BOWL

Ingredients:

Purple cabbage-150gms, cut into small dices / cubes 

For cooking the cabbage bowl:

Oil-2 tsp 

Butter-2 tsp

Garlic- 1 tsp chopped

Ginger – 1 tsp chopped

Chilies- 2-3 tsp

Onion-1 small chopped

Quinoa- 1 cup cooked

Green peas-1/4 cup cooked

Cauliflower- 500 gms, cleaned, blanched

Purple cabbage-1 cup 

Sweet corn-1/2 cup boiled

Salt and pepper to taste

Mixed herbs-1/4 tsp

Chili flakes-1 tsp chopped

Peanut butter-2 tsp

Soy sauce-2 tsp

Spring onion greens- 2-3 tbsp.

For the dressing:

Olive oil-2 to tsp

White vinegar-2 tsp

Lime juice-2 tsp

Roasted crushed cumin seeds-1/2 tsp

Mint leaves- 10-12 no

Cheese- 2-3 tsp grated or use cream cheese

For non-veg: add chopped salami, bacon, chicken/ roast chicken pieces, chicken tikka etc.

For the garnishing:

Assorted nuts/ assorted seeds/ micro- greens/ jalapeno/ olives use.

Method:

1. Prepare all the ingredients for the one-meal dish.

2. To cook up the cabbage bowl, heat oil and butter in a pan, lightly saute the ingredients one by one, can add in the green peas and cauliflower, followed by any other choice of ingredients as included in the recipe.

3. Give it all a nice mix, add in the seasonings, herbs, chili as per taste, and cook for 8-10 mins on a low flame, add a little stock or water and cook it all up well. 

4. Add in the cooked quinoa and cabbage pieces, peanut butter and soya sauce, chili sauce if desired and toss it all up well. Add in parsley/coriander leaves/mint leaves etc and add nuts/ seeds for garnish and serve warm, add a squeeze of fresh lime juice, add cherry tomatoes and relish this healthy bowl.

Recipe-5] QUICK TOSSED CABBAGE AND APPLE

Ingredients:

Purple cabbage-150 gms, shredded

Green apple/red apple- 1 -2 med sized, small dices

Salt and pepper to taste

Oil-2 tsp

Butter-1 tsp

Garlic-1 tsp chopped

Celery- 2-3 tbsp. chopped

Onion-1 small chopped

Parsley-2 tsp chopped

Sugar- 1 tsp

White wine-2 tsp

White vinegar-1 tsp

Raisins-2-3 tsp

Walnuts-2-3 tbsp. sliced

Additional ingredients for non-veg:  use bacon, sausages, salami cubes etc in the same recipe as well for a varied flavor.

Method:

1. Assemble and prepare all the ingredients for the recipe.

2. Heat oil and butter in a pan, quickly add in the garlic, onions, celery and cook for 1 min.

3. Add in the apples and cabbage and cook in the mixture for 2-3 mins, add in the sugar, salt, pepper, white wine/ vinegar/

4. Give it all a nice toss and check for a balanced taste and flavor in the brand.

5. This tossed cabbage and apple recipe can be enjoyed as a relish/pickle format as well and can be enjoyed in a number of ways.

Recipe-6] RIZO CHICKEN CABBAGE CUPS

Ingredients:

Purple cabbage cups- 150-200 gms

For the stuffing:

Oil- 2 tsp 

Butter-1 tsp

Garlic- 1 tsp chopped

Onion-1 small chopped

Boiled cooked white/brown rice-1 cup

Cooked/boiled chicken-1/2 cup diced

Mushrooms-1/2 cup sliced

Green peas-1/4 cup

Salt and pepper to taste

Mixed herbs-1/4 tsp

Chili flakes-1/4 tsp

Cheese-2-3 tbsp. grated

Mayonnaise sauce-1/2 cup

Tomato sauce-1/4 cup

Tabasco/ Capsico- 1 -2 tsp

Soya keema/ soya chunks- ½ cup 

Paneer /tofu- ½ cup

Parsley/coriander/mint- ¼ cup

Lime juice—2-3 tbsp.

Assorted nuts- 2-3 tsp

Assorted seeds- 2-3 tsp

Method:

1. Assemble all the ingredients for the recipe as listed above.

2. Prepare the cabbage leaves, place them in ice cold water to maintain their texture.

3. To prepare the filling, heat oil and butter in a pan, saute the garlic, onions, add in the mushrooms, peas, chicken and rice and any other choice of ingredients as you feel like.

4. Add in the seasonings, herbs, chili flakes, sauces to taste and give it a nice mix.

5. Cook the mixture on a medium to low flame for 3-4 mins, turn off the flame and add in the grated cheese and mix.

6. Just before serving, remove the cabbage leaves from the water, pat dry them one by one and spoon in the filling into the cups while still warm.

7. Garnish the cabbage cups with assorted nuts/seeds/ greens and arrange them on a serving platter/plates.

Serve warm/chilled.

Ingredient Ideology | RUSSIAN FARE TO SHARE By: Dr. Kaviraj Khialani- Celebrity Master Chef.


RUSSIAN FARE TO SHARE

It has been observed that not many people think of Russian food as being internationally renowned when compared to some more widespread cuisines, but there are more and more people around the world who are discovering it and learning to appreciate its qualities. Russian food derives from the great geographical expanse of this country and its multicultural character, which has resulted in a great variety of dishes.

Given the characteristic cold climate of this region of the world, the country has a lot of delicious traditional dishes to help people keep warm. People that discover Russian food for the first time, are often surprised by the variety of ingredients and flavors, which is influenced by its connection to Europe, Asia and the Middle East.

It is also said that Russian food derives from an innumerable wealth of dishes, due firstly to the multicultural character of the country and secondly to its vast geographical size. Many dishes we consider today as typically Russian, are in reality of Polish, French or Italian origin. They arrived at the court of Catherine II through the Empress’s contacts with Western Europe.

Russia’s gastronomic foundations are based on the peasant food of rural populations located in places with an extremely cold climate. Many of the different dishes of soups and stews with meat and fish, are prepared by adding spices to native dishes using some techniques from the Mongols and Tatars in the 13th century.

Many of the Russian dishes are influenced by the ancient silk road as well as the proximity to the Caucasus, as well as the proximity it had with the Ottoman Empire. Russian food is very rich in variety, but also hyper caloric because more energy is needed to withstand the low temperatures they suffer in winter.

As the climate in Russia is almost always cold, most dishes are eaten hot. Soup is one of the main dishes and there are of many different types, they also accompany most of the dishes with rye bread, which is even cheaper than wheat white bread.

Caviar is one of a specialty in Russia. There are two types: the red salmon caviar that we can order in any restaurant or food house, and black caviar, which you’ll only find in expensive restaurants. In fact, for Russians at home, the most normal thing is to eat red caviar on a slice of white bread without toasting with butter. The black is reserved for special occasions, such as Christmas. Did you know the word “caviar” comes from the Persian word “khavah” which means “egg”?

Russians don’t conceive a lunch without soup as a first course, and for dessert they usually have a sweet accompanied by black tea with lemon, which they drink every hour of the day. And yes, the drink that most people drink in Russia is not always vodka, it is tea too! And what about vodka? To take it, Russians have their own protocol first of all, you must exhale through your mouth, then drink it in one gulp and then take a breath.

 One of the most popular dishes in the country is the Russian salad, only that in Russia it’s not called that: it’s known as Olivier salad and takes the name of the Belgian chef who invented it while working in Saint Petersburg. As bread is so important in Russian food, there is the tradition to welcome important guests with a dish of “bread and salt”. Although potatoes are a common ingredient of Russian food, for a long time Russian people only ate turnips, they didn’t know potatoes. King Peter brought the first potatoes from his foreign voyages, but Russians didn’t know how to eat it for some years.

Surprisingly, breakfast in Russian food usually consists of a cup of tea or coffee and a sandwich with some butter, cheese or ham, or some bakery, just for simplicity going along with choice of breads. The most traditional non-alcoholic drink is Kvass (after Coca-Cola). By the way, due to the climate, soft drinks are usually served without ice, if you want it, order it separately.

Some Popular Russian Delicacies:

1. Olivier salad: t’s known as Russian salad around the world. Olivier is a variant of potato salad invented in the 1860s by the Chef Lucien Olivier. The original was made with caviar, grouse, smoked duck, beef tongue and it had its own secret sauce, but today it is prepared with much simpler ingredients: boiled potatoes, carrots, eggs, peas, pickles, and chicken or meat.

2. Shades of Caviar: Quality caviar may be the most expensive food in the world, with most exclusive one’s costing thousands of dollars. The best caviar is that of sturgeon caught in the Caspian Sea in Azerbaijan, Iran and Russia. It consists of gelatinous pearls that explode in the mouth, and it has an intense taste of brine and fish. Red and black coloured caviar are most popular.

3. Chebureki: The word Chebureki was adopted from the Crimean Tatar language and means literally ‘raw cake’. This dish is very popular in Tatar and Russian cuisine, but also in Asian and Caucasian menus. It’s a kind of fried patty with a filling of minced meat and onion. It’s made with a single piece of dough that folds over the filling in a crescent shape.

4. Borscht: Borscht is a beet soup native to Ukraine that was quickly adopted as a Russian specialty. Beet is its main ingredient and the one that gives it its intense and characteristic color. It is prepared with sautéed meat and vegetables, among which we can find cabbage, carrots, onions and potatoes and it can be served hot or cold.

5. Okroshca: This concept relates from Russia which is a cold soup, perfect for hot summer days. Traditionally, it’s cooked with Kvass, and it usually includes meat or mortadella, radish, cucumbers, chives, cooked potatoes and eggs.

6.Uja: this is also a very traditional Russian soup that is prepared with sliced fish fillets. They mainly use Salmon or Cod Fish. To this Russian spoon dish are also added some vegetables cut into pieces such as, for example, potato, carrot or onion.

7. Black Russian Cake- This is an extremely moist and delicious cake. The coffee liqueur gives it an exceptionally rich and unique flavor. It is wonderfully complemented when served with coffee drinks as an after-dinner treat. What made the dessert “Russian”? Quite likely the name transferred from “Russian tea,” which in the late 1800s meant any drink containing rum (not vodka, surprisingly). Red wine and sherry are found in some of the tea and Russian cake recipes. Russian Royal Cake is made with walnut, poppy seed, cherry and chocolate cake layers frosted with Dulce De Leche Buttercream then drizzled with Chocolate.

8. Cabbage Piroshky - Piroshky are the ultimate Eastern European and Russian street food! These are little hand-pies made with fluffy easy dough and filled with either sweet or Savory fillings. Some of the fillings include braised cabbage piroshky is one of the favorites of many foodies. These vegetable piroshkies are filled with cabbage, carrots, mushrooms, onion and bell pepper. You can even add diced kielbasa sausages as well for more flavor.


Popular Ingredients in Russian Food

Russian cuisine and gastronomy includes a great variety of ingredients, but the following are the most used.

Meats and Fish.

They are used in all types of dry dishes and soups. These ingredients include lamb, pork or beef meats. In the case of fish, they are mainly freshwater fish such as carp and sudak, but also fish found in northern areas of the country like sturgeon, salmon, pike and trout.

Assorted Vegetables

The most popular are cabbage, potatoes and cold tolerant greens. Pickling cabbage, cucumbers and tomatoes are used in brine to preserve other vegetables for winter use.

Variety Fruits- In Russia there is a great tradition of preserving the fruits, vegetables and mushrooms grown during the summer. The compotes and jams are made of fruits and berries like strawberry, raspberry, blueberry and others.

Choice of Breads- There are several types, the most typical is black bread, made from rye flour; there are many types of this bread and it’s very healthy. There is also normal bread called white bread made from wheat flour.

Milk & Dairy Products- In Russia there is a great variety and tradition of eating dairy products, many of which aren’t known in other countries. In stores you can buy many kinds of cottage cheese “tvorog”, “kefir” – a drink similar to yogurt.

 Herbs and Spices used commonly in Russian Cooking:

  • Parsley: Mainly used in salads and also to decorate dishes.

  • Pepper: Russians use mainly black pepper.

  • Allspice: It’s often used in unground form in marinades and canned foods.

  • Sage: Mainly used in fish dishes, but also in legumes, vegetables, jams and marmalade.

  • Horseradish: The root of this plant is used in many spicy sauces for meat and fish dishes.

  • Dill: Dill weed simply makes sense in a Russian diet of fish and milk-based dishes.

  • Tarragon: When used in any Russian recipes with vinegar and/or mustard, tarragon is delightful.

  • Garlic: It offers a taste that is versatile enough for a great variety of dishes and it stores well for use in winter cooking.

Here are a few of my select all-time favourite recipes from Russian Cuisine:

Recipe-1] CHEBUREKI SNACK

A popular Russian street side snacky food, dough encased with mince- meat and fried]

Ingredients:

For the wrappers:

Readymade tortilla wraps can be used as well.

To make fresh wrappers:

Refined flour- 1 and a half cup

Oil-2 tsp

Salt- 1 pinch

Baking powder-1/4 tsp

Egg yolk- 1 no

Warm water- as needed to make a firm dough

For the mince-meat stuffing:

Red meat of your choice/ chicken mince- 250 gms

Salt and pepper to taste

Assortment of herbs- parsley/coriander/basil etc

Garlic-1 tsp chopped

Spring onion-1 med size chopped

Spring onion greens- 2-3 tbsp. chopped

White wine- 2-3 tsp optional

Red pepper sauce- 1-2 tsp – optional

To seal and fry:

Oil- as needed to deep fry

Egg wash to seal the edges of the wrappers.

To serve with:

Assorted choice of dips/ sauces to go along.

Method:

1. Assemble all the ingredients for the Chebureki snack.

2. Prepare the dough mix, a firm pliable, semi- hard dough.

3. cover and rest the dough for 15-20 mins.

4. Meantime to work on the stuffing/filling we have two options. The first one the classic way is to work on all of It together in a mixing bowl and use it raw itself, it gets cooked as it gets encased inside the dough and gets fried and ready to eat. The second option, is to separately cook the mince in a pan and then cool it down a little and then stuff them inside the Chebureki dough.

5. To cook the filling and use, heat 2 tsp oil/butter in a pan and saute the garlic, onions, herbs, mince-meat, add a little refined flour, a little stock or water and cook the mince for 8-10 mins, add a little mashed potato to enable better texture and binding.

6. Divide the dough into small lemon sized balls, roll out each one of them into round of 2-3-inch diameter, cut them out into neat rounds. Place small portions of the mince on each wrapper, spread it evenly and then apply a little egg wash and seal it into a half moon shape and using a fork crimp and seal the edges. Deep fry in medium hot oil to a nice golden color and serve hot.


Recipe-2] BORSCHT SOUP

[a delicate beetroot coloured and flavoured soup, popularly form Ukraine, can be made veg as well while some recipes use red meat as well]

Ingredients:

Oil- 2 tsp

Butter- 1 tsp

Bay leaf- 1 no

Garlic- 2-3 cloves, chopped

Onion-1 small, chopped

Potatoes-2 small, peeled and cubed

Beetroots- 2-3 med sized, peeled and cut

Carrot-1/2 cut, cubed

Cabbage-1/2 cup, shredded

Tomatoes- ½ cup, chopped

Dill leaves- 2-3 tbsp. chopped

Water/ stock- 3-4 cups

Fennel seeds-1-2 tsp roasted/crushed

Fresh cream/sour cream -2-3 tsp for garnish.

Method:

1. Pre-prep all the ingredients for the vegetarian recipe of borscht soup.

2. Heat oil/butter in a saucepan, add in the bay leaf, garlic, onions and saute for a few seconds. Add in the potatoes, carrots, beetroot, tomatoes, cabbage, salt, pepper, fennel, dill leaves, water/stock and bring it to a boil.

3. Simmer the soup for 20-25 mins, and then we have two options while in some cases they leave it the way it is with chunks of veggies visible and in some we also blend it up and puree the soup as well.

4. Adjust the texture, seasonings as per taste and add in stock etc as needed and portion the soup into serving bowls, garnish with fresh dill/parsley and some fresh cream/sour cream and serve hot.


Recipe-3] Olivier Salad

Ingredients:

For the base of the salad:

Assorted salad leaves- 1 cup

For the body of the salad:

Veg and non-veg options are possible

For the veg:

Carrots-1/2 cup cubed, boiled

Green peas-1/4 cup, boiled

Potato cubes-1/2 cup, boiled

French beans- 3-4 no, cut into small pieces, boiled.

Pineapple slice- 1-2 no, cubed

For the non-veg:

Boiled chicken cubes-1/2 cup

Diced ham/ salami- ¼ cup

Sausages- ¼ cup sliced

Boiled eggs-1-2, cubed, sliced

Roast/ grilled meat/chicken etc can also be used.

For the dressing of the salad:

Mayonnaise dressing- 1 cup

Mustard paste-1 tsp

Salt and pepper to taste

Lime juice- 1-2 tsp

Sugar-1 pinch

For the garnish of the salad:

Cherry tomatoes-2-3 no cut 1 x 2

Fresh herbs/parsley- 1-2 sprigs

Method:

1.Pre-prep all the ingredients for the salad recipe.

2.One can assemble the salad and allow to chill for some time and then do the plating just before service.

3.To start with clean, rinse the lettuce leaves, place them in ice-cold water to retain freshness and crisp texture.

4. In a mixing bowl, combine together the dressing and add in the ingredients for the body of the salad, once can choose between various ingredients and veg/non-veg as well.

5. Mix the salad well, adjust texture and seasonings and allow to chill, just before serving pat dry the lettuce leaves and arrange them on a salad plate/ salad platter and spoon in the chilled salad and garnish, serve immediately.

Recipe-4] CHICKEN STROGANOFF

[a delicate and mild flavoured Russian main course recipe usually with beef/red meat, laced in a creamy mushroom gravy, here it is being done with chicken]

Ingredients

Boneless chicken breasts- 250-300 gms, sliced

For the marination:

Oil-2 tsp

Garlic-1 tsp fine chopped

Salt and pepper to taste

Lime juice/white vinegar/white wine- anyone to be used

Paprika powder/chili flakes-1/2 tsp

Mustard paste-1/2 tsp

Apply marination, keep refrigerated for 20 -30 mins, coat with dry flour –maida and keep ready.

For the sauce:

Oil-2 tsp

Butter-2 tsp

Garlic-1 tsp chopped

Spring onion-2-3 chopped

Water/chicken stock-1/2 cup

Thick cream- cooking variety- 2 cups

Mustard paste- 1 tsp

Salt and pepper to taste

Gherkins- 2-3 tbsp. sliced

Mushrooms-1 cup fresh, sliced

White wine-2-3 tsp, optional

Parsley- 2-3 tsp, chopped

To serve with: buttered tossed flat noodles/steam rice

Method:

1. Pre-prep all the ingredients for the recipe.

2. Marinate the chicken pieces and post that dredge/coat with dry maida and keep aside.

3.Using a thick bottomed open flat pan, heat oil and butter to start with and shallow fry the chicken pieces on a high flame to get a nice light brown color and cook them in the pan for 2-3 mins, remove and keep aside.

4. To the same pan add in some oil and butter and saute the garlic and spring onions for 1 min. add in the mushrooms, salt, pepper, little parsley, add some white wine if desired here at this stage.

5. Add in the thick cooking cream, little water or stock, mustard paste, and also add the chicken pieces back into the sauce and simmer for 6-9 mins until the chicken pieces are tender.

6. Finally, add in gherkins towards the end of the cooking process and add some more freshly chopped parsley and serve hot.


Recipe- 5] MEAT AND VEG PLOV 

[a delicious recipe with subtle flavors of meat and mild spices steeped together with rice and garden veggies, make it a great dish to enjoy]

Ingredients:

Oil-2 tbsp.

Butter-1 tbsp.

Garlic pod- 1 no, unpeeled.

Onion-1 small, chopped

Meat- lamb/mutton with bones- shoulder part- 500 gms, cut into pieces.

Short grain rice/ Arborio/kolam rice- 1 and a half cup

Carrots-1 cup cubed

Potatoes-1 cup cubed

Celery-1 stalk cut

Salt and pepper to taste

All spice powder-1 tsp

Lime juice-2 tsp

Paprika powder/ chili flakes-1 tsp

Cumin powder-1 tsp

Parsley/coriander-2 tbsp. chopped

Raisins- 2 tbsp.

Cashews-2 tbsp.

Method:

1. Pre-prep all the ingredients for the Plov recipe.

2. Heat oil and butter in a pan, add in the garlic pod, onions, saute and add in the par boiled meat pieces.

3. Add in the rice, salt, cumin powder, all spice powder and mix well. Fry the mixture well for a couple of minutes. Add in the stock/water and allow to simmer and cook until the meat and rice are well cooked.

4. When the rice is half way cooked, add in the carrots and potatoes and continue cooking on a low flame. Finally add in the lime juice, coriander/parsley, nuts and mix well. Serve hot.


Reicpe-6] KASHA- SWEET PORRIDGE

Ingredients:

Buckwheat/ cracked wheat/ daliya- 1 cup

Milk-500 ml- 750 ml

Sugar to taste

Honey/ maple syrup-2-3 tbsp.

Cinnamon powder-1/4 tsp

Butter-1-2 tsp

Brown sugar-1-2 tsp

Raisins- 2-3 tbsp.

Walnuts-2-3 tsp

Almonds- 2-3 tsp

Dates- 3-4 sliced

Apricots- 2-3 sliced

 Method:

1. Start up with the cleaning, rinsing and soaking of the cracked wheat/daliya as we usually use in India. Ideally around 2-3 hours of soaking works.

2. Using a thick bottomed saucepan, add butter and saute the drained wheat, add in cinnamon powder and mix.

3. Add in the milk and simmer, allow to cook for 20- 25 mins, stir occasionally. Add more milk as needed.

4. Now add in the sugar, honey/maple syrup etc as per taste and simmer for another 12-15 mins. It will start taking up texture and get thicker as well.

5. Lastly, we add in the assorted nuts as per choice and mix them in. there is also mention of brown sugar as well which adds a nice flavor once added towards the end into the porridge. Garnish with assorted nuts and serve the porridge with choice of cut fruits.

On a Concluding Note:

The Food of Russia though a little different in taste, flavours and varied a little in a number of ways is indeed worth a try! Subtle and simple, robust and enticing, balanced to proportion is what I have experienced it to be in my own exposure with the delicacies from its authentic kitchens. 

While we still need to explore a lot more on this cuisine and try and adapt to its uniqueness and create awareness about it by having a few of the recipes tried out in our kitchens, work on modifying them in such a way that they suit our palates even better. For instance, they have a rice preparation called Plov which simply refers to a pulao concept with veg/non-veg options. This was one of the first recipe I personally found acceptable and versatile as well. Similarly, with a little change and open mind towards welcoming Russian foods onto our tables would truly be worthwhile.

Happy Cooking.


Ingredient Ideology | The Frittata Affair By: Dr. Kaviraj Khialani- Celebrity Master Chef.

The Frittata Affair

Frittata is an egg-based Italian dish similar to an omelette or crust less quiche or scrambled eggs, enriched with additional ingredients such as meats, cheeses, or vegetables. The word frittata is Italian and roughly translates to "fried”. The word “frittata,” which derives from the Italian verb “friggere,” or “to fry,” connotes the simplicity and pleasures the “humble cuisine” that most of us innately love. Egg is the main ingredient. With its high protein and mineral content, easy availability and low cost, eggs are an essential part of the diet almost everywhere in the world. From China and Southeast Asia to India and Iran, up to the Maghreb, Spain, France, and Italy some kind of frittata-like dish is prepared. Surprisingly, in Italy, it’s rare to find a restaurant that offers frittata on its menu; it’s the quintessential home food.

In Italy, foodies and chefs make delicious frittata with leftover pasta (with or without sauce or seasoning). Also, a frittata is a perfect way to entice children into eating vegetables; it can often be a complete meal in itself. It can be tastier hours later, eaten at room temperature, or enjoyed the next day, with a side of arugula. For a quick lunch, frittata can be served along with sautéed greens, salami or various local cheeses. When stored in the fridge, be sure to put your frittata in an airtight plastic container, as water and humidity can ruin the taste. Remember: any greens or veggies you add into the frittata should first be sautéed, in order to eliminate most of their water. As for whether to use butter or extra-virgin olive oil—besides just personal preference, you should also consider which of those tastes marries best with the other ingredients you’re using in the dish.

Basic ingredients used in making Frittata:

  • Use between 6-12 eggs, while usually 6-8 is probably the most common number. Too many eggs can be a bit difficult to handle, especially if the frittata is turned over.

  • If you have a broiler, you won’t have to worry about flipping over your frittata. Just stick the pan under a low flame and remove when the frittata is golden.

  • Use a 10-12” pan with a thick bottom and round borders. A sturdy, non-stick pan makes it easier to detach the frittata without having to add extra butter or oil.

  • Fresh, sautéed or steamed lightly seasoned vegetables: Boiled or roasted potatoes, Fresh greens, Cauliflower, Cabbage Wild mushrooms, Zucchini, Asparagus, Eggplant, Peppers, Artichokes and the list goes on…

  • Good-quality cheeses are ideal for frittata: Melting cheeses—such as provolone, mozzarella and Emmenthal, Parmigiano, grana, and Pecorino Romano, Ricotta—for a lighter taste and texture

  • Cold cuts or air-cured meats: Sausages, Salami, Mortadella, Prosciutto, Ham, Roasted chicken, or turkey are ideal options to go with.


The fundamentals of cooking a good Frittata:

If you’re not using leftovers, prepare the ingredients to be added to your eggs by sautéing or roasting them. Put these aside and allow them to cool. Usually, this mixture is poured into the same pan in which you sautéed your vegetables; add some more olive oil or butter before you cook the frittata. Mix vegetables or ingredients, into your eggs, which should be salted, peppered, and lightly beaten with a fork. Immediately pour the mixture into the hot pan, and reduce the heat to a moderate-to-low flame.

This next phase can be a little challenging, With the help of a spatula and a wooden fork, allow the upper, liquid part of the mixture to slip down below the solidified part so that all parts of the frittata are cooked. Then, using just the spatula, lift the sides of the frittata and check that the bottom is not starting to burn that’s important. As soon as you see that the top is firm, pull the pan away from the flame, half cover it with a lid, and leave it that way for 30 seconds. Shake the pan to be sure that it’s not sticking to the bottom. If it does stick, gently detach it with a spatula. The frittata can now be turned over.

If you want to use the traditional method for flipping the frittata over, you’ll need to be careful and quick. Using a flat dish that is larger than the pan or you can use a flat lid—place one hand firmly on top of the lid and the other hand on the handle, and quickly turn the whole arrangement upside down. Immediately slide the frittata—the golden-brown side will now appear on top back into the pan to finish cooking for the last few minutes. A frittata concept and preparation is great to include in a brunch menu, kids parties, supper meals, it is also a good chance to serve at small get together/parties as a snack as well.

Here are a few of my favorite options of preparing Frittatas:


Recipe-1] HERBED CHEESY TOMATO FRITTATA

Ingredients:

Eggs- 6- 8 no

Oil- 2 tsp

Butter- 1 tsp

Garlic- 4-5 cloves, sliced

Onion- 1 small, sliced

Tomatoes- 2-3 med sized, sliced.

Ham/sausages/ salami- ½ cup diced

For veg options use tofu/ paneer/ mushrooms

Mixed herbs- ½ tsp

Chili flakes- ½ tsp

White wine- 2 tsp

Capsico/ tabasco- 1 tsp

Salt and pepper to taste

Parsley/ coriander/ cilantro- 2 tbsp. chopped

Cheese- ½ cup grated of your choice

To serve with: toasts/ buns/ garlic bread/ lavash etc.

Method:

1. Pre- prep all the ingredients for the frittata recipe as listed.

2. Beat the eggs in a bowl, add a pinch of salt and a few drops of cold water for better aeration and keep ready.

3. Heat 2 tsp oil in a pan and add in the garlic, onions and lightly brown them add in the tomatoes, non veg or veg options and add salt, pepper, herbs, chili flakes as per taste and mix well. Cook for 2 mins.

4. Add in the white wine, parsley/coriander, grated cheese etc and mix and now add in the beaten eggs in the same pan and allow to set and settle, simmer, add in the butter and cover and cook for 3-4 mins.

5. Once the frittata starts cooking it will get firm to touch at the base using a spatula or a flat spoon and it would be now easy to flip sides, turn over and cook on the other side as well on a low flame for 3-4 mins. once the surface starts getting light brown and well cooked, turn off the flame and cut into triangles/wedges and serve hot with toasts/ breads, ketchup etc.


Recipe-2] ZUCCHINI & SPINACH FRITTATA

Ingredients:

Eggs- 6- 8 no

Garlic- 1 tsp chopped

Onion- 1 small chopped

Star anise- 2 no

Shallots- 6- 8 no

Spinach- 1 cup blanched, chopped

Green zucchini- ½ cup sliced

Yellow zucchini- ½ cup sliced

Sliced mushrooms- ½ cup

Boiled sweet corn- ¼ cup

Salt and pepper to taste

Mixed herbs- ½ tsp

Chili flakes- ½ tsp

White sauce- ½ cup

Grated cheese-1/4 cup

Parsley- 2 tbsp. chopped

Oil- 2 tsp

Butter-1 tsp 

Method:

1. Pre-prep all the ingredients for the frittata recipe as listed. Beat the eggs in a bowl, add a pinch of salt and a few drops of cold water for better aeration and keep ready.

2. Heat 2 tsp oil in the pan add in the star anise, garlic, onions and saute for a few seconds add in the sliced zucchini, mushrooms, corn and other veggies. Add in seasonings to taste and cook for 1 min.

3. Add in the white sauce and spinach and cook the veggies for 2-3 mins in the pan. Now add in the beaten eggs and butter and allow to settle and set. Cook it on a low flame, cover it.

4. As the mixture starts cooking in the pan the base will be easy to slide into and will help us to flip it over to cook on the other side as well. Add in the cheese and parsley and herbs of your choice and carefully turn the side and cook the frittata on the other side as well for 3-4 mins.

5. Once it is firm to touch on both sides and well cooked, turn off the flame and cut the frittata into wedges, slices and serve it hot with breads of your choice and ketchup or dips as desired.

Recipe-3] VEGAN VEGGIE FRITTATA 

Ingredients:

Olive oil- 2-3 tsp

Vegan butter- 1 tsp

Garlic- 1 tsp chopped

Onion- 1 small chopped

Tomato -1 small chopped

Green capsicum-1 small chopped

Besan/ chick pea flour- ½ cup

Baking soda/ baking powder-1/4 tsp

Coriander/parsley- 2 tbsp. chopped

Green chili-1 tsp chopped

Salt and pepper to taste

Turmeric powder-1/4 tsp

Red chili powder-1/4 tsp

Water-1/4 cup

Almond/ cashew milk- ¼ cup

Tofu- ½ cup 

Vegan cheese-1/4 cup grated

Vegan paneer-1/4 cup grated

Flax seeds/ pumpkin seeds/ sunflower seeds- 2 tsp anyone

Method:

1. Prepare all the ingredients for the vegan frittata recipe as listed above.

2. The vegan version can use various products which are prepared and available to suit the taste and flavors from vegan cheese/ paneer/ vegan sausages etc.

3. Using the jar of a mixer grinder/ food processor combine together the tofu, almond milk/ cashew milk, chickpea flour, baking soda, turmeric and little water. Keep aside.

4. Heat oil in a pan saute the garlic, onions, tomatoes, capsicums etc for a couple of mins and then add in the seasonings, flavorings, spices as per taste and mix well, form into a nice dropping textured mixture.

5. Pour in the mixture as blended above and allow to set, settle, cover and cook for 2-3 mins. as the binding effects start happening the frittata will be easy to flip side and cook on the other side, add in the vegan cheese and seeds as well before turning the side over.

6. The mixture will take around 4-5 mins to cook on both sides, ensure the even cooking of the frittata and then turn off the flame. Cut it into slices/ wedges and arrange on a serving plate/ platter and enjoy it with assorted vegan dips/ sauces.


Recipe-4] BEAN AND PULSE FRITTATA

Ingredients:

Eggs- 6- 8 no

Oil-2 tsp

Butter- 1 tsp

Garlic-1 tsp chopped

Onion-1 small chopped

Green chili- 1 tsp chopped

Cumin seeds- ¼ tsp

Baked beans- ½ cup tinned/canned- drained

Boiled kidney beans- ½ cup, lightly crushed

Sprouts- ½ cup

Capsicum- ½ no chopped

Garam masala powder-1/4 tsp

Tomato- 1 small chopped

Salt and pepper to taste

Mixed herbs- ½ tsp

Chili flakes-1/2 tsp

Coriander/ parsley-2 tbsp. chopped

Cheese- ½ cup grated

Milk- 2-3 tbsp.

Method:

1. Pre-prep all the ingredients for the frittata recipe as listed above.

2. In a bowl, beat up the eggs with a pinch of salt and a few drops of cold water and keep aside.

3. Heat 2 tsp oil in a pan add in the cumin seeds, garlic, onions, chilies and saute for 1 minute. Add in the capsicums, tomatoes, sprouts, pulse and beans and mix well.

4. Add in the seasonings, herbs, spices and mix, cook for 2-3 mins, add in the eggs, milk and cheese and allow to set, settle, cover and cook for 3-4 mins or until well set at the base.

5. Once done on the lower side, carefully turn it over and allow to cook on the other side for 3-4 mins. cut the frittata into wedges, slices and serve hot with dips and sauces.

Recipe- 5] CHEFS SPECIAL FRITTATA

Ingredients:

Eggs- 6- 8 no

Oil- 2 tsp 

Butter- 1 tsp

Garlic- 1 tsp chopped

Onion- 1 small chopped

Green chilies- 1 tsp chopped

Tomatoes- 2 small chopped

Chicken sausages- 2-3 no

Boiled sliced potatoes- 1 cup

Red capsicum-1/4 cup shredded

Green capsicum ¼ cup shredded

Salt and pepper to taste

Mixed herbs- ½ tsp

Chili flakes-1/2 tsp

Red chili sauce- 1-2 tsp

Cheese-1/2 cup grated

Cream-2 -3 tsp

Parsley/coriander/cilantro- 2 tbsp. chopped

Method:

1. Pre-prep all the ingredients for the frittata recipe as listed above.

2. In a bowl, beat up the eggs with a pinch of salt and a few drops of cold water and keep aside.

3. Heat 2 tsp oil in a pan and saute the garlic, onions, chilies for a few seconds. Add in the tomatoes, capsicums, sausages and saute for 1 min.

4. Add in salt, pepper, herbs, chili flakes, red chili sauce, boiled sliced potatoes and allow to cook for 2-3 mins. now add in eggs, cream, cheese, parsley/coriander and allow to set, settle and cook for 3-4 mins.

5. Once the frittata is cooked on both sides and firm to touch, turn off the flame and cut into slices/ wedges and arrange on a serving plate/platter and serve with dips/ sauces.

Recipe-6] FRITTATA ITALIANO

Ingredients

Eggs- 6-8 no

Oil- 2 tsp

Butter-1 tsp

Garlic- 1 tsp chopped

Shallots- 10-12 no, cut 1 x 2

Refried beans- ½ cup or use rajma

Tuna fish – ½ cup tinned, drained

Tomatoes- 1 cup sliced

Green peas- ½ cup boiled

Potatoes- 1 cup sliced, boiled

Green/ yellow zucchini- 1 cup sliced

Salt and pepper to taste

Mixed herbs- ½ tsp

Chili flakes-1/2 tsp

Cream- 2 tbsp.

Cheese- ½ cup grated

Parsley/ coriander- 2 tbsp. chopped

Boiled macaroni pasta- ½ cup

Olives- 4-5 no 

Jalapenos- 2-3 tsp sliced

Tomato salsa sauce/ ketchup- 2-3 tsp

Bread crumbs- ¼ cup

Method:

1. Pre-prep all the ingredients for the frittata as listed above.

2. Beat the eggs in a bowl with a pinch of salt and a few drops of cold water and keep aside.

3. Heat 2 tsp of oil in a pan and add in the garlic, shallots, tomatoes and green peas, saute for 30 seconds. Add in the beans, seasonings, herbs, spices as per taste and mix.

4. Add in boiled pasta, refried beans, salsa or tomato sauce and mix, cook for 2-3 mins adjust the texture, add in a little cream, cheese, parsley, jalapenos etc and mix.

5. Now add in the beaten eggs and allow to set, settle, cover, and cook for 3-4 mins and then check if it is easy to turn sides. If yes, go ahead and flip it, cook for 4-5 mins.

6. Once the frittata is well done and cooked, firm to touch it will be advisable to cut into triangles/ wedges/slices and serve hot. Accompaniments can be dips and sauces as per taste.


Ingredient Ideology | Delectable Savory Filipino Style Stuffed Steamed Buns By Dr.Kaviraj Khialani-Celebrity Master Chef


Delectable Savory Filipino Style Stuffed Steamed Buns

While there are a number of stories associated with the origin of this delicious and delicate all-day Filipino favorite snacky bite, it is believed that one of the military strategists in the olden times linked to the Philippines invented this food which is to be offered as a sacrifice to the gods for healing. They are buns shaped like human heads and are made of flour stuffed with meat filling. Siopao literally meaning hot bun or steamed bun is a Filipino version of the Cantonese steamed bread buns. It is a popular snack sold mostly in Chinese restaurants or by sidewalk vendors in the Philippines.

 Siopao is a steamed rice flour bun with a meat filling that is a very popular Filipino afternoon snack. It is usually eaten with a sweet-spicy sauce and goes well with a steaming bowl of beef noodles. It is the larger version of the Cantonese dumpling filled with barbecue pork, which is either steamed or baked. Filipinos fill their siopao with ground beef of pork and shaped like meatballs and cooked in soy sauce and seasonings, but it can also be made with shrimp or shredded chicken with salted duck eggs.

Siopao and its varieties can be found across Asia. It is called Salapao in Thailand, and Pau in Hong Kong. The Chinese version of siopao is baozi filled with vegetables or meat. Baozi was first made during the Three Kingdoms period in China between 220 and 256 A.D. This food was originally called mantou or flour-head. While it is still called mantou in some parts of Southern China, it is now mostly called Baozi. Legend has it that, this food was invented in the shape of a human head and made as an offering to the god.

The basic Baozi idea was brought by Ma Mon Luk, a Chinese immigrant to the Philippines. He began selling Baozi in the streets and gave out door-to-door samples as well as free food for disaster victims. Eventually, he got a small restaurant that became very popular, and this food became part of the Filipino culture. The name siopao replaced baozi. They are still popular in both Chinese and Filipino restaurants and are commonly part of dim sum cuisine.

Bola-bola and Asado are the two most popular flavors in the Philippines. Bola-bola siopao is made with finely ground pork and Chinese sausage. Asado siopao is made with diced beef or pork. It is the most popular variety found in restaurants and street vendors. Part of its appeal is the convenience of eating it in one hand.

You can enjoy this tasty bun for breakfast, lunch, evening snack, supper or dinner. Home-made Siopao is a steamed, meat-filled bun that is a part of traditional Filipino cuisine. It is very similar to, and is probably derived from, smaller Chinese dumplings known as Baozi.  

While the basic concept refers it to as a meat-filled bun these are fairly common in many Asian cuisines, in part perhaps because of their versatility and ease of preparation. They’re often a good way to use leftover meat, and the portability of the end product is often really valuable for people with long commutes or who want a quick meal or snack on the go. The buns are always steamed, too, which usually also means that they’re very easy to cook. They’re commonly paired with a range of dipping sauces to go alongside.


Here are a few of my Twist of Taste versions with this easy-to-make steamed delight called SIOPAO!


Recipe-1] HONEYED CHICKEN SIOPAO

Ingredients:

For the Siopao dough:

All-Purpose flour/Maida/ Refined flour - 2 cups

Salt-1/2 tsp

fresh yeast- 3 tsp

sugar- 1 and a half tsp

warm water-1 cup / as needed to make the dough

butter-2 tsp

For the Honeyed Chicken stuffing:

boneless chicken breast- 1 cup cut into ½ inch cubes

garlic-1 tsp chopped

onion-1 small chopped

salt to taste

pepper powder to taste

oil-1 tsp

soy sauce-2 tsp

Tabasco sauce-1/2 tsp

water-1/2 cup

vinegar-1 tsp

honey-2 tsp

corn starch solution- 2 -3 tsp 

whisky/ brandy-2 tsp optional.

Method:

1. Prepare all the ingredients for the Siopao as listed.

2. Start with the stuffing, heat oil and add in the garlic, onions and saute for a few seconds, add in the chicken pieces and all other ingredients as listed and add little water, reduce the flame and allow to cook for 12-15 mins.

3. Add corn starch solution and thicken up the chicken mixture and make it almost like a semi-dry textured stuffing, allow to cool.

4. Now make the well in the center of the flour, add in yeast and sugar and a little warm water and cover and let the yeast activate for a few mins.

5. Once there are bubbles visible on the surface we can continue with the dough by adding in the butter, salt, little warm water and making a nice soft, pliable and firm to touch the dough.

6. Cover with a damp duster and keep in a cool, warm place for 20 mins, open it and punch it back, release the excess air from the dough, again shape it into a round, and cover and rest for 20 mins.

7. Now again punch back the dough, using the dough cutter divide the dough into 10-12 portions, flatten each dough portion and place 2 tsp of the chicken mixture and close it well, seal up the edges, shape it like a round bun and place it back for fermenting.

8. Heat up water in a steamer and place the siopao for steaming on a high up flame for around 12-15 mins, open carefully see them rise in size and carefully take them out of the steamer, serve hot with dipping sauces.


Recipe-2] CHINTHAI SIOPAO

Ingredients

For the Siopao dough:

All Purpose flour/Maida/ Refined flour - 2 cups

Salt-1/2 tsp

fresh yeast- 3 tsp

sugar- 1 and a half tsp

warm water-1 cup / as needed to make the dough

butter-2 tsp

For the ChinThai Siopao stuffing:

Boiled chicken - 1 cup cut into fine dices/cubes

garlic-1 tsp chopped

onion-1 small chopped

salt to taste

pepper powder to taste

oil-1 tsp

soy sauce-2 tsp

thai red curry paste-1 tsp

coconut milk thick-1/2 cup

thai sweet chili sauce -1 tsp

water-2-3 tbsp.

vinegar-1 tsp

tender coconut flesh -2 tbsp. chopped

corn starch solution- 2 -3 tsp 

spring onion greens-1/4 cup chopped

sprouts-1/2 cup

Method:

1. Prepare all the ingredients for the Siopao as listed.

2. Start with the stuffing, heat oil and add in the garlic, onions and saute for a few seconds, add in the chicken pieces, sprouts and all other ingredients as listed and add little water, coconut cream/milk reduce the flame and allow to cook for 12-15 mins.

3. Add corn starch solution and thicken up the chicken mixture and make it almost like a semi-dry textured stuffing, allow to cool add in the greens and tender coconut.

4. Now make the well in the center of the flour, add in yeast and sugar and a little warm water and cover and let the yeast activate for a few mins.

5. Once there are bubbles visible on the surface we can continue with the dough by adding in the butter, salt, little warm water and make a nice soft, pliable and firm to touch dough.

6. Cover with a damp duster and keep in a cool, warm place for 20 mins, open it and punch it back, release the excess air from the dough, again shape it into a round and cover and rest for 20 mins.

7. Now again punch back the dough, using the dough cutter divide the dough into 10-12 portions, flatten each dough portion and place 2 tsp of the chicken mixture and close it well, seal up the edges, shape it like a round bun and place it back for fermenting.

8. Heat up water in a steamer and place the siopao for steaming on a high up flame for around 12-15 mins, open carefully see them rise in size and carefully take them out of the steamer, serve hot with dipping sauces.


Recipe-3] PALAK PANEER BHURJI SIOPAO

Ingredients:

For the Siopao dough:

All Purpose flour/Maida/ Refined flour - 2 cups

Salt-1/2 tsp

fresh yeast- 3 tsp

sugar- 1 and a half tsp

warm water-1 cup / as needed to make the dough

butter-2 tsp

For the Palak Paneer Siopao stuffing:

oil-2 tsp

butter-1 tsp

garlic-1 tsp chopped

ginger-1 tsp chopped

green chili-1 tsp chopped

onion-1/2 chopped

spinach leaves-1 cup roughly cut

paneer-1 cup grated

salt and pepper to taste

soya sauce-1 tsp

red chili sauce-1 tsp

tomato-1 small chopped

garam masala powder-1/4 tsp

tomato ketchup-2-3 tsp

cheese- 2-3 tsp grated

salt and pepper to taste

coriander leaves-2 tsp chopped

Method:

1. Prepare all the ingredients for the Siopao as listed.

2. Start with the stuffing, heat oil, butter and add in the garlic, green chilies, onions and saute for a few seconds, add in the spinach and paneer, salt and all powdered spices, tomatoes, and saute, add in all the spices, salt to taste, tomato ketchup and add little water, reduce the flame and allow to cook for 4-6 mins. Finally add in coriander, cheese and turn off the flame, cool the stuffing.

3. Now make the well in the center of the flour, add in yeast and sugar and a little warm water and cover and let the yeast activate for a few mins.

5. Once there are bubbles visible on the surface we can continue with the dough by adding in the butter, salt, little warm water and make a nice soft, pliable and firm to touch dough.

6. Cover with a damp duster and keep in a cool, warm place for 20 mins, open it and punch it back, release the excess air from the dough, again shape it into a round and cover and rest for 20 mins.

7. Now again punch back the dough, using the dough cutter divide the dough into 10-12 portions, flatten each dough portion and place 2 tsp of the palak and paneer bhurji mixture and close it well, seal up the edges, shape it like a round bun and place it back for fermenting.

8. Heat up water in a steamer and place the siopao for steaming on a high up flame for around 12-15 mins, open carefully see them rise in size and carefully take them out of the steamer, serve hot with dipping sauces.


Recipe-4] SIOPAO AL FRESCO

Ingredients

For the Siopao dough:

All Purpose flour/Maida/ Refined flour - 2 cups

Salt-1/2 tsp

fresh yeast- 3 tsp

sugar- 1 and a half tsp

warm water-1 cup / as needed to make the dough

butter-2 tsp

For the Siopao Al Fresco stuffing:

Olive oil-2 tsp

butter-1 tsp

garlic-1 tsp chopped

onion-1/2 chopped

tofu-1/2 cup cubed

soya granules-1/2 cup soaked

green peas-1/4 cup boiled.

salt and pepper to taste

soya sauce-1 tsp

red chili sauce-1 tsp

tomato-1 small chopped

garam masala powder-1/4 tsp

tomato ketchup-2-3 tsp

cheese- 2-3 tsp grated

basil leaves-4-5 no

chili flakes-1/2 tsp


Method:

1. Prepare all the ingredients for the Siopao as listed.

2. Start with the stuffing, heat olive oil, butter and add in the garlic, onions and saute for a few seconds, add in the peas, tofu and soya granules, salt and all powdered spices, tomatoes, and saute, add in all the spices, salt to taste, tomato ketchup and add little water, reduce the flame and allow to cook for 4-6 mins. Finally add in chili flakes, basil leaves, cheese and turn off the flame, cool the stuffing.

3. Now make the well in the center of the flour, add in yeast and sugar and a little warm water and cover and let the yeast activate for a few mins.

5. Once there are bubbles visible on the surface we can continue with the dough by adding in the butter, salt, little warm water and make a nice soft, pliable and firm to touch dough.

6. Cover with a damp duster and keep in a cool, warm place for 20 mins, open it and punch it back, release the excess air from the dough, again shape it into a round and cover and rest for 20 mins.

7. Now again punch back the dough, using the dough cutter divide the dough into 10-12 portions, flatten each dough portion and place 2 tsp of the al fresco soya and tofu mixture and close it well, seal up the edges, shape it like a round bun and place it back for fermenting.

8. Heat up water in a steamer and place the siopao for steaming on a high up flame for around 12-15 mins, open carefully see them rise in size and carefully take them out of the steamer, serve hot with dipping sauces.


Recipe-5] SIOPAO BOLA BOLA

Ingredients:

For the Siopao dough:

All Purpose flour/Maida/ Refined flour - 2 cups

Salt-1/2 tsp

fresh yeast- 3 tsp

sugar- 1 and a half tsp

warm water-1 cup / as needed to make the dough

butter-2 tsp

For the Bola Bola stuffing:

Chicken mince-250 gms

Chicken sausage- 2 pieces chopped.

Salt and pepper to taste

Chopped garlic-1 tsp

Chopped onion-1 no

Celery-1 stalk chopped

Soy sauce-2 tsp

Honey-1 tsp

Sugar-1 pinch

White vinegar-1-2 tsp

Egg-1 no

Cornstarch-1-2 tsp

Method:

1. Prepare all the ingredients for the Siopao as listed.

2. Bola Bola in this context refers to the mince being used converted into small meat balls or kofta concepts, poached/steamed and then stuffed into the bun dough and steamed together and served.

3. In a food processor jar combine together the ingredients as listed above for the Bola Bola and churn them up into a nice mixture, remove into a bowl, pick them with a teaspoon/ tablespoon drop small roundish portions into the simmering water and poach for 3-5 mins or steam them for 4-7 mins, keep aside.

4. Now make the well in the center of the flour, add in yeast and sugar and a little warm water and cover and let the yeast activate for a few mins.

5. Once there are bubbles visible on the surface we can continue with the dough by adding in the butter, salt, little warm water and make a nice soft, pliable and firm to touch dough.

6. Cover with a damp duster and keep in a cool, warm place for 20 mins, open it and punch it back, release the excess air from the dough, again shape it into a round and cover and rest for 20 mins.

7. Now again punch back the dough, using the dough cutter divide the dough into 10-12 portions, flatten each dough portion and place couple of the prepared bola bola inside the flattened dough and close it well, seal up the edges, shape it like a round bun and place it back for fermenting.

8. Heat up water in a steamer and place the siopao for steaming on a high up flame for around 12-15 mins, open carefully see them rise in size and carefully take them out of the steamer, serve hot with dipping sauces.


Recipe- 6] MUSHROOM PEPPER SIOPAO

Ingredients

For the Siopao dough:

All Purpose flour/Maida/ Refined flour - 2 cups

Salt-1/2 tsp

fresh yeast- 3 tsp

sugar- 1 and a half tsp

warm water-1 cup / as needed to make the dough

butter-2 tsp

For the Mushroom Pepper Stuffing:

Fresh button mushrooms-8-10 sliced

Green capsicum-1 no chopped

Oil-1tsp

Butter-1 tsp

Garlic-1 tsp chopped

Onion-1 small chopped

Celery-1 stalk chopped

Salt and pepper to taste

Soya sauce-2 tsp

Red chili sauce-2 tsp

Mixed herbs-1/2 tsp

Chili flakes-1/2 tsp

Boiled mashed potato-1/4 cup

Cheese-2-3 tbsp. grated

Corn starch solution-2-3 tsp

Parsley/ spring onion-2 tsp chopped

Method:

1. Prepare all the ingredients for the Siopao as listed.

2. Start with the stuffing, heat oil and butter and add in the garlic, onions, celery and saute for a few seconds, add in the mushrooms, capsicums, salt, pepper, herbs, chili flakes and saute for a couple of minutes, add in the sauces as listed and reduce the flame and allow to cook for 4-6 mins. Finally add in little corn starch solution thicken the mixture a little, add in the mashed potato, cheese greens and mix well, keep aside.

3. Now make the well in the center of the flour, add in yeast and sugar and a little warm water and cover and let the yeast activate for a few mins.

5. Once there are bubbles visible on the surface we can continue with the dough by adding in the butter, salt, little warm water and make a nice soft, pliable and firm to touch dough.

6. Cover with a damp duster and keep in a cool, warm place for 20 mins, open it and punch it back, release the excess air from the dough, again shape it into a round and cover and rest for 20 mins.

7. Now again punch back the dough, using the dough cutter divide the dough into 10-12 portions, flatten each dough portion and place 2 tsp of the mushroom pepper filling inside the flattened dough and close it well, seal up the edges, shape it like a round bun and place it back for fermenting.

8. Heat up water in a steamer and place the siopao for steaming on a high up flame for around 12-15 mins, open carefully see them rise in size and carefully take them out of the steamer, serve hot with dipping sauces.


Ingredient Ideology | Feta To Feast On By : Dr. Kaviraj Khialani- Celebrity Master Chef.

Feta To Feast On 

Feta is a Greek brined curd white cheese made from sheep's milk or from a mixture of sheep and goat's milk. It is soft, with small or no holes, a compact touch, few cuts, and no skin. It is formed into large blocks, and aged in brine. Its flavor is tangy and salty, ranging from mild to sharp. It is a crumbly aged cheese, with small or no holes, a compact touch, few cuts, and no skin. Feta is commonly produced in blocks, and has a slightly grainy texture in comparison to other cheeses. Its flavor is tangy and salty, ranging from mild to sharp. The color is snow white on the inside and on the surface.

Feta is a brined, white cheese with a soft and creamy texture. Compared to other cheeses, it's low in calories and fat. It also contains a high amount of B vitamins, phosphorus and calcium, which can benefit bone health. Additionally, feta contains beneficial bacteria and fatty acids. While feta cheese provides you with an excellent source of nutrients like calcium and protein, it also contains high amounts of sodium and saturated fat. Feta is lower in fat than many other cheeses, however, and is considered a reasonable option to eat in moderation.
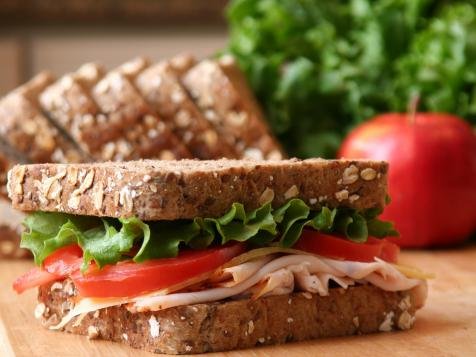
The Greek word feta comes from the Italian fetta 'slice', which in turn is derived from the Latin 'morsel, piece'. The word feta became widespread as a name for the cheese only in the 19th century, probably referring to the cheese being cut to pack it in barrels. Traditional Greek feta cheese is made from sheep or goat milk. Feta cheese has few calories than any other cheese, so it a good choice for weight loss. 28 grams of feta cheese contains 75 calories. However, feta cheese is high in sodium, so it is advised to drink plenty of water if you have it. It was originally produced using sheep's milk, although now most commercial makers of feta use cow's milk. Feta is stored and cultured in whey brine, thus giving the cheese its distinctive salty taste.

 If you find the salty brine taste of feta cheese too strong, it is possible to lessen or remove this taste. With 7 grams of fat and only 3 grams of carbs, feta can be eaten by those following the keto diet. Feta's crumbly texture makes it easy to sprinkle on top of salads or soups. True feta fanatics often top it with olive oil and eat it as a standalone item or side dish. Crumbled feta cheese tends to last up to the expiry date stated on the label if it is left unopened. However, as soon as you open your crumbled feta cheese, it will last only about five days if kept in the fridge. If you buy your feta cheese in a wrapped block form, it will last about a month if left unopened.

 5 Health Benefits of Feta Cheese:

  • Helps treat Anaemia- associated with low levels of iron, folic acid, Vitamin B-12, anaemia can be naturally treated by consuming feta In a wise and appropriate manner.

  • Good for eyes and prevents eye diseases- various studies as we know have suggested that people having healthy diets with good quantity of Vitamin B-2 including feta cheese once in a while have lesser chances of having eye issues.

  • Prevents Headache and Migraine issues- since feta has a good balance of nutrients with a sound quantity of vitamin B-2 it has been considered good to consume to prevent issues related to headaches etc.

  • Immunity-Boosting Cheese-feta cheese is considered good in a number of ways due to its beneficial properties and offerings towards us which help us to maintain our health in a better way and boosts immunity as well.

  • Good for Bones and Gut health – Feta cheese is regarded as a positive source of supporting the health of our bones and gut. It also offers probiotics or bacteria which line our gut as well.


 A Few Culinary Uses of Feta Cheese:

  • Salads and Appetizers: Feta is a good choice to work with when it comes to tossing up salads be it veg or non-veg, be it a greek salad or a quick toss chicken salad. The texture and taste of feta blend well with veggies like cucumber, onions, tomatoes, lettuce, cherry tomatoes, olives, roast of grilled chicken/ meats, cold cuts/charcuterie products as well like ham, sausages, salami, bacon, etc. be it a la carte, plated service, buffets or set meals feta has somehow found its place in a number of ways to impress the audience and food connoisseurs.

  • Fillings and Stuffing’s: making a choice for a rolled up cigar concept or a stuffing with spinach and mushrooms with a little feta gives a good mouthfeel and richness attached into a chicken breast or even a fillet of meat. What matters of course is the correct temperature and timing of cooking when it comes to involving feta cheese. Over heating or too much heat as well is not really recommended since it dis-integrates the elements of the cheese and visibility goes down as well when it comes to eye appeal in the finished product.

  • Ideal to add into Dips: Feta cheese is not only good to add into various other category of dishes on the menu but also when it comes to dipping delicacies to along with crunchy cuts of veggies like carrot sticks, cucumber sticks, white or red radish, olives, lavash, cheese straws, soup sticks, flaky pastry preparations etc. a good dip not only offers a creamy texture but also a punch and bite when it comes to looking for an ideal one and feta adds it just right in the correct proportion.


Here are a few of my all-time favorite recipes using Feta Cheese:


Recipe- 1] CRUNCHY VEG & FETA DELIGHT SALAD

Ingredients:

For the base of the salad:

Iceberg/ Lollorosso/ romaine/ cos lettuce- 1 small bunch

For the body of the salad:

Feta cheese- ¼ cup cubed.

Cucumber-1 med sized, cut into cubes

Tomato- 1 med sized, cut into cubes

Green capsicum-1/2 no, cut into cubes

Red capsicum-1/2 no, cut into cubes

Yellow capsicum-1/2 no, cut into cubes

Black olives- 3-4 no

Green olives-3-4 no

Capers/jalapenos -2-3 no

For non-veg options:

Roast/ grilled chicken/ meat- 1 cup sliced.

Boiled eggs- 2 no cubed.

Anchovy fish/ tuna fish- ½ cup tinned

Luncheon meat/ canned processed meat- ¼ cup cubes

Poached fish/ shrimps etc- 1 cup 

For the dressing of the salad:

Olive oil- ¼ cup

Mustard paste- 1 tsp

Mixed herbs-1/2 tsp

Chili flakes-1/2 tsp

Lime juice/ white vinegar/ balsamic vinegar- 2-3 tsp

Sugar-1/4 tsp

Flax seeds/ sunflower seeds/ chia seeds- 1-2 tsp

Parsley- 2 tsp chopped

Raisins- 2-3 tsp chopped

Almond flakes- 2 tsp

For the garnish of the salad:

Micro- greens- ½ cup

Fresh assorted herbs like basil/ thyme/ rosemary- a few sprigs

Cherry tomatoes- 3-4 no cut 1 x 2

Crushed black pepper- ¼ tsp

Feta cheese- 100 gms, crumbled.


Method:

1. Pre-prep all the ingredients for the crunchy veg and feta salad.

2. Place the lettuce leaves in chilled water to retain their freshness and texture.

3. Mix up all the ingredients for the dressing in a jar or small bottle and shake it well/ mix well if using a mixing bowl. I usually prepare these kind of dressings ahead of time and keep them refrigerated for a week or so.

4. Just before serving the salad, we need to have the salad plate ready and a mixing bowl to toss up the body of the salad with the dressing.

5. Drain up the lettuce leaves and pat dry them, place them on the salad plate, top it up with the prepared salad, garnish appropriately and serve immediately.


Recipe- 2] HERBED SPINACH WITH FUNGI AND FETA CHEESE ROLLS

Ingredients:

For the dough/ wrapper of the rolls:

Maida- 1 cup

Salt-1/4 tsp

Oil-2 tsp

Pepper powder-1 pinch

Egg yolk-1 no, optional

Warm water as needed.

We can ideally also use readymade wrappers/ spring roll covers which are readily available as well.

For the Feta and Fungi filling:

Fresh button mushrooms- 100 gms, thinly sliced

Spinach leaves- 1 bunch, cleaned- blanched, fine chopped

Pine nuts/ roasted crushed peanuts- 2-3 tbsp.

Feta cheese- 100 gms, crumbled

Olive oil- 2 tsp

Garlic- 1 tsp chopped

Onion-1/2 chopped

Salt and pepper to taste

Mixed herbs-1/2 tsp

Chili flakes-1/2 tsp

Maida-1 tsp

Maida- water paste for sealing the rolls

Oil- to deep fry the rolls.

Method: 

1. Decide between using ready to use wrappers or prepare the dough using maida and keep it aside to rest for 20 mins, divide into 12-14 equal portions and roll them out very thin using little dry maida.

2. Prepare the ingredients for the filling, heat olive oil and saute onions, garlic, add in the mushrooms, spinach, nuts, seasonings, herbs, chili flakes and cook on a medium flame for 3-4 mins, add in the maida and mix well.

3. Once the mixture starts cooking and excess moisture is absorbed and or evaporated, turn off the flame and then add in the feta cheese, mix lightly and keep aside to cool.

4. Place the feta filling on each rolled out portion and apply little sealing liquid on the sides, roll it up like spring rolls and deep fry in medium hot oil and fry until lightly golden browned. Drain off excess oil and serve hot with dipping sauces.


Recipe- 3] INDO FUSION MINCED MEAT WITH FETA

Ingredients:

Oil-2 tsp

Butter-2 tsp

Bayleaf- 1 no

Peppercorns- 3-4 no

Garlic- 1 tsp

Onion-1 small chopped

Tomato-1 small chopped

Mincemeat/ mutton keema- 250 gms

Green peas-1 cup par boiled.

Salt and pepper to taste

Mixed herbs-1/2 tsp

Chili flakes- ½ tsp

Garam masala powder-1/4 tsp

Tomato puree-1/2 cup

Chili sauce- 2 tsp

Water-1/2 cup

Tomato ketchup- 2-3 tbsp.

Boiled macaroni pasta- 1 cup

Boiled mashed potatoes- 3-4 med-sized.

White sauce- 1 and a half cup

Fresh cream- 2-3 tbsp.

Grated cheese- ½ cup

Black olives- 6- 8 no

Green olives- 5-6 no

Method:

1. Prepare all the ingredients for the baked dish recipe.

2. Heat oil and butter in a pan and add in the whole spices and onions, saute them for a couple of minutes, add in garlic, and mincemeat.

3. Saute the keema on a medium-high flame for few mins, add in the masala and herbs, chili flakes, salt and pepper to taste.

4. Add in tomatoes, puree and bhunao the keema for 4-5 mins to get over with the raw ness in the mincemeat.

5. Add in little water and allow the mincemeat to cook on a low flame for 20-25 mins, add in the green peas and mix, cook for 10 mins, finally add in the chili sauce, tomato ketchup and mix well.

6. Now grease a baking dish and pre-heat oven to 180 deg celsius and start layering the dish starting with keema mix, white sauce, macaroni pasta, cheese and then mashed potatoes, followed by keema again, top it up with cheese on the top and drizzle little cream as well. Place the dish for baking for around 15- 18 mins, and remove. Finally garnish it with the olives and fresh herbs and serve it hot with garlic bread, assorted bread rolls etc.

Recipe-4] MARINATED TOMATO – OLIVE & FETA BITES

Ingredients:

For the base of the canapes:

Sliced french bread/ baguette- 10-12 pieces

Brown bread/ white bread- 4-5 slices, cut into shapes

Olive oil- 2-3 tbsp. to drizzle and toast the base

For the topping:

Feta cheese- ½ cup crumbled

Shallots- 10-12 no sliced

Olive oil- 2-3 tbsp.

Garlic- 2 tsp chopped

Tomato- ½ cup chopped

Salt and pepper to taste

Red capsicums-1/2 no fine chopped

Mixed herbs- ½ tsp 

Balsamic vinegar- 2 tsp

Chili flakes-1/2 tsp

Tomato ketchup- 2-3 tsp

Walnuts- 2-3 tsp chopped

Fresh basil leaves- 8-10 no

White wine- 2-3 tbsp.

Olives- 3-4 no sliced, black or green


Method:

1. Pre-prep all the ingredients for the quick fix snack bites.

2. Apply or brush a little olive oil on the base or choice of bread being used, pre-heat the oven to 180 degrees celsius and toast it for 3-4 mins, remove and keep aside.

3. Heat oil in a pan, saute the garlic, shallots for a couple of mins, add in the capsicums and seasonings, herbs, chili flakes, tomatoes, wine and cook for 4-6 mins.

4. Turn off the flame add in the balsamic vinegar, and all other ingredients including feta and nuts. Mix lightly and keep aside.

5. Just before serving we need to assemble the canape bites on the toasted bread pieces by spooning over the mixture and garnish it appropriately with fresh herbs, micro- greens, olives etc 

Recipe- 5] AIOLI AND FETA STUFFED CHICKEN BREAST

Ingredients:

For the chicken breast marination:

Boneless chicken breasts- 400 gms, without bones and skin.

Oil- 2-3 tbsp.

Salt and pepper to taste

Fresh herbs- ½ tsp

Garlic- 1 tsp chopped

Soya sauce- 2 tsp

Red chili sauce- 2 tsp

White wine/ vinegar- 2-3 tsp

Roasted crushed fennel seeds- 1-2 tsp

For the stuffing of the chicken breasts:

Feta cheese- ½ cup crumbled

Assorted nuts- 2-3 tbsp. chopped

Sliced mushrooms-1 cup

Garlic-1 tsp chopped

Onion- 1 small chopped

Parsley-2 tbsp. chopped

Breadcrumbs- ½ cup

Melted butter-1/2 cup

Grated processed cheese-2-3 tbsp.

Salt and pepper to taste

To serve the chicken breasts:

Sliced tomatoes-1/2 cup

Onion rings- ½ cup

Assorted lettuce leaves- 1 cup

Sliced lime- 5-6 no

Olives/jalapenos/pickled veggies- as desired.


Method:

1. Prepare all the components and ingredients for the chicken recipe.

2. Clean, wash and pat dry the chicken breasts, apply the marination and mix well and keep aside for 12- 15 mins.

3. To prepare the stuffing for the chicken breasts, warm up the butter in a pan add in the garlic, onions, saute for a few mins, add in the mushrooms, salt, pepper, herbs, chili flakes, breadcrumbs and mix well.

4. Cook the mixture for a couple of mins and turn off the flame, cool for 10 mins and then add in the parsley, feta and processed cheese, mix.

5. Stuff the chicken breasts, close the edges beating it a little with the back of a knife and place them on a roasting tray, cook it in the oven for 15- 18 mins at 180 degrees celsius, cover with aluminium foil and cook if the heat gets too high. Using a knife cut and check once chicken is cooked. Remove and serve hot. Garnish the plate with fresh crispy cuts of veggies and enjoy the chicken with a splash of fresh lime juice.


Recipe- 6] VEGGIE PAN PASTA WITH FETA 

Ingredients:

For the Pasta:

Spaghetti pasta/your choice- 150 gms, boiled

Olive oil- 2-3 tbsp.

Garlic- 2 tsp chopped

Onion-1 small chopped

Red capsicum- ½ cut into strips

Yellow capsicums-1/2 cut into strips

Green capsicums- ½ cut into strips

Salt to taste

Crushed black pepper to taste

Garam masala powder-1/4 tsp

Fresh basil- 6-8 leaves

Chili flakes-1/2 tsp

Tomato sauce- 1 cup

Water/stock-1/2 cup

Red chili sauce/tabasco-1-2 tsp

Peanut butter-2 tsp

Tomato ketchup- 2-3 tbsp.

Fresh cream – ½ cup

Feta cheese- 150 gms, crumbled

Breadcrumbs-1/2 cup

For the assorted choice of veggies:

Roasted/ fried cubes of eggplant

Blanched cubes of zucchini- green/yellow

Blanched broccoli florets

Blanched asparagus spears

Blanched baby carrots

Artichoke/ bamboo shoots/ water chestnuts

To serve with:

Assorted bread rolls

Herbed bread

Focaccia bread

Whole wheat and flaxseed rolls

Method:

1. Prepare all the ingredients for the yummy pasta recipe.

2. Boil water add in a little oil and salt and boil the pasta of your choice until just firm to the bite/ al dente stage, drain the water, refresh the pasta and keep aside.

3. To prepare the pasta in the pan, heat oil and add in the garlic, onions and saute for a few seconds. Add in the choice of veggies as desired from the list and add seasonings, herbs, chili flakes, and little water/stock and allow the veggies to get cooked.

4. Add in the sauces, add in the cooked pasta and peppers, give it all a nice mix, simmer the pan and cook for 3-4 mins. Add in a little fresh cream, herbs, peanut butter and mix well, cook for another 2 mins, turn off the flame.

5. Finally portion the feta crumbles on the top just before serving and add a touch of finesse with olives, micro-greens, herbs of your choice, etc. serve hot.


Ingredient Ideology | Twist Of Taste From MexicoBy : Dr. Kaviraj Khialani- Celebrity Master Chef.


Twist Of Taste From Mexico

Colorful & Vibrant mexican delicacies to Indulge into.

The flavors of Mexican foods are not only inviting and appealing to us but also easy to adapt into our daily recipes as well. From the chili and peppers to the salsa, nachos, and tacos! this cuisine has so much to offer that it gets difficult to pick and choose between the options. Mexican ingredients are easily available from assorted fresh vegetables to cornmeal, tortillas, jalapenos, peppers, and tomatoes for the salsa. The kitchens of Mexico also have a wide array of non-veg ingredients too including chicken, eggs, fish and seafood, red meat as well in some recipes. 

The methods of cooking in this cuisine are easy to follow and also don’t really call for any unusual equipment as well. Pots and pans, griddles and hot plates, fryers, and ovens are some of the most commonly used mediums. The steps involved in the recipes are short and easy to follow keeping in mind the nutritive aspects as well in most recipes. While they do love to have their foods well presented with accompaniments and garnishes there is a lot more which we can think of as well when it comes to fusion with Mexican recipes.

Here are a few simple recipes from Mexico with my little twist of taste attached to make them more palatable and delicious!

Recipe-1] MEXI- BEAN VEGGIE SOUP

Ingredients:

Oil/ olive oil-1 tbsp.

Garlic- 1 tsp chopped

Onion-1 small chopped

Red chilies-1-2 slit

Carrot-1 small peeled and cubed

Potato- 1 small peeled and cubed

Kidney beans/ rajma-1/2 cup boiled.

Green capsicum-1/2 no cubed.

Sweet corn-1/4 cup boiled.

Tomato puree-1/2 cup

Salt and crushed black pepper to taste

Mixed herbs-1/2 tsp

Chili flakes-1/2 tsp

White vinegar-1 tsp

Sugar-1 pinch

Veg stock/ water- 3-4 cups

Black/green olives/ jalapeno peppers- 2-3 tsp sliced

Avocado-1 ripe, peeled and cubed for garnish.

Parsley/coriander leaves- 2 tsp chopped.

Method:

1. Assemble all the ingredients for the Mexican style bean veggie soup.

2. Heat oil in a pan add in the garlic and onions saute for 1 min add in the vegetables, boiled beans, corn, capsicum, and tomato puree saute for 2 mins.

3. Add in the salt, pepper, herbs, chili flakes and mix well. Add in the water/veg stock and bring to a boil, simmer for 15-20 mins.

4. Check for seasonings and texture and adjust accordingly, add in the white vinegar, pinch of sugar and parsley or coriander, and mix.  Portion the soup in a soup bowl and top with avocado and fresh herbs, olives, jalapenos, etc, and serve hot.

Recipe-2] MEXICAN CORN AND AVOCADO SALAD

Ingredients

For the base of the salad:

Assorted iceberg lettuce/ purple- white cabbage-1 cup

For the body of the salad:

Sweet corn-1 cup boiled

Avocado-1 ripe, peeled and cubed

Onion-1 med sized sliced

Tomato-1 med sized cubed

Assorted capsicums-1/2 cup cubed

Sprouts-1/2 cup.

Cucumber- 1 no cubed.

For the dressing:

Olive oil-2-3 tbsp.

Mustard paste-1 tsp

Salt and pepper to taste

Lime juice-2 -3 tbsp.

Chopped parsley-2 tsp

Chopped mint-2 tsp

Chopped green chilies-1 tsp

Flax seeds/ sunflower seeds- 2 tsp

Honey-1 tbsp.

Dates-2-3 chopped.

Sliced almonds/cashews-4-5 no

Red chili sauce-2 tsp

Tomato ketchup-2 tsp

For the garnish of the salad:

Assorted fresh herbs/ seeds/ nuts/ pomegranate seeds/ olives etc

Method:

1. Assemble all the ingredients for the salad recipe as listed.

2. Arrange the base of the salad or assorted greens in the serving bowl or on the salad plates.

3. In a mixing bowl, combine together the ingredients for the dressing and mix well.

4. Just before serving the salad combine the ingredients of the body and dressing together and give it a nice toss.

5. Portion out the salad on the base and garnish appropriately and serve.


Recipe-3] SPICY CHICKEN SALSA TACOS

Ingredients

Taco shells- 10-12 no

For the base in the taco shells:

White/purple cabbage-1 cup shredded

Lime juice-2 tsp

Salt and pepper to taste

Chopped mint/coriander leaves-2 tsp

Chili flakes-1/2 tsp

Tomato ketchup-2 tsp

Mix and chill for 20 mins.

For the chicken mixture:

Oil-2 tsp

Garlic-1 tsp chopped

Green chilies-1 tsp chopped

Onion-1 small chopped

Chicken shredded-1 cup boneless boiled.

Salt, pepper, chili flakes to taste

Tomato ketchup-2-3 tsp

Red chili sauce-2 tsp

White vinegar-1 tsp

Chopped coriander leaves-2 tsp.

For the salsa mixture:

Tomatoes-1 cup chopped

Green chilies-1 tsp chopped

Jalapenos/olives/gherkins-2-3 tsp sliced

Salt and pepper to taste

Capsicum-1/2 no chopped

Tabasco/Capsico sauce-1 tsp

Pinch of sugar

Coriander leaves-2 tsp chopped

Mix and chill for 20 mins.

Method:

1. Assemble ingredients for the various components of the recipe.

2. Prepare the salsa and base mixture for the tacos and chill.

3. Heat oil saute the garlic, chilies, onions and add in the boiled chicken pieces/shreds and saute on a high flame for 1 min, add tomato sauce, chili sauce, vinegar and cook for few mins, remove and keep aside.

4. Finally just before serving place the base of cabbage in the taco shells top with the prepared cooled chicken filling and top with the tangy tasty salsa and garnish as desired and serve immediately.


Recipe-4] MUSHROOM & COTTAGE CHEESE CHIMICHANGAS

Ingredients:

For the wrapper:

Readymade tortilla rotis- 4-6 no

Or else whole wheat/ flour/corn meal based rotis- 4-6 no.

For the filling of chimichangas:

Oil-2 tsp + as needed for cooking/ frying.

Butter-1 tsp

Garlic-1 tsp chopped

Green chilies-1 tsp chopped

Spring Onion-1 small chopped

Sliced mushrooms- 8-10 no

Paneer-1 cup grated

Capsicum-1 no chopped

Salt, pepper, herbs and chili flakes to taste

Red chili sauce + green chili sauce + soy sauce- 2 tsp each

Spring onion greens-2-3 tbsp. chopped

Grated cheese-1/4 cup

To serve with: salsa sauce as listed in the above recipe for tacos.

Method:

1. Prepare the wrappers for the chimichangas by either using readymade tortilla wraps or prepare chapattis using variety of flours as desired.

2. To prepare the filling, heat oil and butter in a pan add in the garlic and onions and saute until light pink add in the sliced mushrooms, capsicums, salt, pepper, herbs and chili flakes to taste.

3. Cook for 2-3 mins and add in the grated cottage cheese or paneer and mix, cook for another 2-3 mins, turn off the flame add in the spring onion greens and cheese and mix well.

4. Place the wrapper on a work station and place the prepared filling in the center of the wrapper carefully close up the sides by folding them in and securing it up.

5. If we are using a fresh dough to make chimichangas we use a maida water thick paste to seal the edges if using readymade wrappers, we can just roll them up.

6. Using a non-stick tava or a griddle pan we can cook the chimichangas using little oil to a nice golden brown color but in case of using a freshly made dough concept we can deep fry the sealed chimichangas as well to a nice crusty color and remove, drain excess oil, cut and serve or top with salsa sauce, cheese sauce or sour cream and enjoy.


Recipe-5] TEX- MEX RICE WITH CHICKEN

Ingredients

For the rice mixture:

Oil-1 tsp

Butter-1 tsp

Bay leaf- 2 no

Pepper corns- 4-5 no

Sliced onions-1 no

Garlic- ginger-1 tsp chopped

Slit green and red chilies- 2-3 each

Boiled white/brown rice- 1 and a half cup cooked.

Salt and pepper to taste

Chili flakes-1/2 tsp 

Mixed herbs-1/2 tsp

Saffron- 8-10 strands soaked in ½ cup milk

Parsley/mint/coriander-2 tbsp. chopped

For the chicken mixture at the base of the pot:

Oil-2 tsp

Butter-2 tsp

Chicken drumsticks/ thighs- 500 gms or 4-5 pieces.

Salt and pepper to taste

Garlic- ginger-chili paste-1 tsp mix

Onion-1 small chopped

Tomato puree-1 cup

White wine- 2-3 tbsp.

Cooked beans- rajma/chickpeas etc-1/2 cup,

Cumin powder-1/2 tsp

Coriander powder-1/2 tsp

Chili flakes, herbs to taste or use mexican peri peri spice powder-1 tsp

Water/stock-1 cup just to cook up the chicken

To assemble:

Sliced jalapenos/ black olives/ green olives- 2-3 tsp sliced

Cheese- 3-4 tbsp.

To serve alongside-a bowl of crispy nacho chips.

Method:

1. Assemble all ingredients as listed to fix the one pot meal.

2. Heat oil and butter and add in the ingredients one by one and saute onions, add tomato puree, salt, spices and chicken pieces, wine, cooked or boiled beans and saute for 2 mins, add water or stock and allow to cook 12-15 mins.

3. Heat oil and butter in another pan and saute the spices, garlic, ginger, onions, chilies and add in the rice and saffron solution, salt and pepper to taste and simmer or cook in steam for 4-6 mins.

4. Layer the rice over the chicken but in between add cheese, olives, jalapenos, herbs, coriander and then the rice. Close the pot with a tight fitting lid and cook on a low flame for 10-12 mins in steam. Open and serve hot.

Recipe-6] DESI CHOCOLATE EMPANADAS

Ingredients:

For the wrappers:

Maida-1/2 cup

Salt-1 pinch

Powdered sugar-1 tsp

Oil- 1 tsp

Baking powder-1/4 tsp

Vanilla essence-1/2 tsp

Warm water- as needed.

For the stuffing:

Brownies- ½ cup crumbled

Desi pedha-2-3 no crumbled.

Assorted chopped nuts-2 tsp

Chocolate chips-2-3 tsp

Chocolate sauce-2 tsp

Oil to fry

To top and serve with:

Powdered sugar/ chocolate sauce and serve with a scoop of vanilla ice cream/ also try serving them with some chilled rabdi.

Method:

1. Prepare the dough for the empanada wrappers and cover with a damp kitchen cloth and keep aside to rest for 12- 15 mins.

2 In a mixing bowl combine together the ingredients for the stuffing and mix them all well, add a little rum or brandy for flavor.

3. Roll out the dough into a thin chapati, using a glass cutter or a cookie cutter cut out the round discs and apply little maida water thick paste on the edges.

4. Place the prepared chocolate stuffing on one side and carefully close it like a half-moon shape, seal the edges with a fork, and deep fry in medium hot oil for 3-5 mins until nicely golden browned, remove and drain excess oil and serve hot garnished appropriately.


Brief About Writer


Ingredient Ideology | The Cheesecake MedleyBy: Dr. Kaviraj Khialani- Celebrity Master Chef.


Delicious- Delectable -Dynamic

While the concept of cheesecake goes a long back in time and history when it is said that the romans spread the tradition of making cheesecake from Greece to all across Europe and ever since New York created some of the world’s best variety recipes in cheesecakes it has gained popularity all across the globe being a favorite pick – n – choice for food lovers and connoisseurs.

The traditional greek cheesecake used ricotta cheese and these cheesecakes were sweetened with honey and while some used flour blended with the cheese and then baked and some used a crusty base for the cheesecake. Most Americans have grown up eating the crunchy crushed cookie or digestive biscuits or crackers being powdered and set with butter at the base of a well flavoured cheese mixture which would chill and set on the base and come out wonderfully perfect when sliced.

While technically speaking cheesecakes are a version of pies and not cakes since the base structure is usually unleavened. Most baked variety of cheesecakes use a custard base for the fillings comprising of milk, sugar, eggs, salt, vanilla and other flavorings in addition to the cheese. A small amount of flour, corn starch, arrowroot and potato starch can be found in some cheesecake recipes as well to help stabilise the mixture.

While the varieties remain numerous and versatile with the concept of cheesecakes from eggless, with egg, baked, no –bake, set and chilled, vegan and wow some keto cheesecakes and more, there is something in store for each one of us!

Here are a few simple and easy recipes to try and enjoy with Cheesecakes!


Recipe-1] FRUITY MELANGE CHEESECAKE

Ingredients:

For the Fruity mixture

Mango pulp/ Strawberry pulp-2 cups

Sugar-1/2 cup

For the base with biscuits:

Digestive biscuits/crackers- 8-10 no

Melted butter-1/4 cup

For the cheesecake:

Cream cheese-130 gms

Condensed milk- 130 ml

Vanilla essence- ½ tsp

Fresh cream- 50 ml

Mango pulp-2-3 tbsp.

For the topping:

Fruit pulp- ¼ cup of your choice

Corn flour-1 tbsp.

Water-2 tbsp.

Sugar-2 tbsp.

Method:

1. For the fruity mixture- prepare a smooth pulp from the mangoes.

2. Cook the mango puree and sugar on a low flame until it starts to bubble, remove and cool it down completely.

3. For the biscuit base, grind the biscuits in a food processor and add melted butter and churn it well to a smooth texture.

4.Place the crumb and butter mixture into a tin for the cheesecake and using a spoon press it down well on all sides, and chill the mould for 30-45 mins.

5. Pre-heat the oven to 150 degrees Celsius. in a bowl combine the cream cheese, condensed milk, vanilla essence and mango puree and blend it well to a smooth texture add in the cream and blend again.

6.Pour the above mixture on the biscuit base in the tin and cover the base of the tin with aluminium foil, place it in a little water bath in the baking tray and place the tin for baking in the oven 25-35 mins until the surface is firm to touch and the texture is a little wobbly.

7.Remove and cool and cover it with a cling wrap and refrigerate the cheesecake for 10-12 hours. For the final topping, in a pan combine mango puree with corn flour water and sugar and stir well cook on a medium flame until it leaves the sides of the pan, cool completely. Fill into a piping bag with a nozzle and gently de-mould the chilled cheesecake and start decorating with the prepared fruity topping, pipe or cover it well and allow to chill for another 2-3 hours and slice and serve garnished with fresh mango & mint leaves.


Recipe-2] NEW ERA NEW YORK CHEESECAKE

Ingredients

For the cheesecake crust:

 Powdered digestive biscuits/crackers-1 cup

Melted butter-1/2 cup

Brown sugar/grain sugar-2 -3 tbsp.

For the cheesecake filling:

 Full cream, whipping variety-2 cups

 Cream cheese, mild salted is fine-2 cups

 Vanilla essence-1 and a half tsp

Sugar- ¾th cup

Yogurt/curd-1/2 cup thick 

Method:

1. To prepare the crust, in a mixing bowl combine together the powdered crackers, melted butter and sugar and mix them well, place the mixture at the bottom of a cheesecake tin and press it well to settle, chill for 1 hour.

2.In a separate mixing bowl, combine and beat up together the cream cheese, yogurt, vanilla essence until nice and fluffy, separately whip up the full fat cream in another bowl, now fold it into the cream cheese mix and blend.

3. Pour the above mixture onto the chilled crust as prepared and spread it evenly all across the tin, allow to set and chill for 3-4 hours, remove, de-mould it and cut into wedges and top up with the berry sauce or toppings and serve.


Recipe-3] VEGAN COFFEE CHEESECAKE

Ingredients

To prepare the crust/base:

Cashews/almonds/walnuts-3/4th cup

Dates-1 cup, chopped

Raw cocoa- 2 tbsp.

Vegan coconut oil- 2 tbsp. melted

For the filling for the cheesecake:

Raw cocoa-1 tbsp.

Vegan coconut oil- ½ cup

Dates-1/2 cup chopped

Raisins-2 tbsp. chopped

Lime juice-2 tbsp.

Cashews-1 and a half cup, soaked for 2-3 hours

Coconut milk-1/2 cup

Coffee powder-2 tsp.

Warm water-1/2 cup

Method:

1. To prepare the base for the cheesecake, using a food processor combine together the nuts, dates, coconut oil and cocoa and blend it to a smooth texture, assemble it at the bottom of a removable cheesecake tin and press it well, chill the base for 30 mins.

2. To get together the filling for the cheesecake, using the blender jar prepare a paste of the dates and little warm water and then add in the drained cashews and cocoa and oil, coconut oil and blend it all well, remove into a bowl and add in the lime juice and instant coffee and mix well.

3. Transfer the prepared mixture into the chilled base tin and spread it evenly using a spatula. Continue to chill the cheesecake for 2-3 hours, remove and de-mould carefully, dip a knife in hot water and neatly slice up the cheesecake and serve with a hot cuppa coffee!


Recipe-4] THE CHOCOLATE LOVERS CHEESECAKE

Ingredients

For the crust for the cheesecake:

Chocolate cookies/crackers/biscuits- 200 gms

Almonds/walnuts-2 tbsp. chopped.

Butter- 120 ml, melted

For the chocolate cheese filling:

Powdered sugar-1/2 cup

Whipping/full fat cream- 220 ml

Dark chocolate- 250 gms, melted.

Vanilla essence-1 tsp

Cream cheese- 350 gms

For decorating the cheesecake:

Ganache topping with cream and chocolate combination can be used.

Assorted shavings/chocolate garnishes/fresh fruits etc as desired to decorate.

Method:

1. To start with this delicious cheesecake recipe let us first start with the base crust for the same by using a food processor the chocolate cookies/crackers into crumbs along with the nuts and melted butter and getting it all together.

2. Prepare a loose bottomed cheesecake tin or mould and set the prepared base mixture and spread it evenly and press it using a spatula or spoon, allow to set and chill in the fridge for 1 hour.

3. Now to continue with the filling, in a mixing bowl beat up cream cheese, vanilla essence, powdered sugar and add in the melted chocolate and using a spatula mix it all well, separately whip up the fresh cream to soft peak texture and fold it into the cheese and chocolate mixture.

4. Pour this mixture into the prepared chilled cheesecake base tin and spread it evenly all over and allow to chill and set for 2- 3 hours and then remove, carefully demould, decorate with whipped cream, ganache topping, cherries, mint etc and serve.

Brief about Writer: Chef Kaviraj Khialani


Ingredient Ideology |The Ravishing Ravioli By Dr. Kaviraj Khialani- Celebrity Master Chef

The Ravishing Ravioli

Fresh home-made pasta varieties to relish

Italian cooking is one of the favorites of many of us and the very name of pasta and pizzas is so very inviting and mesmerizing. The basic of this universally accepted cuisine revolves around a few choice of ingredients which suit almost all of us and it starts from the varieties it has to offer from vegetarian to poultry, meat, seafood and even vegan in today’s times.

The word pasta as it goes back into history was all hand crafted and the chefs have designed some really amazing creative pieces of art with shapes and sizes of pasta which today are on menu cards across the globe with everyone’s own little twist of taste and flavors modifying it to suit the need of every guest and foodie.

To me ravioli has been a very exciting experience since it is possible to stuff these two sheets of pasta sheets with almost anything you can think of as your most favorite to the unusual combinations as well come out really well when tried out with a little open mind and out of the box. The concept of a ravioli is to place a filling between two sheets of pasta and seal the edges, ensure they open during boiling or frying and then they are tossed in a sauce or served with a dip when fried.

Innovation with ravioli from my kitchen include cheesy chicken tikka olive ravioli with creamy makhani sauce, palak aur soya ki ravioli tossed in a coriander peanut pesto sauce, shrimps cooked with butter garlic and dill leaves stuffed into a ravioli and then fried, served with a mayonnaise based tangy desi cocktail dip and the list goes on and on.

Here are a few of my all-time ravioli recipes to try out in your kitchens and enjoy the ravioli delicacies!

Recipe-1] CHEESY RAVIOLI WITH WALNUT PESTO

Ingredients

For the Ravioli dough:

Maida- 1 cup

Salt -1/4 tsp

Olive oil/ oil-2 tsp

Mixed herbs-1/4 tsp

Chili flakes-1/4 tsp

Egg-1 no optional

Warm water-as needed.

For the cheesy stuffing:

Oil-1 tsp

Garlic-1 tsp chopped

Onion-1/2 chopped

Cottage cheese-1/2 cup grated

Green capsicum-1/2 chopped

Salt and pepper to taste

Mixed herbs and chili flakes to taste

Cheese-2 tsp grated

For the walnut pesto:

Basil leaves- 1 cup

Garlic-1 tsp

Walnuts- 4-6 no

Olive oil/oil- 2 tbsp.

Chilled water-2 tsp

Lime juice-2 tsp

Salt and pepper to taste

Parmesan cheese/ cheese-2 tsp grated.

Method:

1. Prepare the ravioli dough and cover and keep for resting under a damp kitchen towel for 15-20 mins, divide the dough into 2 and roll out 2 thin rotis and cut the edges shape them into rectangle shapes of same size, side by side.

2.Heat oil in a pan and saute the ingredients for the stuffing and cook for 2-3 mins and remove, cool completely.

3.Using a chutney grinder, combine all ingredients for the pesto and churn them all into a nice chutney concept, remove and keep chilled.

4. Place the cooled filling on the rectangle sheets around 1 tsp, keep some gap between two. After placing the filling apply a paste of maida and water on all sides and edges and sandwich with the second sheet and using a fork pinch the sides, cut into small squares as per filling placed and boil the ravioli in boiling water for 3-4 mins and remove.

5. In a bow toss together the prepared pesto sauce with the ravioli and add cheese, cherry tomatoes and olives, basil etc and serve as a pasta snack or a mini meal concept.


Recipe-2] FRIED KEEMA MATTAR RAVIOLI

Ingredients

For the Ravioli dough:

Maida- 1 cup

Salt -1/4 tsp

Olive oil/ oil-2 tsp

Mixed herbs-1/4 tsp

Chili flakes-1/4 tsp

Egg-1 no optional

Warm water-as needed.

For the keema mattar stuffing:

Oil-2 tsp

Ginger-garlic-chili paste-1 tsp mix

Onion-1 small chopped

Chicken keema-1 cup

Green peas-1/4 cup boiled

Salt to taste

Garam masala powder-1/2 tsp

Tomato puree-2 tbsp.

Coriander powder-1 tsp

Mixed herbs and chili flakes to taste.

Water to cook the keema.

Cheese- 2 tsp grated.

Oil to deep fry the ravioli.

For the dip:

Tomato ketchup/ sweet chili sauce/ hot garlic sauce can be served.

Method:

1. Prepare the ravioli dough and cover and keep for resting under a damp kitchen towel for 15-20 mins, divide the dough into 2 and roll out 2 thin rotis and cut the edges shape them into rectangle shapes of the same size, side by side.

2. Heat oil in a pan and saute the ingredients for the stuffing and cook the onions until light pink, add in the chicken keema and peas, salt and all masalas, tomato puree and saute for 2-3 mins, reduce the flame add little water just to cook the keema and dry it at the end, cool and add cheese.

3. Place the cooled filling on the rectangle sheets around 1 tsp, keep some gap between two. After placing the filling apply a paste of maida and water on all sides and edges and sandwich with the second sheet and using a fork pinch the sides, cut into small squares as per filling placed and deep fry in medium hot oil for 3-4 mins and remove, drain excess oil on a kitchen paper.

4. Serve the fried chicken keema mattar ravioli with assorted dips or sauces of your choice.

Recipe-3] NUTTY SPINACH STUFFED RAVIOLI

Ingredients:

For the Ravioli dough:

Maida- 1 cup

Salt -1/4 tsp

Olive oil/ oil-2 tsp

Mixed herbs-1/4 tsp

Saffron water-few drops

Egg-1 no optional

Warm water-as needed.

For the nutty spinach stuffing:

Oil-2 tsp

Garlic-1 tsp chopped

Spinach-1 cup blanched and chopped

Salt, pepper, herbs, chili flakes to taste

Cheese- 2 tsp grated

Nuts- almonds/cashews/walnuts-2 tsp chopped

To serve with:

Mayonnaise-chili dip/ hung curd dips/ assorted sauces of your choice.

Method:

1.Prepare the ravioli dough and cover and keep for resting under a damp kitchen towel for 15-20 mins, divide the dough into 2 and roll out 2 thin rotis and cut the edges shape them into rectangle shapes of same size, side by side.

2.Heat oil in a pan and saute the ingredients for the stuffing and cook for 2-3 mins and remove, cool completely and add the cheese last.

3. Place the cooled filling on the rectangle sheets around 1 tsp, keep some gap between two. After placing the filling apply a paste of maida and water on all sides and edges and sandwich with the second sheet and using a fork pinch the sides, cut into small squares as per filling placed and boil the ravioli in boiling water for 3-4 mins and remove.

4. Serve the cooked ravioli with assorted dips and sauces of your choice.


Recipe- 4] RAVIOLI WITH BASIL AND SAUSAGES

Ingredients:

For the Ravioli dough:

Maida- 1 cup

Salt -1/4 tsp

Olive oil/ oil-2 tsp

Mixed herbs-1/4 tsp

Chili flakes-1/4 tsp

Egg-1 no optional

Warm water-as needed.

For the stuffing:

Oil-2 tsp

Garlic-1 tsp chopped

Onion-1/2 chopped

Chicken sausages-2-3 chopped

Salt, pepper, herbs and chili flakes to taste

Cheese- 2 tbsp. grated

Fresh basil-4-5 leaves cut.

For the tomato herb sauce:

Olive oil/ oil-2 tsp

Garlic-1 tsp chopped

Onion-1/2 chopped

Tomato puree-1 cup

Salt, pepper, herbs, chili flakes to taste

White wine-2 tsp- optional

Sliced green/black olives- 3-4 no

Fresh parsley/basil- 2 tsp

Method:

1.Prepare the ravioli dough and cover and keep for resting under a damp kitchen towel for 15-20 mins, divide the dough into 2 and roll out 2 thin rotis and cut the edges shape them into rectangle shapes of same size, side by side.

2. Heat oil in a pan and saute the ingredients for the stuffing and cook for 2-3 mins and remove, cool completely and add the cheese last.

3. Place the cooled filling on the rectangle sheets around 1 tsp, keep some gap between two. After placing the filling apply a paste of maida and water on all sides and edges and sandwich with the second sheet and using a fork pinch the sides, cut into small squares as per filling placed and boil the ravioli in boiling water for 3-4 mins and remove.

4. Prepare the sauce in a pan add oil, garlic, onion saute until pink, add tomato puree, salt, pepper, herbs, chili flakes, wine and cook for 3-4 mins, add sliced olives and parsley/basil and add in the cooked pasta and toss it for 1-2 mins. Garnish with cheese, basil and serve hot.

Recipe-5] RAVIOLI WITH TOFU & GARDEN VEGGIES

Ingredients

For the Ravioli dough:

Maida- 1 cup

Salt -1/4 tsp

Olive oil/ oil-2 tsp

Mixed herbs-1/4 tsp

Chili flakes-1/4 tsp

Egg-1 no optional

Warm water-as needed.

For the tofu- veg stuffing:

Oil-1 tsp

Garlic-1 tsp chopped

Extra firm tofu- ½ cup crumbled

Sliced mushrooms-3-4 no

Boiled sweet corn-2-3 tbsp. crushed

Salt, pepper, herbs, chili flakes to taste

Grated cheese-2 tbsp.

Dipping sauces:

Tomato chili sauce/ sweet garlic dip/ mayonnaise chili/ schezuan dip.

Method:

1.Prepare the ravioli dough and cover and keep for resting under a damp kitchen towel for 15-20 mins, divide the dough into 2 and roll out 2 thin rotis and cut the edges shape them into rectangle shapes of same size, side by side.

2. Heat oil in a pan and saute the ingredients for the stuffing and cook for 2-3 mins and remove, cool completely and add the cheese last.

3.Place the cooled filling on the rectangle sheets around 1 tsp, keep some gap between two. After placing the filling apply a paste of maida and water on all sides and edges and sandwich with the second sheet and using a fork pinch the sides, cut into small squares as per filling placed and deep fry in medium hot oil for 3-4 mins and remove, drain excess oil on a kitchen paper.

4. Serve the fried tofu & garden veggie ravioli with assorted dips or sauces of your choice.


Recipe-6] SEAFOOD RAVIOLI

Ingredients:

For the Ravioli dough:

Maida- 1 cup

Salt -1/4 tsp

Olive oil/ oil-2 tsp

Mixed herbs-1/4 tsp

Chili flakes-1/4 tsp

Egg-1 no optional

Warm water-as needed.

For the stuffing:

Oil-2 tsp

Garlic-1 tsp chopped

Onion-1/2 chopped

Shrimps-1/2 cup chopped

Salt, pepper, herbs, chili flakes to taste

Soy sauce-1 tsp

Red chili sauce-1 tsp

Cheese-2 tbsp. grated.

For the cream sauce:

Oil-2 tsp

Butter-1 tsp

Maida-1 tsp

Garlic-1 tsp chopped

Prawns- 10-12 med sized

Salt, pepper, herbs, chili flakes to taste

Fresh cream-1/2 cup

Water/fish stock-1 cup

Cream cheese-2 tsp

Fresh herbs/olives/cherry tomatoes.

Method:

1.Prepare the ravioli dough and cover and keep for resting under a damp kitchen towel for 15-20 mins, divide the dough into 2 and roll out 2 thin rotis and cut the edges shape them into rectangle shapes of same size, side by side.

2. Heat oil in a pan and saute the ingredients for the stuffing and cook for 2-3 mins and remove, cool completely and add the cheese last.

3. Place the cooled filling on the rectangle sheets around 1 tsp, keep some gap between two. After placing the filling apply a paste of maida and water on all sides and edges and sandwich with the second sheet and using a fork pinch the sides, cut into small squares as per filling placed and boil the ravioli in boiling water for 3-4 mins and remove.

4. To prepare the cream sauce for seafood ravioli, heat oil and butter in a pan add in the garlic, maida and saute for 30 seconds, add in the fish stock /water and salt, pepper, herbs, chili flakes to taste, add a little saffron water as well for a nice shade. As the sauce starts thickening, reduce the flame and slowly add in the full fat cream and cream cheese and blend it well then add in the cleaned prawns and cook for 4-5 mins.

5. Once the sauce is ready add in the cooked ravioli and toss it carefully in the pan and serve hot garnished with fresh herbs, cherry tomatoes, cheese, olives, etc.

Brief about the Writer:


Ingredient Ideology | MUFFINS TO MUNCH By Dr. Kaviraj Khialani- Celebrity Master Chef


MUFFINS TO MUNCH 

FUN TO BAKE & YUMMY TO RELISH!

The word Muffin comes from the French word ‘Moufflet’ which is described as freshly baked small round bread-like bakery products with a sweet taste and best served warm. Muffins are known to be British and American specialties while the British muffins have a flat shape and a hollow inside and the American ones are more like bread cooked in a muffin mould or pan. Muffins can be sweet as well as savory and are usually available such as cornmeal & cheese muffins or sweet ones like the famous blueberry, chocolate chip, lemon or banana flavored as well. 

They are often eaten for breakfast, brunches, evening high-teas, and tea, coffees are also usually found accompanied along with muffins. While we find cupcakes being topped and decorated and loaded with frostings and icings, muffins usually wear a sober look when it comes to their presentation.

 Muffins are single-serving bread that rises with the help of baking powder, baking soda and eggs, instead of yeast. They tend to be sweet and somewhat moist but a little heavier than a cupcake. Muffins are so easy to make that if one is a beginner after cookies it should be the next great baked goodie to be tried out and experimented!

Here are five ways with muffins for bakery lovers!

Recipe-1] THE VERY BERRY MUFFINS

Ingredients

2 cups maida/ refined flour

¾ cup grain sugar

1 cup blueberries

¼ cup butter

1 and a half cup milk

1 tbsp. baking powder

¼ tsp baking soda

Pinch of salt

1 tsp lime juice

1 tsp vanilla essence

Method:

1. Pre-heat the oven to 180 degrees Celsius, grease and line up the muffin tins.

2. Sieve the flour with salt, baking powder, baking soda and keep aside.

3. Coat the berries with 1 tsp maida and keep aside.

4. In a bowl add milk, lime juice, butter, vanilla essence and sugar and stir well to combine the ingredients.

5. Gradually add in the dry ingredients using cut and fold method using a spatula and ensure proper mixing, avoid lumps and do not over mix as well.

6. Lastly fold in the coated berries into the muffin mixture and give it a light mix, fill the muffin mould 3/4th and allow to bake for 15-18 mins and check with a toothpick if comes out clean. Allow to cool on a baking rack for 20 mins and store/serve.


Recipe-2] ALMOND COCONUT MUFFINS

Ingredients

2 cups maida/ refined flour

2 eggs

½ cup butter

½ cup milk

¾ cup grain sugar

½ cup desiccated coconut

¼ cup chopped/sliced almonds

1 and a half tsp. baking powder

1 pinch salt

1 tsp vanilla essence

½ tsp almond essence-optional.

Method:

1. Pre-heat the oven at 180 degrees Celsius and grease and line up the muffin mould and keep them ready.

2. Sieve the flour, salt, baking powder and keep aside.

3. In a mixing bowl cream together the butter and sugar using a hand blender until light and fluffy, add in the eggs a little at a time, add in the essence, milk, and beat it all well.

4. Carefully add in the dry ingredients a little at a time and using a spatula and fold it along, also add in the almonds and coconut, and with a light hand blend them all in.

5. Pour in the mixture into the muffin mould and fill them a little over halfway in the mould and allow to bake for 14- 16 mins and once the toothpick comes out clean from the center of the muffins, remove them allow to cool for 20 mins and then store/serve.


Recipe-3] HEAVENLY BLESSED CHOCOLATE MUFFINS

Ingredients

2 eggs

2 cups maida/ refined flour

1 cup grain sugar

½ cup butter

½ cup milk

Salt a pinch

2 tsp baking powder

1 tsp vanilla essence

1 cup choco chips

Method:

1. Pre-heat the oven at 180 degrees Celsius and prepare the muffin mould grease and line them up.

2. Sieve together the flour, salt, baking powder and keep aside.

3. In a mixing bowl using a hand blender combine and beat together the sugar and butter for a couple of minutes.

4. Add in the eggs and continue beating until light and fluffy, add in the essence, add in the dry ingredients and slowly mix them all in, finally add in the milk and get the mixture to the right dropping texture and add in the choco chips and using a spatula gently mix them in.

5. Now spoon this mixture into the prepared muffin mould and allow to bake for 20-25 mins or until done. Remove and allow to cool for around 30 mins and then store/serve.


Recipe-4] PEANUT BUTTER FRUITY MUFFINS

Ingredients

3 large ripe bananas

2 eggs

½ cup crunchy peanut butter

1 and a half cup maida/ refined flour

4 tbsp. honey

2 tsp vanilla essence

A pinch of salt

1 tbsp. baking powder

½ cup choco chips or assorted sliced nuts.

Method:

1. Pre-heat the oven at 180 degrees Celsius and prepare the muffin mould and keep ready.

2. Sieve the flour with a little salt and baking powder and keep it aside.

3. In a mixing bowl, combine the mashed bananas, peanut butter, honey, eggs, and vanilla essence, and using a hand blender blend it all well.

4. Now fold in the dry ingredients gently using a spatula and ensure proper mixing, also add in the choco chips or assorted nuts of your choice.

5. Spoon the muffin mixture into the prepared mould and allow to bake for 18-20 mins or until done and allow to rest and cool for around 20 mins upon baking and then store/serve.


Recipe-5] POWER PACKED WHOLE WHEAT MUFFINS

Ingredients

1 cup wheat flour

1 egg

½ cup butter

½ cup sugar

Pinch of salt

½ cup hot water

½ cup chopped dates

½ tsp baking powder

½ tsp baking soda

¼ tsp cinnamon powder

½ tsp vanilla essence

Method:

1. Pre-heat the oven at 180 degrees Celsius and prepare the muffin mould and keep ready for baking.

2. Sieve the flour with salt, baking powder, baking soda, cinnamon powder and keep aside.

3. Soak the dates in hot water for 8-10 mins and keep them aside.

4. In a mixing bowl combine together butter and sugar and cream it up well using a hand blender.

5. Add in the eggs beat until light and fluffy, add in the dates and blend them in well, finally add in the dry ingredients into this bowl and using a spatula mix it all up well.

6. Pour the mixture into the prepared muffin mould and allow to bake for 15- 20 mins or until just baked enough. Remove and allow to cool for 30 mins and then store/serve.


Ingredient Ideology | THE COMFORTING COCONUT By: Dr. Kaviraj Khialani- Celebrity Master Chef.

COCONUT INTRO PIC 2.jpg

THE COMFORTING COCONUT

Coconuts have been said to be known as the fruit of the tree of the palm family, while having originated somewhere in indo-Malaya they however remain an important crop of the tropical countries. The term coconut can refer to the whole coconut palm, the seed of the fruit which botanically is a drupe and not a fruit. While being a hard shell on the outside with tender flesh and water within it has a number of culinary applications and uses to offer us in our kitchens.

A preferred choice for a refreshing cool welcome drink coconut water is said to be very beneficial and nutritionally high for us while the tender coconut malai goes well into desserts, puddings, salads. Coconut milk laces our curries quite well and be it Indian or international cuisines recipes with veg, fish, chicken, or prawns it just blends to perfection.

Let us have a look at a few Health Benefits of Coconuts:

Coconut water offers a good source of potassium, a mineral that helps balance sodium levels in the body and regulates blood pressure. But the idea that coconut water is more hydrating than plain water or is a superior post-workout drink is largely a myth. As for coconut flour, which is dried, ground coconut meat, it has 5 g of fiber in just 2 tbsp., making it an impressive replacement for traditional white flour, especially for those following a gluten-free diet.

 Coconut for weight loss is still the stuff of lore, despite what tons of dubious health sites may say. Until more research is done and proves otherwise, you shouldn’t consider coconut a magic elixir for weight loss. What’s more, if you freely eat coconut oil (or other coconut products) believing it will help you lose weight, you can easily take in more calories than your body needs and gain weight.

  • It is said that Coconut Boosts the immune system since coconuts are anti-parasite, antibacterial, anti-viral and antifungal.

  • Coconuts Provide quick energy and improves athletic and physical performance.

  • Consuming coconut considerably reduces the risk of heart diseases.

  • Having coconut Protects against bladder infection and kidney disease.

  • Coconut also Restores and maintains thyroid functionality.

  • Including coconut in our diets Makes one look young by preventing age spots, sagging skin, and wrinkles.


Fortunately, there are a ton of recipes out there for ways you can cook various foods using coconut, so there is no way you will get bored with them. Once you stick to a coconut diet, there is no going back! Here are a few of my select favorites with Coconut.

summer coconut smoothie.jpg

Recipe-1] SOOTHING SUMMER COCONUT SMOOTHIE

Ingredients:

Fresh tender coconut flesh or malai-1/2 cup

Coconut milk- 1 cup

Soy milk-1/2 to 3/4th cup

Banana-1 no ripe

Dates-3-4 no chopped

Honey- 1 tsp

Sliced cashews/almonds/walnuts-1 tbsp.

Flax seeds/ sunflower seeds- 1 tsp

Mint/microgreens/ nuts for garnish.

Method:

1. Prepare all the ingredients for the healthy shake and keep them chilled.

2. Using a jar of a food processor combine all of them and churn them up well to a smooth texture.

3. Adjust texture with milk as needed or add a little yogurt.

4. Pour the smoothie into jars/glasses and garnish with fresh shavings of coconut/sliced nuts/toasted seeds etc

Recipe-2] TROPICAL COCONUT CHICKEN SALAD

Ingredients

For the base of the salad:

Assorted lettuce leaves- 1 cup

For the body of the salad:

Fresh tender coconut malai-1/2 cup

Boiled chicken -1 cup cubes/ shreds

Celery- 2-3 tbsp. cut into small pieces.

Pineapple-1/2 cup cubes

Mango-1 no cubes

For the dressing of the salad:

Olive oil-2 tbsp.

Mustard paste-1 tsp

Salt and pepper to taste

Lime juice- 2 tsp

White vinegar-1 tsp

Sliced red/green chilies-2 no

Mixed herbs-1/2 tsp

Assorted seeds of your choice- 1 tsp

Assorted sliced nuts of your choice- 2 tsp

For the garnish of the salad:

Micro-greens/ cherry tomatoes/ mint/ parsley/ olives.

Method:

1. Prepare all the parts of the salad and keep ready.

2. Assemble the crispy lettuce leaves on a salad serving plate or a serving platter.

3. In a mixing bowl combine together all the ingredients for the dressing and mix them well.

4. Just before serving the salad, toss the body of the salad in the dressing and arrange it on the bed of lettuce, garnish appropriately and serve the delicious salad chilled.

COCONUT RIZ PILAF.jpg

Recipe- 3] COCONUT RIZ PILAF

Ingredients:

Basmati rice- 1 and a half cups, cleaned and soaked in 4 cups water for 20 mins.

Oil-2 tsp

Butter- 1 tsp

Garlic-1 tsp chopped

Lemongrass- 4- 5 pieces

Onion- 1 small chopped

Red/green chilies-2 no slit/shred.

Salt and pepper to taste

Veg stock/water- 2 and half cups

Coconut milk-1/2 cup

Tender coconut malai- 2-3 tbsp. shredded.

Fried cashew nuts and raisins- 2 tbsp. garnish.

Method:

1. Pre-prep all the ingredients for this tasty rice recipe.

2. Heat oil and butter in a pan add in the lemongrass, chili, onions, and garlic, and give it a nice saute for 1 min.

3. Add in the drained rice and fry it for 30 seconds, add in the veg stock or water, salt, and pepper to taste and allow to boil, cover and simmer until almost cooked.

4. Lastly add in the thick coconut milk and tender coconut malai and lightly blend it in, cover and cook in dum for 4-6 mins, garnish and serve hot with your gravies/curries, etc

COCONUT PRAWN CURRY.jpg

Recipe-4] COCONUT PRAWN CURRY

Ingredients

Coconut milk-2 cups thick

Prawns- medium to large size-500 gms cleaned, deveined.

Oil/ghee-2 tsp

Butter- 1 tsp

Cumin seeds-1/2 tsp

Bayleaf-1 no

Cinnamon stick-1-inch piece

To make a paste with the following ingredients:

Onions- 1 cup fried, lightly browned

Garlic- 6-8 cloves

Ginger- 1-inch piece

Red chilies- 6-8 boiled

Tomatoes-2 med sized.

Water-1/2 cup

Other ingredients to finish with the curry:

Turmeric powder-1/2 tsp

Coriander powder-1 tsp

Salt and crushed black pepper to taste

Garam masala powder-1/4 tsp

Water-1 cup

Lime juice-2 tsp

Coriander leaves- 2 tbsp.

Method:

1. Prepare all the ingredients and keep aside.

2. In some cases we also marinate the prawns with salt, turmeric, lime and keep aside for 10 mins.

3. Heat oil/ghee and butter in a thick bottomed pan add in the cumin seeds, whole spices and saute for 30 seconds, add in the prepared paste mixture and cook it on a medium flame for 2-3 mins.

4. Add little water if needed and add in the prawns and all other spices and seasonings and give it a nice mix with the masala.

5. Simmer the prawns for 2-3 mins, add in the coconut milk and cover and cook for 4-5 mins, serve hot garnished with coriander, a splash of lime juice, crushed black pepper.

Recipe-5] COCO NAKA PUDDING

Ingredients:

Coconut milk-1 cup thick.

Desiccated coconut-2 tbsp.

Butter-2 tsp

Sponge cake/ chocolate brownie-  200 gms cut into cubes.

Milk- 2 cups

Brown sugar-2 tbsp.

Condensed milk- 2-3 tbsp.

Dates- 3-4 chopped

Assorted chopped nuts- 2 tbsp.

Cinnamon powder-1/4 tsp

Banana-1 ripe peeled and sliced.

Pineapple-1/2 cup cubes

Cherries/ kiwi/ mango etc assorted fruits can be added to the layer of the pudding as well.

Method:

1. Prepare all the ingredients for the pudding.

2. In a sauce pan heat up the milk, add in the dates, brown sugar, condensed milk and cinnamon powder and reduce for 10 mins.

3. Add in the coconut milk, desiccated coconut and bananas, butter and cook for 2-3 mins. Turn off the flame.

4. In a pudding bowl arrange the cubes of cake or brownie and fruits of your choice and top it up with the warm coconut milk mixture and allow to set in the fridge for 1 hour.

5. Serve this pudding with a scoop of ice-cream of your choice and some chocolate sauce and cherries to garnish.


Brief About the Writer:

Ingredient Ideology | LOVE FOR LEMONGRASS By: Dr. Kaviraj Khialani- Celebrity Master Chef.

LEMONGRASS INTRO PIC.jpg

Lemongrass is an herb with a lemony scent. The culinary herb is produced from the stalk of the lemongrass plant. This plant grows in many tropical climates, most notably in Southeast Asia. Lemongrass is a plant. The leaves and the oil are used to make medicine. Lemongrass is used for treating digestive tract spasms, stomach-ache, high blood pressure, convulsions, pain, vomiting, cough, achy joints (rheumatism), fever, the common cold, and exhaustion. It is also used to kill germs and as a mild astringent.

 Lemongrass is native to the tropical countries of India, Cambodia, Indonesia, China, Guatemala, Sri Lanka and Malaysia. It grows upright in dense bunches and thrives in moist, warm climates with well-drained, loose, dry, loam soils.

The lemongrass herb has stalks that are fibrous and smell much like lemons. In an essential oil, the scent is fresh and light with a hint of lemon. Lemongrass can be found in subtropical and tropical areas, where it thrives on fertile, well-drained, sandy and loamy soil that is exposed to direct sunlight. Lemongrass tea is generally a safe and healthy herbal drink. Animal and laboratory research has shown that lemongrass has anti-inflammatory, antimicrobial, and anticancer properties. Lemongrass may also help protect your stomach lining and improve your lipid profile

Here are a few Health Benefits of using Lemongrass in our Daily Cooking.

  • Lemongrass has pain- killer properties and is useful in a number of ways.

  • It helps to cure respiratory diseases & can protect liver from damage.

  • It has anti- fungal properties as well, can help reduce diarrhoea.

  • Lemongrass promotes in detoxification of our body in a number of ways.

  • It Is a great immunity booster and also helps treat fever.

  • Lemongrass is good for our skin and bone health as well.

  • It can be helpful to us since it helps prevent anaemia and also lowers cholesterol.


Here are a few of my favorite Recipes with Lemongrass:


Recipe-1] LEMONGRASS & ASPARAGUS SOUP

Ingredients:

Fresh lemongrass- 4-5 no, cut into medium sized pieces.

Asparagus- 10-12 no, tips trimmed for garnish, rest to be sliced

Oil-1 tsp

Butter-1 tsp

Garlic- 1 tsp chopped

Onion-1 small, chopped

Salt and pepper to taste

Mixed herbs- ½ tsp

Maida- 1-2 tsp

Chili flakes- ½ tsp

Sweet potato- ½ cup cubed

Water/ stock- 2-3 cups

Flax seeds/ melon seeds-2 tsp

Fresh cream-1/4 cup

Cheese-2-3 tsp

Assorted fresh herbs for garnish

Method:

1. Pre-prep all the ingredients for the lemongrass- asparagus soup.

2. Heat oil and butter in a pan, saute the lemongrass pieces, garlic and onions for a few seconds. For non-veg versions we can add some chopped bacon as well.

3. Add in the sweet potatoes, asparagus slices, add in the seasonings, herbs, chili flakes, seeds and mix well, also add some maida and saute for 20 seconds.

4. Now pour in the liquid content/stock or water and allow the ingredients to soften and cook for 12-18 mins, cool, remove the lemongrass pieces and then puree, strain the soup.

5. Bring the contents of the soup back to a boil, add in the cream and simmer for 3-4 mins, check for salt and adjust seasonings and texture accordingly.

6. Serve the delicate and refreshing soup piping hot and garnish with some herbs, chili flakes, micro-greens etc.


Recipe-2] LEMONGRASS TEMPERED FRIED RICE

Ingredients:

Basmati rice- 2 cups boiled

Oil-2 tsp

Butter-1 tsp

Lemongrass- 10-12 pieces’ cut

Garlic- 1 tsp sliced

Ginger-1 tsp shredded

Shallots- 6- 8 no sliced

Boneless chicken breast- 1 cup sliced thinly

Eggs-2-3 no

Salt and pepper to taste

Assorted veggies for color- carrots/ cabbage/green capsicum etc

Cut them into small pieces/ cubes/ dices.

Soy sauce- 2-3 tsp

Red chili sauce-1-2 tsp

White vinegar/ chili vinegar- 1-2 tsp

Roasted crushed peanuts-2-3 tsp

Spring onion greens- 2-3 tbsp. chopped

Method:

1. Pre-prep all the ingredients as per the recipe. Heat 1 tsp oil in the pan and break in the eggs, scramble them add salt and pepper and cook for 2-3 mins, remove and keep aside.

2. Heat oil and butter in a wok/ pan add in the garlic, ginger, shallots, and lemongrass, and saute for a few seconds.

3. Add in the chicken pieces and saute them on a high flame for 1-2 mins, add in the seasonings, sauces, little water and allow the chicken to cook for 6- 8 mins.

4. Also we can use assorted colorful veggies as listed which can be going into the pan as well side by side and cook.

5. Add in the boiled rice and greens, give them a nice mix and cook for 3-5 mins and then dish out, serve hot.


Recipe- 3] LEMONGRASS FLAVORED GREEN VEG CURRY

Ingredients:

Oil-2 tsp

Lemongrass- 6- 9 pieces’ cut

Garlic-1 tsp sliced

Ginger/thai galangal- 2 tsp sliced

Shallots- 4-6 no peeled and cut 1 x 2

Eggplant- 1 cup cubed

Fresh basil leaves- 10-12 no

Broccoli florets-1 cup

Mushrooms-1/2 cup cut 1 x 2

Snow peas- 10-12 no

Carrots-1/4 cup cubes

Babycorn- 2-3 no sliced

Salt to taste

Green curry paste- 2-3 tsp

Sugar- 1 pinch

Water-1/2 cup- 1 cup

Coconut milk- 2 cups thick

Cornstarch solution- 2-3 tsp.

Coconut cream/ tender coconut/ basil leaves for garnish

Method:

1. Pre-prep all the ingredients for the lemongrass flavored curry.

2. Heat oil in a pan add in the lemongrass, ginger/galangal, fresh basil, green curry paste, add in some water to prevent the curry paste from sticking or burning.

3. Add in the assorted veggies of your choice and saute for a couple of minutes, add ½ cup water and 1 cup coconut milk and simmer for 8-10 mins.

4. Pour in a little more coconut milk as per texture desired along with a little corn starch solution to thicken up a bit, cook for 2-3 mins, garnish with fresh basil/ coconut cream and serve hot with steaming hot sticky jasmine rice/ lemongrass flavored white rice.


Recipe- 4] PAN FRIED LEMONGRASS FISH FILLETS

Ingredients:

Boneless fish fillets- 450gms- 750gms, sliced

For the marination:

Oil-2-3 tsp

Lemon juice- 2-3 tsp

Ginger shreds- 2 tsp

Mixed herbs-1/2 tsp

Chili flakes-1/2 tsp

Soy sauce-1 tsp

Brown sugar-1 tsp

Basil leaves- 5-6 no

White wine-2-3 tbsp. optional

Salt and pepper to taste

For pan-frying the fish:

Maida-1 cup

Oil-1/4 cup

Butter-2-3 tsp

For the accompaniments and plating:

Butter-2-3 tsp

Garlic-2-3 tsp sliced

Shallots- 5-6 no, cut 1 x 4

Spring onion greens- ½ cup chopped

Salt and pepper to taste

Steamed white rice/brown rice- 2 cups

Lemon grass- 5-7 pieces

Flax seeds/ melon seeds- 2-3 tsp

Jalapenos/ slit green/ red chilies- 2-3 no

Blanched spinach leaves- 1 cup

Method:

1. Pre-prep all the ingredients as per the recipe for the fish.

2. Prepare the fish fillets, apply the marination, keep them aside for 12-15 mins in the refrigerator.

3. Coat the fillets with dry maida/refined flour and pan fry it in a little oil and butter in a medium-hot pan for 2 mins on each side, remove and place on a baking tray, cook in the oven for 8-10 mins at 180 degrees celsius.

4. To prepare the accompaniments, heat oil and butter in a pan add in the lemongrass, garlic, shallots, spring onion greens, spinach, salt, pepper, chilies, seeds and give it a nice mix and toss.

5. Add some white wine or lime juice at this stage if desired and add in the cooked steamed rice and mix well. Cook for 2 mins, continue the plating of the fish, starting with a base of rice and greens, and top it up with the cooked fish and garnish with herbs/ garlic butter sauce, etc and serve hot.

Recipe-5] LEMONGRASS PISTACHIO PUDDING

Ingredients:

Lemongrass- 8-10 pieces’ cut

Full fat/cooking cream- 750 ml

Sugar-1/2 cup

Condensed milk- ¼ cup

Lemon essence-2-3 drops

Pistachios- 2-3 tsp chopped

Gelatin- 2-3 tbsp. hydrated

Assorted berries/ herbs/ nuts/ seeds/ praline etc for garnish

Method:

1. A delicate and delicious dessert with a mild and refreshing lemony flavor in it.

2. Start using a thick-bottomed saucepan, warm up the cooking cream and add in the sweeteners to taste and stir for 2-3 mins.

3. Add in the lemongrass pieces and allow them to infuse their flavor in the cream for 8-10 mins, remove.

4. Cool down the mixture and add in the pistachios, lemon essence and fold in the hydrated gelatin/ agar agar and mix well.

5. Pour the mixture into ramekins/ small baba mould etc and allow them to chill in the refrigerator and set for 3-4 hours.

6. Carefully demold the dessert and plate it using elements of color and crunch to add variety and eye appeal on the plate and serve it chille

LEMONGRASS INFUSED HERBAL TEA.jpg

Recipe-6] LEMONGRASS INFUSED HERBAL TEA

Ingredients:

Lemongrass- 6-8 pieces

Water- 750 ml

Lime slices- 2-3 no

Ginger slices- 3-4 no

Mint leaves- 8-10 no

Cinnamon stick- 1-inch piece

Peppercorns- 3-4 no crushed

Basil leaves- 2-3 no

Method:

1. Prepare all the ingredients for the herbal spiced tea.

2. There are various combinations to work on when it comes to the infusion of flavors into warm/hot beverages.

3. Startup with a saucepan, warm up the water, add in the lemongrass and all the other ingredients as well, simmer for 8-10 mins, bring to a light boil and turn off the flame.

4. Allow resting for a couple of mins, carefully strain it out using a strainer or a muslin cloth into serving small teacups and enjoy this any time of the day for a nice digestive effect and immunity-boosting drink as well with lemongrass.

Brief About the Writer:

Dr.Kaviraj.jpg

Ingredient Ideology | Bengal Gram: A Benevolent & Befitting Choice to Make By: Dr. Kaviraj Khialani- Celebrity Master Chef.

Bengal Gram: A Benevolent & Befitting Choice to Make

Chana dal is also known as Bengal gram or split chickpeas. These lentils have a sweet and nutty taste. Chana dal comes from black chickpeas (Kala chana). They are split and the outer husk is removed. These lentils are also powdered to give besan or gram flour. Chana dal derives from black chickpeas which are split with the outer covering removed. The resulting lentils are a bright golden hue and are common among various Indian dal recipes. 

The term dal refers to "pulses" such as lentils, beans, and peas. “Chana” is chickpeas, and “dal” is split lentils, peas, or chickpeas. Therefore, chana dal is split chickpeas in soup or curry form! For this dish, chickpeas are split and polished, resulting in a different texture and feel than whole chickpeas.

People quite often ask is chana dal the same as gram dal? Chana dal is also known as split chickpeas or Bengal gram. It derives from black chickpeas which are split with the outer covering removed. The resulting lentils are a bright golden hue and are common among various Indian dal recipes. 

The term dal refers to "pulses" such as lentils, beans, and peas. Bengal gram seeds are small and dark and have a rough coat. It is majorly cultivated in India, Pakistan, Bangladesh, Iran, and Mexico.
In the Indian vegetarian culinary scenario, Bengal gram is a major ingredient. It is essentially used in making curries. In southern India, unripe grams are picked and consumed as snacks and the leaves are added in the making of salads

Chana dal is rich in B-complex vitamins that play an important role in glucose metabolism and are vital for your body to remain active and energetic. It is also essential for the heart as it is rich in antioxidants and reduces inflammation keeping the organ healthy. 

Another query I often come across is, can one eat chana dal at night? “In general, it is best to consume dal during daytime as whatever we eat at night should be light and easily digestible. For example, moong dal is light and easily digestible, thus, it is completely okay to have it at night.

Chana dal is a widely grown lentil in India. It is an important pulse crop of the country. its vegetable or dal, besan (flour), crushed of a whole gram, boiled or parched, roasted or cooked, salted, unsalted, or sweetened, both green foliage and grain, are the forms in which it is consumed by the people.

Chana dal is cooked in a variety of ways with onions, spices, tamarind, or garlic and is also used for binding kebabs and koftas. They are cooked with jaggery and ground to paste and used as stuffing’s in Maharashtrian pancakes called “Puran Poli”. In Kerala, a dish called “Chana Dal Payasam” is made during festivals. This consists of chana dal cooked with jaggery, coconut, cashew nuts, raisins, and clarified butter (ghee).

Let us check out a few health benefits of Bengal Gram or Chana Dal:

  • Bengal gram helps in weight loss management.

  • Bengal gram is beneficial since it is a good source of energy.

  • Bengal gram is ideal for diabetics who wish to relist its flavor.

  • Bengal gram helps lower our cholesterol levels in the body.

  • Bengal gram is a good source of proteins and minerals.

  • Bengal gram promotes a healthy heart and prevents anemia.

  • Bengal gram is good for our skin, bones, and teeth.

  • Bengal gram strengthens immunity and the digestive system too.


Here are a few of my favorite ways with Bengal gram or Chana dal:

CHANA DAL KA PULAO.jpg

Recipe-1] CHANA DAL KA PULAO

Ingredients:

Chana dal/ Bengal gram- 1 cup, soaked for 30 mins in water.

Basmati rice- 1 and a half cup, cleaned, washed, soaked for 15 mins

Oil-2 tsp

Ghee-2 tsp

Bay leaf-2 no

Peppercorns- 3-4 no

Green cardamom- 2-3 no

Cloves- 2-3 no

Onion- 1 small sliced

Green chilies- 2-3 chopped

Ginger-1 tsp chopped

Garlic- 1 tsp chopped

Tomatoes- 2 small chopped

Salt to taste

Turmeric powder-1/4 tsp

Cumin powder- ¼ tsp

Coriander powder-1 tsp

Red chili powder-1/2 tsp

Kasuri methi- 1 tsp

Water- as required

Fried cashews and raisins- 2-3 tbsp.

Coriander leaves- 2 tbsp. for garnish.

Method:

1. Prepare all the ingredients as needed for the recipe.

2. Heat oil and ghee in a pan, add in the whole spices and ginger-garlic, chilies, onions- saute for 2-3 mins.

3. Add in the tomatoes and salt, all powdered spices, the drained dal, and rice, mix well.

4. Add in double the quantity of water and bring to a boil, cover and simmer for 20-25 mins until well done.

5. Serve hot garnished with fried onions, nuts, coriander leaves, and enjoy it with a bowl of raita, some papad and pickle.

[as a variation I also like adding cubes of fried potatoes tossed in our basic Indian home spices into the pulao and mix it, give it a dum for a few mins and serve hot] 

CHANA DAL KABABS.jpg

RECIPE- 2] CHANA DAL KABABAS

Ingredients

Chana dal- 1 cup soaked for 30 mins, boiled with a little salt, turmeric powder, and water, ideally pressure cook for 4-6 whistles and remove.

Boiled mashed potato- 1 cup

Oil-2 tsp + for frying

Ghee-2 tsp

Ghee-2 tsp

Hing-1/4 tsp

Cumin seeds-1/2 tsp

Ginger-garlic paste-1 tsp

Green chilies-1 tsp chopped

Onion-1 small chopped

Salt to taste

Red chili powder-1/2 tsp

Coriander powder-1 tsp

Garam masala powder-1/2 tsp

Mint leaves- 2 tbsp. chopped

Coriander leaves- 2 tbsp. chopped

Amchur powder-1/2 tsp

Chaat masala-1/2 tsp

Maida/ corn flour/ breadcrumbs- for binding/coating as needed

To serve with: tomato sauce/ green chutney/ dips/mayo-based dipping sauces etc.

Method:

1. Pre-prep all the ingredients as per the recipe.

2. Heat oil and ghee in a pan add in the hing, cumin, green chilies, ginger-garlic paste, onions and saute for a couple of mins.

3. Add in the boiled, cooked, and drained chana dal, salt, and all the powdered spices and give it a nice mix.

4. Cook the dal mixture for 2-3 mins on a medium flame, add in the mint, coriander leaves, mashed potatoes and remove from the flame.

5. Allow the mixture to cool for a few mins, add in bread crumbs and start shaping it into rounds, ovals as desired for the kababs.

6. There is an option of stuffing them with cheese and dry fruits as well for a tastier version.

7. Chill the prepared and shaped kababs for 30 mins, then dip into a batter of maida- water and then final coat of bread crumbs- immerse them into medium hot oil fry the kababs to a nice golden color, remove, drain off excess oil and serve hot with choice of sauces/dips.

Recipe-3] CABBAGE AND CHANA DAL DELIGHT

Ingredients:

Oil-2 tsp 

Ghee-2 tsp

Dry red chilies- 2-3 slit

Green chilies-1 tsp chopped

Hing-1/4 tsp

Curry leaves -8-10 no

Cumin seeds-1/2 tsp

Mustard seeds-1/2 tsp

Ginger-1 tsp shredded

Onion-1 small sliced

White cabbage- 200 gms, shredded

Boiled chana dal- 1 cup

Salt to taste

Turmeric powder-1/2 tsp

Cumin Powder-1/2 tsp

Coriander powder-2 tsp

Garam masala powder-1/4 tsp

Lime juice- 2 tsp

Coriander leaves- 2 tbsp. chopped

Roasted crushed peanuts-2-3 tbsp.

Method:

1. Pre-prep all the ingredients for the cabbage and chana dal subzi.

2. Heat oil and ghee in a kadai and add in the chilies, hing, ginger, cumin, mustard, onions and saute them for a few seconds.

3. Add in the shredded white cabbage, salt, and all powdered spices and mix well. Cover and simmer for 10-12 mins.

4. Add in the boiled chana dal, garam masala powder, a little fresh grated coconut can be added as well for taste. Cook for another 6- 8 mins.

5. Finally check for seasonings, add fresh coriander leaves, lime juice, and peanuts, and mix well. Serve hot with phulkas, rotis, a bowl of curd.

Recipe- 4] CHANA DAL AUR LAUKI KA MEL

Ingredients:

Oil- 2 tsp

Ghee-2 tsp

Hing- ¼ tsp

Shahi jeera- ½ tsp

Ginger- 1 tsp chopped

Green chilies- 1 tsp chopped

Onions- 1 cup chopped

Tomatoes- ½ cup chopped

Salt to taste

Turmeric powder-1/2 tsp

Coriander powder-1 tsp

Kasuri methi-1 tsp

Red chili powder-1/2 tsp

Water as needed

Chana dal- 1 cup soaked for 30 mins

Dudhi/ Lauki- 300 gms, peeled and cut into cubes

Fresh coriander leaves- 2 tbsp. chopped

Method:

1. Prepare all the ingredients for the chana dal and Lauki recipe.

2. Heat oil and ghee in a pan, add in the ingredients for the tadka one by one and allow to crackle and splutter.

3. Add in the onions, saute them to a light pink color, add in the tomatoes, salt, and all powdered spices and bhuna for few mins.

4. Add in the soaked and drained chana dal and Lauki pieces and saute for 2-3 mins, add in Kasuri methi.

5. Now it’s time to add the liquid content/ water to the pan and mix it well. Bring it to a boil and simmer/ pressure cook until well done and cooked.

6. While some people completely mash up the dal and Lauki at the end of the cooking process you have an option to leave it just like that too. You can also give it a tadka of red chilies and garlic before serving hot garnished with coriander leaves.

Recipe- 5] CHANA DAL PARATHAS

Ingredients:

For the paratha dough:

Whole-wheat flour/atta- 1 cup

Maida-1/2 cup

Salt to taste

Oil-1 tsp

Chopped coriander leaves-2 tsp

For the chana dal filling/stuffing:

Boiled chana dal- 1 cup

Green chilies-1 tsp chopped

Ginger-1 tsp chopped

Onion-1 small chopped

Salt to taste

Garam masala powder-1/4 tsp

Amchur powder-1/2 tsp

Coriander powder-2 tsp chopped

Cheese-2-3 tbsp. grated

Oil/ ghee – to cook the parathas.

To serve with: curd/ raita/ pickle/ papad.

Method:

1. Prepare a firm dough for the parathas, cover them with a damp duster/muslin cloth for around 20 mins.

2. Soak the chana dal for around 30 mins, drain and put it to boil with fresh water, salt and turmeric a tsp of ghee and cook it until just done, drain and keep aside.

3.In a mixing bowl, combine together the cooked dal along with all the other ingredients, seasonings, spices and mix well.

4. Divide the rested dough into 4- 6 portions and equally divide the chana dal filling as well.

5.Roll out the dough one by one and stuff the parathas and shape them well into a ½ inch thick paratha.

6.Heat up a tava/ non-stick pan and cook the chana dal parathas on both sides to a nice golden color, smear the parathas with oil/ghee and serve hot with curd, papad, pickle.

Recipe-6] CHANA DAL KA MEETHA

Ingredients:

Chana dal- 1 cup, soaked in water for 30 mins, par boiled

Sabudana/ sago- ½ cup soaked for 20 mins.

Ghee- 2-3 tsp

Green cardamom- 2-3 no

Sugar -1/2 cup

Jaggery- ½ cup

Date puree-1/2 cup can also be used for less sugar

Milk-500- 600 ml

Coconut milk-1 cup thick

Cashew paste-2 tsp

Raisins- 2-3 tsp 

Almonds- 2-3 tsp sliced

Saffron-3-4 strands

White chocolate- ½ cup grated

Motichoor ladoo- 2-3 no crumbled

Method:

1. Prepare all the ingredients for the chana dal ka meetha.

2. Warm up the milk and add in the green cardamom, sago, and parboiled chana dal and simmer for 20-25 mins.

3. Once the dal and sabudana have cooked up well in the milk, add jaggery and mix, simmer for 3-4 mins, cashew paste, saffron strands, add coconut milk and simmer for 4-5 mins, finally add the white chocolate and mix.

4. Check for sweetness and adjust accordingly, the texture of the sweet should be like custard by now. Allow to cool.

5. To assemble the sweet dish, using a glass dish/bowl spread the prepared mixture at the base, sprinkle crumbled motichoor ladoo along with a few nuts, and repeat the layer.

6. Finally garnish the top with nuts and allow to chill for 1-2 hours, serve the pudding/sweet dish chilled with a little dark chocolate sauce drizzle.

Dr.Kaviraj.jpg

Dr.Kaviraj Khialani

Brief About The Writer:

Dr. Kaviraj Khialani- Celebrity Master Chef, is a Mumbai-based Author, Writer, Healthy Eating - Lifestyle Specialist, Food Designer, Academician & having mastered over 33 International Cuisines, is also a Food & Beverage Consultant. He has worked with esteemed properties like the Taj Group of Hotels, Kuwait Airways to name a few, he has been awarded several Global and National Awards for his outstanding performance in his chosen field he loves to share his knowledge and experience of over 2 decades with the Food & Hospitality Industry.

Ingredient Ideology | The Adorable Dragon Fruit By: Dr. Kaviraj Khialani- Celebrity Master Chef.

DRAGON FRUIT INTRO PIC 2.jpg

The Adorable Dragon Fruit

Dragon fruit is also known as “pitaya” or “strawberry pear”. Dragon fruit grows on a climbing cactus plant that can grow from 15-20 feet high and can live for as long as two decades. The flower buds of the fruit are edible when cooked. Dragon Fruits are native to Southern Mexico and across Central and South America. The name 'dragon fruit' is derived from its unique appearance, where the spikes resemble fire and the scales resemble that of a dragon, as depicted in Chinese mythology. Dragon fruit is a fruit of many names, known as pitaya and pitahaya depending on genus, as well as strawberry pear and even night blooming cereus.

Dragon fruit can be considered as a superfood being low in calories but high in fibre, antioxidants, phytonutrients, vitamins and minerals, and containing healthy fatty acids and probiotics. Antioxidants are essential to protect cells from free radical damage, which cause chronic disease and ageing. Some of the major antioxidants found in dragon fruit are betacyanins, betaxanthins, hydroxycinnamates and flavonoids. According to a research article published in the World Journal of Pharmacy and Pharmaceutical Sciences in 2018, the antioxidant activity of the fruit can be helpful in preventing inflammatory conditions such as gouty arthritis. Hydroxycinnamates have proven anticancer activity, while flavonoids are linked to better brain health and reduced risk of heart disease.

To choose a ripe dragon fruit, look for bright, even-coloured skin. A few blemishes on the skin are usual, but if the fruit has a lot of flaws, it may be over-ripe. Hold the dragon fruit in your palm, and try pressing the skin with your thumb or fingers. It should give a little, but shouldn’t be too soft or mushy

Dragon fruit is rich in phytonutrients and antioxidants, including good amounts of carotene and vitamin C, and its nutritional and antibacterial properties have been studied for their ability to improve digestion, strengthen the immune system, and boost energy levels. Dragon fruit has high water content (about 80% water), and is a good source of iron, magnesium, B vitamins, phosphorus, protein, calcium, and fiber. The fruit’s edible seeds are also nutritious, as they are high in polyunsaturated fats like omega-3 and omega-6 fatty acids, which have been shown to lower the risk of cardiovascular disorders

Dragon fruit is best used raw and slightly chilled, but can also be cooked, such as grilling with a sprinkle of chili powder to balance its sweet flavor. Slice the fruit lengthwise and scoop out the flesh, or quarter it and peel off the leathery skin entirely, as it can be bitter. Dragon fruit is commonly blended in smoothies, or juiced for beverages and cocktails. It can be used to make jams or flavor ice creams, sorbets and other desserts, while syrup made from the fruit is often used for colouring pastries and candies. 

The soft yet dense texture will hold its shape nicely when cut, so it can be diced into fruit salads with papaya, coconut, mango, guava or kiwi. It can also be used in Savory salads, and pairs well with seafood, such as scallops and white, flaky fish. Ripe Dragon fruit can be kept at room temperature for a few days, or refrigerated in a sealed container for prolonged use. Fresh, cut segments will keep in a sealed container in the refrigerator for a day or two. Dragon fruit can also be sliced or cubed, then frozen for future use in blended or pureed applications.


Here are a few Health Benefits of Dragon Fruit:

1. Dragon fruit is considered good for the eyes, bones, teeth and skin.

2.Dragon fruit offers good support to our digestive system since it is high in fiber content, also aids in weight loss if consumed wisely.

3.Dragon fruit is a great immunity boosting ingredient and a fruit which can be had regularly due to good quantities of vitamins and minerals present in it.

4.Dragon fruit is also regarded as anti-aging since it has anti-oxidants which work against the free radicals and makes our skin tighter and younger look wise.

5.Dragon fruit also helps prevent cardio-vascular diseases, lowers cholesterol levels and helps reduce high blood pressure.

6.Dragon fruit is also anti-inflammatory and also supports our nervous system as well since it is high in vitamin B levels which aid in the formation of nerve cells and healthy fats for proper conductive signalling.

7. Dragon fruit is also heart healthy food, good in vitamin A and vitamin C content, also helps cure constipation issues.

8. Dragon fruit helps keeping the kidney clean and de-toxified and it also beneficial for our bone health as well.

9.Dragon fruit has also been regarded as a stress buster, due to its attractive look and eye appeal it is also a mood enhancer and works well to manage stress levels as well.

10.Dragon fruit is also regarded as good for the health of our hair and it supports good development of hair in our body and also strengthens hair growth.

Here are a few recipes with Dragon Fruit being incorporated into various cuisines and methods of cooking/ applications:

Recipe-1] DRAGON FRUIT WALDORF 

Ingredients:

For the base of the salad:

Assorted lettuce leaves-1 cup [Iceberg/Lollorosso/ Cos/ Romaine]

For the body of the salad:

Green apples/red apples-1 no, do not peel, cut into cubes.

Dragon fruit- 1 no, peeled and cut into med size cubes.

Celery- 2 stalks, cut into ½ inch pieces

Walnuts- 8-10 no. roughly cut.

For the dressing of the salad:

Mayonnaise- 1 cup

Mustard paste-1/2 tsp

Salt and pepper to taste

Lime juice-2 tsp

Mint leaves- 6-8 no.

For the garnish of the salad:

Assorted herbs/ nuts/ seeds/ micro-greens

Method:

1. Pre-prep all the ingredients for the salad recipe.

2. Clean, wash/rinse the lettuce leaves, place them in ice-cold water to maintain their freshness.

3. In a mixing bowl, combine together the ingredients for the dressing and mix well, I also tried using greek yogurt in place of mayonnaise and it turned out to be yummy as well.

4. Just before serving, add in the body of the salad into the dressing and give the salad a nice toss and mix.

5. Check for seasoning and adjust accordingly, arrange the drained and pat dried crispy lettuce leaves on a salad plate and portion the tossed salad on it and garnish appropriately and serve.


Recipe-2] MARINATED DRAGON FRUIT SALAD

Ingredients

For the base of the salad:

Assorted lettuce leaves-1 cup [ Iceberg/Lollorosso/Cos/ Romaine]

For the body of the salad:

Dragon fruit- 1 no, peeled and cubed

Fresh pineapple- 3-4 slices, cubed

Apple- red or green- 1 no, cubed

Chickoo- 2 no, peeled and cubed

Grapes- 10-12 no

Berries- ¼ cup any variety

For the marination cum dressing:

Honey-2 tbsp.

Lime juice-2 tbsp.

Mint leaves- 10-12 no

Ginger juice- 2 tsp

White wine-2 tsp- optional

Raisins- 10-12 chopped

Dates- 3-4 no puree

For the garnish of the salad:

Toasted flax seeds/ melon seeds/ pumpkin seeds- 2-3 tsp

Micro-greens/ fresh herbs.

Method:

1. Pre-prep all the ingredients for the marinated dragon fruit salad.

2. Prepare the base of the salad, clean, wash- rinse and place in cold water.

3. In a mixing bowl, assemble the ingredients for the marination cum dressing and give it a nice mix.

4. Add in the fruits as desired and mix, place in a cool place/ chiller/ fridge etc for around 20-30 mins.

5. Give the fruits a nice toss one more time and portion them on a bed of crispy lettuce leaves on a salad plate/ bowl.

6. Garnish the salad with toasted seeds/ slivers of almonds/ nuts/ micro-greens etc and serve.


Recipe-3] DRAGON FRUIT & PRAWN COCKTAIL SALAD

Ingredients:

For the base of the salad:

Assorted lettuce leaves- 1 cup preferred to use iceberg lettuce

For the body of the salad:

Dragon fruit- 1 no, peeled, cubed

Prawns- 12- 16 no, shelled, de-veined and washed.

To blanch/cook the prawns:

Water- 500 ml

Onion-1/2 no sliced

Bay leaf-1 no

Peppercorns-3-4 no

Celery stalk- 1 no cut

Lime slices- 2-3 no

White vinegar-1 tsp

Salt-1/2 tsp

For the dressing of the salad:

Mayonnaise-1 cup

Capsico/ tabasco sauce-1/2 tsp

Salt and pepper to taste

Lime juice-2 tsp

Tomato ketchup-2-3 tsp

Brandy/rum-1-2 tsp optional

Parsley-2 tsp chopped

Shallots- 3-4 chopped

Celery-2 tsp chopped

Gherkins/ olives- 2-3 tsp chopped

For the garnish of the salad:

Assorted fresh herbs/ boiled sliced egg/ black or green olives

Method:

1. Pre-prep all the ingredients for the dragon fruit and prawn cocktail salad recipe.

2. Start with the poaching/blanching/ boiling of the prawns first by assembling the listed ingredients into a saucepan/open pan and allowing it to come to a boil, simmer it, add the cleaned prawns into the pan and cook it for 6-8 mins, refresh with cold water, slice them 1 x2.

3. In a mixing bowl, combine together the ingredients for the dressing of the salad and add in the prawns and dragon fruit and give it a nice mix. Allow chilling until used.

4. Just before serving it, use transparent martini/ cocktail glasses for better eye appeal, arrange ice-berg lettuce in the glasses, layer up the chilled salad and garnish appropriately and serve immediately.

DRAGON FRUIT DELIGHT.jpg

Recipe-4] DRAGON FRUIT DELIGHT

Ingredients:

Dragon fruit- 2 no, peeled and cut roughly

Ginger juice- 2 tsp

Lime juice- 2 tsp

Sugar syrup- 2-3 tbsp.

Cashews-2 tsp chopped

Lychee crush- 2 tsp

Tender coconut/ malai- 2 tbsp. chopped

Coconut Water- ½ cup

For garnish

Mint leaves- 6-8 no

Cherries- 2-3 no

Method:

1. This recipe is about preparing small shorts with dragon fruit in the form of a juice / healthy sips.

2. Pre-prep all the ingredients as listed above and can be adjusted as desired/ as per taste.

3. Using a jar of a mixer-grinder/ food processor, combine together the dragon fruit with all the other ingredients as listed and give it a nice churn and process it.

4. Remove into a bowl, check for the balance between sweetness and flavor and adjust it accordingly. At times I also avoid the sugar element in this shot drink and prefer without sugar as well.

5. Just before serving the refreshing shot drink, portion it into small glasses, garnish it as desired and serve.


FUSION FIRNI WITH DRAGON FRUIT.jpg

Recipe-5] FUSION FIRNI WITH DRAGON FRUIT

Ingredients:

For the Firni mixture:

Milk- 500- 750 ml

Rice paste- 2-3 tbsp.

Green cardamom powder- ½ tsp

Sugar- to taste

Condensed milk-1/4 cup

Mava- 2-3 tsp

Raisins- 2-3 tsp chopped

Almonds- 2-3 tsp chopped

Cashews- 2-3 tsp chopped

Dragon fruit- 1 no, peeled, cubed

Mint leaves- 8-10 no

Glazed/tinned cherries- 3-4 no

Fruit cocktail tin- 1 cup, assorted tinned fruits can be added too.

Rossogulla- 2-3 no, sliced for the fusion touch in the Firni.

White chocolate- ¼ cup either shavings/ chips/ melted.

Method:

1. Pre-prep all the ingredients for the fusion Firni recipe.

2. In a saucepan combine together the milk, rice paste, sugar, elaichi powder and cook for 12-15 mins on a low flame, keep stirring.

3. Add in mava and condensed milk as it starts cooking, and continue to cook for another 8-10 mins on a low flame. Turn off the flame and cool.

4. Add in the white chocolate, mix and chill. Now it’s time to layer the dessert.

5. Using dessert glasses, cups start with the layering of the white chocolate Firni, place the dragon fruit, sliced rossogulla, assorted fruits, nuts and repeat the layers.

6. Chill the dessert for 2- 3 hours and then garnish and present the wow some dessert with dragon fruit combined in a white chocolate flavoured Firni.

THAI STYLE CHICKEN AND DRAGON FRUIT TOSS (1).jpeg


Recipe- 6] THAI STYLE CHICKEN AND DRAGON FRUIT TOSS

Ingredients:

Oil-2 tsp

Lemongrass- 3-5 pieces

Fresh basil leaves- 6- 8 no

Galangal/ Thai ginger- 2 tsp cut

Thai red curry paste- 2 tsp

Water-1/4 cup

Coconut milk- ¾ cup

Salt to taste

Boneless chicken cubes-1 cup

Corn starch solution-2-3 tsp to thicken up

Sugar-1 pinch

Dragon fruit- 1 no, peeled and cubed

Lime juice- 2 tsp

Base of assorted lettuce leaves/ purple cabbage- 1 cup

Garnish with olives/ gherkins/ parsley/ basil/ nuts/ seeds.

Method:

1. Pre-prep all the ingredients for the recipe as listed.

2. This recipe combines a cooked thai version of chicken in a coconut sauce, thickened up and cooled then tossed with dragon fruit and served.

3.Heat oil, add in the lemon grass, galangal, basil, red curry paste, a little water, and cook for a few seconds, add in the chicken cubes, allow to simmer and cook for 6-9 mins.

4.Add in the thick coconut milk and mix well. Cook for another 3-4 mins, thicken up a little with corn starch solution, add salt to taste, once done, turn off the flame and allow to cool.

5. This can be served like a cold appetizer, salad, starter as well. Toss the dragon fruit with the chicken just before serving and add some lime juice, fresh herbs for garnish, portion it into glasses/ bed of fresh lettuce/ purple cabbage leaves or even a small empty coconut shell could be used for presentation.

Dr.Kaviraj.jpg

Brief About The Writer:

Dr. Kaviraj Khialani- Celebrity Master Chef, is a Mumbai based Author, Writer, Healthy Eating - Lifestyle Specialist, Food Designer, Academician & having mastered over 33 International Cuisines, is also a Food & Beverage Consultant. He has worked with esteemed properties like the Taj Group of Hotels, Kuwait Airways to name a few, he has been awarded several Global and National Awards for his outstanding performance in his chosen field he loves to share his knowledge and experience of over 2 decades with the Food & Hospitality Industry.


Ingredient Ideology | The Celery Connect By: Dr. Kaviraj Khialani- Celebrity Master Chef.

The Celery Connect

Celery is a low-calorie vegetable with a high water content that contains a sizable dose of fiber, along with some vitamins and minerals. It's a convenient on-the-go snack as well as a vegetable that can be incorporated into cooked dishes, stir-fries, and salads.it has a long fibrous stalk tapering into leaves. Depending on location and cultivar, either its stalks, leaves, or hypocotyl are eaten and used in cooking. Celery seed is also used as a spice and its extracts have been used in herbal medicine. 

The first cultivation is thought to have happened in the Mediterranean region, where the natural habitats were salty and wet, or marshy soils near the coast where celery grew in plant communities. North of the Alps, wild celery is found only in the foothill zone on soils with some salt content. It prefers moist or wet, nutrient rich, muddy soils. It is a marshland plant that comes from the same family as carrots and parsley. It has long, firm, pale green fibrous stalks and grows in bunches of approximately eight to 10. The stalks taper into leaves at the top. Although most people discard the leaves, they are also edible. Celery has a mild, earthy, slightly peppery taste.

 The plants are raised from seed, sown either in a hot bed or in the open garden according to the season of the year, and, after one or two thinning’s and transplanting’s, they are, on attaining a height of 15–20 cm (6–8 in), planted out in deep trenches for convenience of blanching, which is effected by earthing up to exclude light from the stems Unlike some vegetables, celery retains most of its nutrients even if it is steamed.

 A study published in 2011 in the journal LWT – Food and Science Technology compared celery that had been steamed, boiled and blanched and found that, after 10 minutes of steaming, the vegetable still maintained 83% to 99% of its antioxidants, compared with uncooked celery. On the other hand, boiling and blanching led to a 38% to 41% loss in antioxidants. Celery is rich in compounds called phytonutrients, which are produced by plants and may have antioxidant and anti-inflammatory properties. (Antioxidants are substances that help prevent cell damage, according to the National Institutes of Health; and ant-inflammatory compounds are those that fight inflammation in the body.)  

Celery was first grown as a winter and early spring vegetable. It was considered a cleansing tonic to counter the deficiencies of a winter diet based on salted meats without fresh vegetables. By the 19th century, the season for celery in England had been extended, to last from the beginning of September to late in April. 

Celery is eaten around the world as a vegetable. In North America the crisp petiole (leaf stalk) is used. In Europe the hypocotyl is used as a root vegetable. The leaves are strongly flavoured and are used less often, either as flavorings in soups and stews or as a dried herb. Celery, onions, and carrots make up the French Mirepoix, often used as a base for sauces and soups. Celery is a staple in many soups, such as chicken noodle soup. 

Celery leaves are frequently used in cooking to add a mild spicy flavor to foods, similar to, but milder than black pepper. Celery leaves are suitable dried as a sprinkled on seasoning for use with baked, fried or roasted fish, meats and as part of a blend of fresh seasonings suitable for use in soups and stews. They may also be eaten raw, mixed into a salad or as a garnish.

The seeds can be ground and mixed with salt, to produce celery salt. Celery salt can be made from an extract of the roots or using dried leaves. Celery salt is used as a seasoning, in cocktails (notably to enhance the flavor of Bloody Mary cocktails), on the Chicago-style hot dog, and in Old Bay Seasoning. Similarly, combinations of celery powder and salt are used to flavor & preserve cured pork and other processed meats as alternative to industrial curing salt. The naturally occurring nitrites in celery work synergistically with the added salt to cure food. 


Here are a few health benefits of Celery:

Celery is a low-calorie vegetable that may have powerful anti-inflammatory properties. It can be used to lower cholesterol levels and arthritis pain, quicken weight loss, protect against oxidative damage, and reduce high blood pressure. Including celery stalks in your diet might promote your overall health as it is rich in vitamin C.

Good for immunity system: Rich in vitamin A and C as well as antioxidants, celery may greatly boost the immune system and make it more active and efficient. Eating this vitamin C rich vegetable regularly can help reduce your risk of catching a common cold, as well as protect you against a variety of other diseases.

Helps reduce blood pressure: Celery contains organic chemical compounds called phthalides. These compounds may help lower the level of stress hormones in your blood. It also contains potassium, which is a vasodilator and can be helpful in reducing blood pressure. When blood pressure is reduced, it puts less stress on the entire cardiovascular system and reduces the chances of developing complications or suffering from a heart attack or stroke.

Has anti-inflammatory properties: Experimental studies show that celery can potentially help reduce inflammation in the body. A 2019 study suggested that celery leaves may affect cytokines, which are immune system messenger molecules responsible for anti-inflammatory effects in the body. This is because the leaves may have high levels of bioactive compounds. Researchers concluded that it can be a potential ingredient for the treatment and prevention of inflammatory diseases. 

Helpful in reducing cholesterol levels: A research study published also suggests that the levers of fiber found in celery may help reduce artery-clogging cholesterol (called LDL or bad cholesterol) The phthalides in these vegetables also may help stimulate the secretion of bile juices, which work to reduce cholesterol levels. Less cholesterol means less plaque on the artery walls and a general improvement in heart health. The fiber that is found in it also can work to scrape the cholesterol out of the bloodstream and eliminate it from the body with regular bowel movements, further boosting cardiovascular health.

Here are a few Culinary Uses of Celery:

  • Though we haven’t seen celery being used much in the indian cuisine and recipes yet, there is a scope and possibility of including it in a varied way and adding a touch of spice to it which can benefit us and also give us variety in our daily foods.

  • Celery added to the kachumber concept with cucumber, onion, tomato, chilies, coriander, lime, roasted crushed peanuts would be one of the good ways to start adding it in.

  • A tempered celery and sesame seed raita, spiced up with a little roasted crushed cumin and a dash of mint and chaat masala is also one of the ways to add it on the side with a meal.

  • Celery in the form of a subzi with cabbage/ carrots/ white radish and a tempering of mustard seeds, curry leaves, dried red chilies did like a foogath or a poriyal concept with a little fresh coconut and coriander can be one of the tasty ways too.

  • Blending it into juice, soups, adding it to baked dishes, stir-fried concepts, adding it into Chinese soups, gravies, fried rice, noodles, pot rice, futchi rice concepts, spring rolls, wontons are quite popular.

Here are a few of my favorite recipes with celery:

Recipe-1] CELERY ALMOND SOUP

Ingredients

Celery- 4-5 stalks, washed, cleaned and roughly cut.

Potatoes- 2 med sized, peeled and cubed

Oil-1 tsp

Butter-1 tsp

Garlic- 2-3 cloves, chopped

Onion-1 small chopped

Bay leaf-1 no

Peppercorns- 3-4 no

Salt and pepper to taste

Water/ veg stock- 2-3 cups

Almond paste-2 tsp

Sliced almonds-2 tsp

Parsley-2 tsp chopped

Fresh cream-2-3 tsp

Flax seeds/ pumpkin seeds- 2 tsp

Method:

1. Prepare all the ingredients for the celery and almond soup.

2. Heat oil and butter in a pan, add in the bay leaf, peppercorns, garlic, onions and saute for 1 min.

3. Add in the celery, potato cubes, salt and pepper to taste, add in the water/stock and bring to a boil, simmer for 20-25 mins.

4. Cool the soup, remove the bay leaf, and churn the soup to a well-blended puree and bring it back to a boil. Adjust the texture by adding a little stock.

5. Now add in the almond paste, fresh cream and mix well and check for seasonings.

6. Serve the soup hot garnished with some more almonds, toasted nuts, parsley/cream.


Recipe-2] CELERY PEPPER FRIED RICE

Ingredients

Boiled rice- 2 cups- white/brown

Oil-2 tsp

Garlic- 1 tsp chopped

Ginger-1 tsp chopped

Onion-1 small chopped

Celery-1/2 cup stalks- cut into small pieces.

Salt and pepper to taste

Red chili sauce-1 tsp

Schezuan sauce/chutney- 2-3 tsp

Soy sauce-1 tsp

Red Capsicum-1/2 cut into small cubes

Yellow capsicum-1/2 cut into small cubes

Green capsicum-1/2 cut into small cubes

Chicken- boiled/cubed/shredded-1 cup or assorted veggies.

Spring onion greens-1/2 cup chopped

Method:

1. Prepare all the ingredients for the fried rice recipe.

2. Heat oil in a pan add in the ginger, garlic, onions, celery and saute for 2 mins.

3. Add in the capsicums/ assorted veggies/ chicken/ scrambled eggs etc and saute for 1 minute, add in the rice, all seasonings, sauces as per taste and mix well.

4. Cover and cook for 3-4 mins on a medium flame, toss well and mix up all ingredients in the pan.

5. Serve hot garnished with spring onion greens.


Recipe-3] STIR FRIED CELERY WITH CHICKEN

Ingredients:

Oil-2 tsp

Butter-1 tsp

Garlic-1 tsp chopped

Ginger-1 tsp chopped

Onion-1 small chopped

Celery- 3-4 stalks- cut into strips

Star anise -2 no

Peppercorns-2-3 no

Red chilies-1-2 slit

Green chiles-1-2 slit

Red/ green/yellow capsicums-1/2 cup shreds

Boneless chicken- 1 cup cut into strips

Salt and pepper to taste

Soya sauce-2 tsp

Red chili sauce-1 tsp

Green chili sauce-1 tsp

Honey-1 tsp

Water chestnuts-3-4 no sliced

Water/veg stock -1/2 cup

Corn starch solution-2-3 tsp to thicken

Roasted crushed peanuts-2-3 tbsp.

Spring onion greens- 2-3 tbsp.

Method:

1. Prepare all the ingredients for the stir fry recipe.

2. Heat oil and butter in a pan add in the star anise, pepper, ginger, garlic, onions, chilies and saute them all for couple of minutes.

3. Add in the chicken pieces and saute them, add in seasonings to taste, little stock/water and allow the chicken to cook for 6-8 mins.

4. Now add in the assorted capsicums, water chestnuts, celery and other veggies if any and cook for 2-3 mins.

5. Add in the corn starch solution and thicken a little to get it all together, adjust seasonings/sauces as per taste, mix well and serve hot garnished with greens.


Recipe-4] CELERY & BEAN FRIED RICE

Ingredients:

Boiled rice-2 cups, white or brown

Oil-2 tsp

Butter-1 tsp

Celery-2-3 stalks, cut into small pieces

Garlic-1 tsp chopped

Ginger-1 tsp chopped

Green chilies-1 tsp chopped

Onion-1 small sliced

Bay leaf-1-2 no

Cinnamon stick-1-inch piece

Salt and pepper to taste

Boiled beans- 1 cup- kidney beans/ black beans/ baked beans etc can also be used in this recipe.

Water-1/2 cup

Parsley-2 tsp chopped

Mixed herbs-1/2 tsp

Chili flakes-1/2 tsp

For the base of the rice:

Oil-2 tsp 

Ginger-garlic-1 tsp chopped

Spring onion-2 sliced

Green chilies-2 slit

Salt and pepper to taste

Boneless chicken shredded-1 cup

Soya sauce-2 tsp

Red chili sauce-2 tsp

Mushrooms-1/2 cup sliced

Boiled sweet corn-1/2 cup

Corn starch -2-3 tsp to thicken 

Cheese- 2-3 tsp grated

Method:

1. Prepare all the ingredients for the base of the recipe and the fried rice

2. Heat oil and saute the ginger, garlic, chilies, onions and saute for 1 minute, add in the chicken shreds and saute for 1-2 mins, add in the seasonings, mushrooms, corn water/stock and sauces and mix well.

3. Reduce flame and cook for 6-8 mins and then add corn starch solution to thicken it all up.

4. Place this mixture at the base of your serving dish or bowls. Now toss the rice and add it over this and serve.

5. To prepare the fried rice, heat oil and butter in a pan add in the spices, ginger, garlic, chilies, onions and saute for 2 mins.

6. Add in the beans and celery and saute, add seasonings, herbs, chili flakes, sauces to taste and add in the cooked rice and saute it all well for 3-4 mins, cook for 4-5 mins and then place this over the chicken and mushroom mixture and top it up. Garnish with greens and serve hot.


ASIAN CELERY STIR FRY.jpg

Recipe- 5] ASIAN CELERY STIR FRY

Ingredients:

Oil-2 tsp

Butter-1 tsp

Red chilies-1-2 slit

Green chilies-1-2 slit

Spring onions- 4-5 no sliced

Celery- 3-4 stalks cut into small pieces

Chicken sausages- 2-3 no sliced

Salt and pepper to taste

Carrot-1 cup strips

French beans- 4-5 sliced

Red capsicum-1/2 no strips

Soy sauce- 2 tsp

Red chili sauce-2 tsp

Peanut butter-2 tsp

Water/stock-1 cup

Mixed herbs-1/4 tsp

Chili flakes-1/4 tsp

Honey-1 tsp

Corn starch solution- 2-3 tsp to thicken

Parsley-2 tsp chopped

Assorted nuts-2-3 tsp sliced

Assorted seeds-2 tsp toasted and added

Spring onion greens- 2-3 tbsp. chopped

Method:

1. Prepare all the ingredients for the celery stir fry dish.

2. Heat oil and butter in a pan, saute the chilies, onions, and garlic for a couple of minutes.

3. Add in the chicken sausage pieces and saute for 2-3 mins. Add in seasonings, herbs, chili flakes, honey, sauces, little water and allow the chicken to cook for 6- 8 mins.

4. Add in the carrot and capsicums, peanut butter and adjust it with a little water, cook for 3-4 mins.

5. Now add in a little corn starch solution and thicken up the mixture to a semi-dry/ medium gravy texture, add in nuts and seeds, mix well and garnish with parsley/ spring onions and mix. Serve hot. 


Recipe- 6] CELERY AVOCADO TUNA SALAD

Ingredients:

For the base of the salad:

Assorted lettuce leaves-1 cup

For the body of the salad:

Celery-2-3 stalks cut into slices

Avocado-1 ripe, peeled, stoned, cut into cubes

Tuna fish-1 cup, drained from the tin.

For the dressing of the salad:

Mayonnaise sauce-1/2 cup

Salt and pepper to taste

Lime juice-2 tsp

Assorted herbs-2-3 tsp fresh

Mustard paste-1/2 tsp

For the garnish of the salad:

Assorted nuts/seeds-2-3 tsp

Micro-greens-2-3 tsp

Fresh herbs-2 tsp

Cherry tomatoes-3-4 cut

Method:

1. Prepare all the ingredients for the salad as listed. We can also use tofu, grilled paneer or grilled veggies, boiled/roast chicken, etc in this salad.

3. In a salad plate, arrange the assorted cleaned, washed, chilled, and crispy lettuce leaves as the base.

4. In a mixing bowl combine together the ingredients for the dressing and mix well.

5. Now add the body of the salad into the dressing and toss it well, check for taste and adjust it accordingly.

6. Dish out the chilled salad onto the serving salad plate and garnish it, serve cold.

Dr. Kaviraj Khialani- Celebrity Master Chef, is a Mumbai based Author, Writer, Healthy Eating - Lifestyle Specialist, Food Designer, Academician & having mastered over 33 International Cuisines, is also a Food & Beverage Consultant. He has worked with esteemed properties like the Taj Group of Hotels, Kuwait Airways to name a few, he has been awarded several Global and National Awards for his outstanding performance in his chosen field he loves to share his knowledge and experience of over 2 decades with the Food & Hospitality Industry.

Ingredient Ideology The Sensational Sausage By: Dr. Kaviraj Khialani- Celebrity Master Chef.

The Sensational Sausage

The concept of sausage is quite an old one and goes back to historic times in our culinary heritage where this term Sausage can refer to the loose sausage meat, which can be formed into patties or stuffed into a skin. When referred to as a product it is usually cylindrical and encased in a skin or a casing. Sausages have also been said to have probably been first been invented as a means of preserving blood, offal, and small scraps of meat in convenient edible containers, the stomachs, and intestines of the slaughtered animals.


While it is also said that the word “Sausage” was first used in English in the mid-15th century, spelled “sawsyge”. This word came from Old North French saussiche (Modern French saucisse)”. The French word came from Latin salsica (sausage), from salsicus (seasoned with salt). The earliest known reference to sausage dates to Greece in the eighth or ninth century BC. Evidence suggests that sausages were already popular both among the ancient Greeks and Romans and most likely with the various tribes occupying the larger part of Europe.


While sausages may have begun in frugality, they had already evolved into delicacies worthy of a gourmet’s attentions. Pork is the meat most commonly used to produce sausages. Hot dog or frankfurter, frank, or wien is a cooked sausage, traditionally grilled or steamed and served in a partially sliced bun. Pork and beef are the traditional meats used in hot dogs. 

Less expensive hot dogs are often made from chicken or turkey, using low-cost mechanically separated poultry, and while the sausage is also defined as a type of meat product usually made from ground meat, often pork, beef, or poultry, along with salt, spices, and other flavorings. Other ingredients such as grains or breadcrumbs may be included as fillers or extenders.

Though we also relate to forcemeats in association with sausage making with a variety of components and formulae which form a part of their composition have been helping create and prepare varied types of sausages around the world over the years which have been used in a number of ways in our culinary repertoire.

A Few Culinary Uses of Sausages:

While there are loads of sausages around the world for us to enjoy and relish in various recipes/ cooking styles and combinations, some of the most commonly used options with sausages are as below:

1. Sausages have been popular on a Breakfast table: A variety of sausages are used for breakfast be it English breakfast, American or the contemporary to the new world cuisine varieties, sausages are able to find their right place in grilled forms, saute, and cooked up on a hot griddle and dished out with eggs, baked beans etc. from hot dogs to frankfurters and the long list of international sausage varietals there have been a number of them being used. Some of the famous ones have included black pudding sausage and Scottish varieties being served for morning munchies.

2. Sausages are good to go in Soups, Salads, Stir-fries: Sausages are ideal to be used in a number of gourmet delicacies add them to your favorite choice of soup with veggies ideally with potatoes and some herbs, have them in the form of a broth with veggies in a well-flavored stock. Add sausages to your salad bowls, grill them, pan fry them, use the smoked varieties as well to add that special punch into a salad with a nice tart dressing to compliment it. Sausage stir-fries in combination with veggies, pulses, legume options, greens, beans, root veggies, etc also turn out to be good for brunch options.

3. Sausages in Baked & Roast dishes: Lace them in combination with choicest veggies and complimenting options in a creamy white sauce with cheese and set it into a baking dish, layer it with a twist of taste flavors, with pasta, noodles, rice, bread, and potatoes, etc. it turns out to be a yummy delight the moment it is browned at the top and has a nice crusty cheesy look. It has also been observed that sausages have also been a part of roast preparations be it a poultry roast like stuffed roast chicken with a stuffing of bread, herbs and sausages, or be it a roast turkey as well. A variety of sausages have been adding their delectable and robust flavor into roast preparations as well.

4. Sausages in bakery products: Baking variety of goodies with sausages is a great thing to do, talking of the varieties of pastry options, puff pastry, flaky pastry, shortcrust pastry, filo pastry, etc somehow they are all able to adapt themselves well with sausages in the form of fillings and stuffing since a long time now. Some of the all-time favorites include quiche, tarts, tartlets, filo-wrapped sausages, bread dough wrapped sausage delights, stuffing for a croissant, sausage and cheese puffs etc.

5. Sausages in Fusion recipes: one of the recent trends we have witnessed includes mix-n-match combination recipes with a little of this and a little of that dishing out a delicacy to excite the senses and treat the palate. Indian twist to sausages by tempering them, adding them to a curry, cooking them in a saute or stir fry format, simmering them into a desi coconut stew, adding them to a pulao, stuffing it into a samosa, wrapping it into a Kathi roll and more! besides when we talk of fusion we can also mix two of more cuisines as well for instance an Indo-Chinese sausage Tava pulao, an Indo- Mexican sausage peri-peri tortilla wrap, an Indo –Spanish sausage tapas platter with varied flavors. Today we also have a choice of vegan sausages as well to work with and they are simply awesome to try and include in our diets, recipes, and menus.

6. Sausages in Sandwiches, Pancakes Rolls and Wraps: while we relate crepes to be the original french variety of pancakes, they are thin and delicate which can be wrapped up with a variety of fillings using eggs and sausages, Akoori and the scrambled versions have also found their way all the way with sausages in pan rolls for brunches, savory sausage pancakes topped with an array of delectable toppings/sauces to go along from a live counter during festive occasions/ Sunday brunches etc. rolls, wraps and hot dog bread, subs have also been one of those options where sausages have been found popularly across the western part of the world. While in India we talk about our famous kathi rolls, Frankie’s etc having a sausage incorporated in them too would be a nice way to enjoy them for a change with a touch of spice and dash of robust flavors.

Here are a few of my favorite easy to dish out Recipes with Chicken Sausages:

Recipe-1] COCONUT CURRIED SAUSAGES

Ingredients:

Sausages- 250 gms, cut 1 x 3

Carrot-1 small cubed/sliced- blanched

Potato cubes-1 cup fried.

Oil- 2 tsp

Butter-1 tsp

Bay leaf- 1-2 no

Peppercorns- 3-4 no

Curry leaves- 4-5 no

Garlic- 1 tsp chopped

Ginger-1 tsp chopped

Green chilies-1 tsp chopped

Onions-1 cup chopped

Tomatoes-2-3 small puree

Salt to taste

Red chili paste-2 tsp

Coriander powder-1 tsp

Cumin powder-1/2 tsp

Turmeric powder-1/2 tsp

Garam masala powder-1/4 tsp

Coconut milk- 2 cups thick

Water-1/2 cup

Cashew paste-1 tsp

Coriander leaves-2 tbsp. chopped

Method:

1. Prepare all the ingredients for the coconut curried sausages.

2. Heat oil and butter in a pan add in the curry leaves, ginger, garlic, onions, green chilies, and saute for 2-3 mins.

3. Add in the tomato puree, red chili paste, salt, and all powdered spices and saute for 2-3 mins.

4. Add in little water and let the gravy cook for 5- 7 mins, add in the coconut milk and cashew paste, and simmer for 3-4 mins.

5. Finally add in the sausages and fried potatoes and allow them to simmer in the gravy for 5-7 mins, add coriander and serve hot.


Recipe-2] SAUSAGE AND SPINACH DUET

Ingredients:

Sausages- 250 gms, cut 1 x 3

Spinach leaves- 1 bunch, cleaned and blanched

Sweet potato- 1 cup, cubed and boiled.

Oil-2 tsp

Butter- 1 tsp

Cinnamon stick- 1-inch piece

Cloves- 3-4 no

Dry red chilies-1-2 no slit

Green chilies-1-2 slit

Ginger-garlic paste-1 tsp

Onion-1 small chopped

Tomato- 1 small chopped

Salt to taste

Black pepper powder to taste

Cumin seeds-1/2 tsp

Mixed herbs-1/2 tsp

Chili flakes-1/2 tsp

Garam masala powder-1/4 tsp

Water-1/4 cup

Method:

1. Prepare all the ingredients for the sausage and spinach duet.

2. Heat oil and butter in a pan add in the cinnamon stick and cloves.

3. Add in the ginger-garlic paste, red chilies, green chilies, onion and cumin seeds, saute for 1-2 mins.

4. Now add in the tomato, salt, and all powdered spices, herbs, chili flakes and little water and cook for 2-3 mins.

5. Add in the sausages, spinach and potatoes and cover, simmer for 3-5 mins and serve hot.


Recipe-3] SAUSAGE SANDWICH FIESTA

Ingredients:

Sausages- 4-6 no, cut 1 x 2 lengthwise

Hot dog rolls/ bread- 3- 4 no

Butter-2 tsp to spread on the bread

Oil- 2 tsp

Garlic- 1 tsp chopped

Onion-1 small chopped

Salt and pepper to taste

Mustard paste-1 tsp

Red chili sauce-1 tsp

Tomato ketchup-2-3 tsp

Chopped parsley-2 tsp

To add on into the sandwich roll:

Mustard mayonnaise-2-3 tsp

Cheese slices-2-3 no

Sliced onions- 2-4 slices

Coleslaw- ¼ cup

Tomato-1 sliced

Cucumber-1/2 sliced

Gherkins- 2-3 slices

Method:

1. Prepare all the ingredients for the sausage sandwich recipe.

2. Slit open the hot dog rolls and warm them on a non-stick pan/ griddle apply little butter and keep aside.

3. Heat oil in a pan add in the garlic, onions and saute it for 2 mins, add in the sausages and stir fry them on a high flame for 1 min.

4. Add in the mustard paste and all other sauces and coat them well on the sausages, cook for a minute and turn off the flame, add chopped parsley.

5. Place the saucy coated sausages in between the slit rolls and add more spreads/ sauces etc as needed and also place slices of assorted veggies, gherkins etc as listed to add more color, texture, crunch and freshness to the sandwich. Serve hot.


Recipe- 4] SAUSAGE MEXICANA 

Ingredients:

Sausages- 250 gms, cut 1 x 3

Oil-1 tsp

Butter- 1 tsp

Star anise- 1-2 no

Garlic- 1 tsp chopped 

Onion-1 small chopped

Refried beans/ kidney beans- 1 cup boiled

Green capsicum- ½ no chopped

Jalapeno peppers- 2-3 tsp sliced

Salt and pepper to taste

Cumin powder-1/2 tsp

Coriander powder-1 tsp

Red/ yellow capsicums-1/2 cup shredded

Water/stock-1/2 cup

Tomato puree- ½ cup

Tomato ketchup-2 tsp

Red chili sauce-2 tsp

Mixed herbs-1/2 tsp

Chili flakes-1/2 tsp

Boneless chicken cubes- 1 cup or paneer cubes/tofu- 1 cup

Parsley/coriander/ basil leaves- 2 -3 tsp

Method:

1. Prepare all the ingredients for the sausage Mexicana recipe.

2. Heat oil and butter in a pan add in the star anise, garlic, onion and saute for 1-2 mins, add in the tomato puree, salt, pepper, herbs, spices or use Mexican peri-peri spice powder to taste and saute for 1-2 mins, add little water and simmer for 2-3 mins.

3. Add in the chicken cubes, allow to cook for 5-7 mins, add in the kidney beans, tofu or paneer at this stage if being used in case of veg- do not mix with non-veg in the same recipe.

4. Add in the sausages and all the other sauces, seasonings and mix well, simmer for 3-6 mins, add in the colorful capsicums and mix well. Also add in the jalapenos, fresh herbs/ grated cheese/ sour cream on top as desired before serving.

5. Serve this recipe along with Mexican fried rice/ french bread / herbed garlic rolls etc.


Recipe- 5] STIR-FRIED SAUSAGES

Ingredients:

Sausages- 250 gms, cut 1 x 3

Oil-2 tsp

Butter-1 tsp

Peppercorns- 3-4 no

Slit green chilies-2-3 no

Spring onions- 1 cup sliced

Red capsicum-1/2 no shredded

Green capsicum-1/2 no shredded

Yellow capsicum-1/2 no shredded

Celery-1 stalk cut

Salt and pepper to taste

Soy sauce- 2-3 tsp

Red chili sauce- 2 tsp

Green chili sauce-2 tsp

Honey-2 tsp

White vinegar-2 tsp

Sugar-1 pinch

Schezuan sauce/hot garlic sauce-2 tsp

Water-1/2 cup

Corn starch solution-2-3 tsp

Assorted greens for garnish-1/4 cup or spring onions- chopped.

Method:

1. Prepare all the ingredients for the stir fried sausages.

2. Heat oil and butter in a pan add in the peppercorns, slit green chilies, sliced spring onions and saute for 2 mins.

3. Add in the sausages and capsicums, salt, pinch of sugar and pepper to taste, stir fry them on a high flame for 1-2 min.

4. Add in the sauces to taste as listed/ as per choice and mix, add little water and allow to cook for 3-4 mins.

5. Finally add in some corn starch solution and thicken it up a little to coat the sausages in the pan.

6. Serve hot garnished with assorted greens/ spring onion greens.


Recipe- 6] SAUSAGE PEPPER TARTS

Ingredients

Sausages- 250 gms, cut into small pieces

Oil-1 tsp

Butter-1 tsp

Garlic-1 tsp chopped

Shallots- 3-4 chopped

Celery-1 stalk chopped

Assorted capsicums-1/2 cup fine chopped

White sauce-1/2 cup

Cheese-2-3 tbsp. grated

Ready to use Tart shells- 10-15 no

Peanut butter-2 tsp

Water-2-3 tbsp.

Mixed herbs-1/2 tsp

Capsico sauce- 1 tsp

Parsley-1 tbsp. chopped

Olives- 3-4 sliced

Method:

1. Assemble all the ingredients for the sausage tarts.

2. Heat oil and butter in a pan and saute the garlic, shallots, celery for a minute, add in the capsicums and sausages, and stir for 1 min.

3. Add in the salt, pepper, herbs, peanut butter, and little water and mix it all up, cook for 2-3 mins.

4. Once the sausages are nicely coated with the mixture lastly add in the Capsico sauce, a little white sauce for a creamy texture.

5. Fill the tart shells with this sausage mixture and top with olives, grated cheese and bake in the oven for 2-3 mins and serve hot as a snack.

Dr.Kaviraj.jpg

Brief About The Writer:

Dr. Kaviraj Khialani- Celebrity Master Chef, is a Mumbai based Author, Writer, Healthy Eating - Lifestyle Specialist, Food Designer, Academician & having mastered over 33 International Cuisines, is also a Food & Beverage Consultant. He has worked with esteemed properties like the Taj Group of Hotels, Kuwait Airways to name a few, he has been awarded several Global and National Awards for his outstanding performance in his chosen field he loves to share his knowledge and experience of over 2 decades with the Food & Hospitality Industry.