RECIPES | Republic Day Culinary Delicacies By Dr. Kaviraj Khialani- Celebrity Master Chef

Republic Day Culinary Delicacies

Republic Day has been celebrated every year in India on January 26, since 1950 to honour the date on which the Constitution of India came into effect. India was a colony of the British for over 200 years and became independent from the rule of the British Raj following the Indian independence movement. While India became independent on August 14, 1947, it still didn’t have a permanent constitution, and Indian laws were based on a modified version of the British established, Government of India Act 1935. 


However, two weeks later on 29 August 1947, a Drafting Committee was appointed for the drafting of a permanent Indian Constitution, with Dr B R Ambedkar as chairman. After a lot of hard work, the Constitution was finally drafted, and January 26 was chosen as the day to declare India as the Sovereign Republic. 

The significance of January 26 is that on that day in 1929, the Indian National Congress made the well-known Declaration of Indian Independence (Purna Swaraj) as opposed to British rule. And though the Constitution came into force in 1950 with a democratic government system, it was adopted by the Indian Constituent Assembly on 26 November 1949. 


This completed the country’s transition into becoming a sovereign republic. The draft of the constitution was submitted to the Indian Constituent Assembly on 4 November 1947. Over the course of 166 days, that were spread over two years, the 308 members of the Assembly met in sessions that were open to the public and made some modifications. Finally, on January 24, 1950, the Assembly members signed two handwritten copies of the Constitution, one in English and one in Hindi. And two days’ later history was made. On that day began Dr. Rajendra Prasad’s first term of office as President of the Indian Union. The Constituent Assembly became the Parliament of India under the transitional provisions of the new Constitution. January 26 is celebrated to commemorate the Indian Constitution replacing the Government of India Act (1935) as the governing document of India. And now it is celebrated across India with a lot of fervour. In Delhi, at Raj Path magnificent parades by regiments of the Indian Army, Navy, Air Force, police and paramilitary forces march and there is also a display India’s defence prowess is on display with latest missiles, aircraft, and weapon systems. Beautiful tableaus, representing the beauty of all the states of India are also showcased during the parade. There are also sky shows by the Air Force, though we are still fighting the pandemic bravely all across the country, India will be celebrating its Republic Day this year as well.


The Food and Hospitality Industry has always stepped up on a very positive note when it comes to making moments and occasions like these special for our valued guests and food lovers! A lot of hotels and restaurants plan up special menus with the tri-coloured theme attached to suit the republic day! There is a décor and ambience created in the outlets to add that look and feel experience to make the auspicious day all the more patriotic and the feeling of pride which every indian carries on this day is just incomparable. Republic day theme related welcome drinks, display pieces from fruit and vegetable carvings, spice and salt displays, margarine carvings etc have also been spotted as a part of presenting the menu for the day in a very appealing and impressive manner.


Buffets, special a la carte offers, table promotions, tent card delights, live counters, chefs special offerings, mocktail bar specials are some of the attractions which see a houseful of food lovers visiting the food outlets to celebrate the day with family and friends. In India, the term "tricolour" refers to the Indian national flag. The National flag of India is a horizontal tricolour of deep saffron (kesari) at the top, white in the middle and dark green at the bottom in equal proportion. The design of the flag of India that was first presented in 1921 to Late Shri. Mahatma Gandhi, leader of the All-India Congress, was created by Pingali Venkayya. 

The Chakra or the wheel also symbolizes the Power of the State governed by Dharma. It is also called the tiranga or tricolour. The National Flag is a horizontal tricolour of India saffron (kesari) at the top, white in the middle and India green at the bottom in equal proportion.

 The ratio of width of the flag to its length is two to three. In the centre of the white band is a navy-blue wheel which represents the chakra. The top saffron colour, indicates the strength and courage of the country. The white middle band indicates peace and truth with Dharma Chakra. The green shows the fertility, growth and auspiciousness of the land.

Food is also one of the important elements associated with the tricolour and as we represent various meanings and values via colors it not only pleases the senses and whets the appetite but also creates wonderful concoctions and makes our culinary diaspora more rich and varied from indian cooking to international it gives a sense of brotherhood and togetherness creating a melange of flavours, tastes and balance.

Here are a few of my favorite easy to make recipes with a mix-n-match touch of twist on this auspicious occasion of 26th January.


Recipe-1] TIRANGA MASALA PULAO

Ingredients:

Basmati rice- 2 cups boiled, divided into 3 parts.

Makhani gravy- for the orange layer- 1 and a half cup

White onion- cashew- coconut gravy- 1 cup for white layer

Green spinach gravy- 1 cup for the green layer

Star anise-1 no for the center garnish.

To assemble the pulao:

Edible food colors which are safe to use may be used to color the rice lightly or just lightly toss them in the respective gravies as well with a little butter.

Fried onions/ birishta- 1 cup

Fried cashews and raisins-1/2 cup

Rose water-2-3 tbsp.

Kewra essence-2-3 tsp

Pure ghee-2-3 tsp

Coriander and mint leaves-1/2 cup chopped

Saffron and milk solution-1/4 cup

For adding into the makhani gravy:

 Saute some cubes of chicken tikka for non veg- or Paneer cubes/ mushroom quarters/ carrot cubes/ soya chunks etc and cook it in the gravy and keep aside.


For adding into the white gravy:

Fried makhanas, cubes of cooked potatoes, grated cheese or cream cheese can be used, for non-veg options use marinated fish or boneless chicken cubes in malai tikka marination.

For adding into the green gravy:

Boiled green peas, cubes of blanched green zucchini, blanched broccoli florets, blanched snow peas, methi paneer koftas, for non-vegetarian options use prawns or shrimps or pahadi chicken tikka sliced.

Method:

1. This recipe is more of a pre-prepared assembly recipe in which we are trying to combine together three different flavors of indian cuisine in one pulao recipe, we can choose veg or non-veg.

2. Once we have prepared the rice as per the divisions and also tossed the veg/non-veg in respective gravies we need to now assemble and layer the pulao in a flat thick bottomed kadai.

3. Spoon in a little ghee at the base of the kadai and then start placing the respective gravy tossed veggies/non-veggies in three sections in the kadai, sprinkle all the biryani garnishes and flavourings all over and then top with the respective coloured rice.

4. Place a tava below the kadai, cover with a tight fitting lid, apply atta on the side or aluminium foil and place some weight on the top and give dum to the tri-coloured pulao for 20-25 mins, serve hot.


Recipe-2] TRI- COLORED PANEER ON SKEWERS

Ingredients:

Paneer/ tofu – 400 gms, cut into cubes, divide into three parts.

For the orange marination:

Use a tandoori marinade as always and coat the paneer or tofu cubes and keep aside for 20-25 mins, arrange them on a skewer and cook either in a non-stick grill pan or using the oven/tandoor.

For the white marination:

Use a combination of little oil, curd, cream, cashew paste, salt, garam masala powder, ginger-garlic paste and apply on the paneer or tofu and keep aside for 20-25 mins, arrange them on a skewer and cook either in a non-stick grill pan or using the oven/ tandoor.

For the green marination:

Use a combination of little oil, curd and green mint and coriander chutney with a little blanched spinach puree as well, green chili-ginger-garlic paste and touch of spices, apply on the paneer or tofu and keep aside for 20-25 mins, arrange them on a skewer and cook either in a non-stick grill pan or using the oven/ tandoor.

To serve with:

Green mint and coriander chutney/ assorted dips.

Sliced onion & lemon slices/wedges.

Method:

1. The paneer or tofu preparation in this case also uses three different colors as marination and shall be assembled separately, cooked and then served on the same platter.

2. Being a starter category recipe, we can make this pre-preparation a day prior and keep it refrigerated as well, we can also use chicken or fish for non-veg variations for the same recipe.

3. Once we have cooked the paneer/ tofu skewers as per choice of method of cooking it, we need to assemble the platter to serve this colorful starter.

4. Place the cubes of paneer/tofu de-skewer them on the platter, sprinkle a little lime juice and dash of chaat masala over and arrange the chutneys and other accompaniments by the side and serve hot.


Recipe-3] TRI- COLOURED GRILLED SANDWICHES

Ingredients:

Sliced white/ brown/ multi-grain bread- 12-14 slices

For the orange layer:

Butter-1 tsp to spread on the bread slices

Tandoori mayonnaise/schezuan sauce-2-3 tsp to spread

Tomato slices- ½ cup de-seed and use them.

Salt- pepper- chaat masala to flavor.

For the white layer:

Butter-1 tsp to spread on the bread slices

Eggless mayonnaise-2-3 tsp to spread

Sliced cucumbers-1/2 cup or boiled sliced potatoes-1/2 cup

Salt-pepper- chaat masala to flavor.

Grated cheese-1/2 cup to spread.

For the green layer:

Butter-1 tsp to spread

Mint mayonnaise-2-3 tsp to spread

Shredded green capsicums-1/2 cup

Salt-pepper- chaat masala to flavor.

Method:

1.Pre-prep all the ingredients as per the divisions to get the tri color effect in this bulky grilled sandwich concept, good for a brunch or evening snack.

2. Apply butter and then the flavoured spread on the bread slices, assemble the ingredients as listed and sandwich them.

3.Now the tri color layered sandwiches are ready and assembled, heat up a griller or grill pan and place it carefully to get nice grill marks on both sides turning them carefully and smearing a little melted butter as well when we do that.

4. Once we get a nice grilled effect and golden brown color on our sandwiches, remove them, cut them with a sharp knife into triangles/squares etc and assemble them on the serving platters and serve them with ketchup, hung curd- mint and cucumber dip, green pesto chutney etc and wafers/chips/french fries.


Recipe-4] TRIO SWEET TEMPTATIONS

Ingredients:

For the dessert mix:

Milk- 1 litre boiled

Sugar- to taste

Condensed milk may also be used if desired.

Green cardamom powder-1/2 tsp

Rice paste- ½ cup, raw rice and water to grind- fine paste

Rose water-2-3 tsp

Mava- 100 gms grated

For the orange flavor and color:

Use orange essence

Use orange crush

Use orange segments

For the white layer and flavor:

To be used the way it is add blanched sliced almonds

For the green flavor and color:

Use fresh kiwi fruit puree

Use kiwi crush

Use khus syrup 

For garnishing we can use many options:

praline/chikki can be crushed and used.

Glazed cherries

Meetha paan can be chopped and used

Method:

1. Prepare a basic mixture of the phirni concept by using a thick bottomed saucepan, combine together the milk, sugar to taste, elaichi powder, rice paste and keep stirring it carefully and cook the mixture for around 30-45 mins until nice and thick like custard and well cooked.

2. Turn off the flame and check for sweetness adjust and divide the mixture into three portions.

3. Mix in the ingredients as listed above to get the desired color contrasts in the prepared phirni.

4. Use dessert glasses/ cups and layer the tri-coloured phirni and garnish as desired accordingly.

5. We need to chill this dessert for 2-3 hours in the fridge and then relish the flavors from these layers one by one.


Recipe-5] THREE TONED DESI TEMPERED SNACK

Ingredients:

Semolina/rava-1 and a half cup

Curd- 1 cup sour curd to be used ideally

Salt to taste

Sugar -1/2 tsp

Ginger-1 tsp grated

Green chilies-1 tsp chopped

Water-1/2 cup

For the orange layer-1 carrot to be pureed and used

For the green layer-1/4 cup blanched spinach paste/chutney

baking soda- ¼ tsp for each layer for steaming to be added

we can also use ¼ tsp of eno as well in the layers in place of soda.

oil for greasing and tempering for the discs.

For the tempering:

Oil-2 -3 tsp

Hing-1/4 tsp

Curry leaves- 10-12 no

Mustard seeds-1-2 tsp

Green chilies-2-3 slit/shredded

White sesame seeds-1-2 tsp

Lime juice-2-3 tsp

Coriander and mint leaves- ¼ cup chopped

Water- 2-3 tbsp.

Sugar-1-2 tsp

Salt-1 pinch

Combine together and cook for 1-2 mins.

To serve with: assorted chutneys/ dips of your choice to go along with the snack.

Method:

1. Clean the semolina, add it to a bowl add in the sour curd and add little salt and 2 tbsp. water mix well, cover and keep aside for 20 mins.

2. Prepare the blanched carrot puree and blanched spinach paste as well and keep aside.

3. Now post resting we need to divide the semolina curd mixture into three equal parts.

4. Mix in the carrot puree and spinach puree respectively into their parts and keep one part as white itself.

5. Get the steamer ready meantime with water and slice of lime in the water, get the mould/thali ready and greased with little oil or ghee.

6. Add a little water to all the three parts of the semolina mixture to get it to right dropping texture and add in the baking soda and mix well and pour the mixture into the mould.

7. Start with the green layer first, place it in the hot steamer and cover, steam for 5-6 mins, remove and place the white layer and repeat the steaming process and finally the top layer with the orange semolina mixture and steam once again for 5-7 mins, using a toothpick check if it comes out clean, turn off the flame and let the mixture rest in the steamer for 5 mins.

8. Remove the steamed preparation and loosen the edges with a oiled knife and de-mould it and cut into discs using a round cutter and place it on your serving platter.

9. The last step is to prepare the tempering and once it all comes together and cooks for a couple of minutes, pour the hot tempering over the discs and serve it immediately with assorted dips/chutneys of your choice.


Ingredient Ideology | Baked Bean Bonanza By: Dr. Kaviraj Khialani- Celebrity Master Chef.


Baked Bean Bonanza

A delicacy par excellence, versatile & variable!

Baked beans originate in Native American cuisine, and are made from beans indigenous to the Americas. The dish was adopted and adapted by English colonists in New England in the 17th century and, through cookbooks published in the 19th century, spread to other regions of the United States and into Canada. Baked beans are a dish traditionally containing white beans that are parboiled and then, in the US, baked in sauce at low temperature for a lengthy period. In the United Kingdom, the dish is sometimes baked but usually stewed in the sauce. Canned baked beans are not baked, but are cooked through a steam process.

They were originally called BAKED beans because the can is first filled with blanched beans, then the sauce, then the can is sealed with a lid, and it is then that the cooking begins. The beans are cooked inside the sealed can. The original recipe for Heinz Beans was based on Boston beans, so they used to contain pork. Baked beans provide fiber and plant-based protein. They're also a good source of thiamine, zinc, and selenium, which support energy production, immune function, and thyroid health, respectively. Did you know Brits eat beans for breakfast? We do and this is because England is known for its Full English Breakfast (picture below) consisting of sunny-side up eggs, English back bacon, cooked tomato slices, black pudding (sausage), mushrooms and fried bread. Baked bean originated in the U.S.

 Navy beans are called haricot beans in England and also go by names such as Boston beans and white pea beans. Baked beans on toast is often served for breakfast as a part of a fry up (the British term for a Cooked English Breakfast). More to the point, can tinned white beans swimming in a vivid tomato sauce justifiably be called a superfood? “But baked beans provide protein, fibre and micronutrients including thiamine, copper and manganese, so they are a nutritious food.

Let us look at a few culinary applications of Baked Beans:

Baked beans are a good source of fiber, thiamine, copper, phosphorus and lycopene which overall rates it quite well in terms of beneficial offerings. 

Some of the ways in which baked beans have been used are well known to us the idea is how to make it more creative and interesting to apply a creative mind to the concept and make it more acceptable.

1. Baked Bean Cheelas with sour cream dip and tossed green salad is a good way to enjoy a brunch with added flavors of curry leaves, cumin seeds, coriander, green chilies.

2. Baked Bean Ragda Pattice has been one of my early time favorites and the fusion of giving it a rustic tadka with garlic, onions, chilies and a dash of rock salt, placed on the chaat plate topped with schezuan tamarind chutney is just awesome.

3. Baked Bean Pan Rolls, this one calls for a mix-n-match approach in which we temper the beans with herbs, chili flakes, ginger, olives and parsley and then roll them in between ragi pancakes/dosas and top it with a pepper salsa, cheese and bake.

4. Baked Bean Stuffed Mexican Kofta Curry, this one is a must try as well. A sweet potato outer covering flavoured with fennel and cumin, the inside softy filling with puree of baked beans cooked with mava and desi masalas, shaped into koftas, deep fried, steeped in a peri-peri mexi makhani sauce.

5. Baked Bean Ravioli Al Fresco, a square shaped fresh home-made pasta with a cheesy baked bean stuffing, boiled/ fried and served with assortment of dipping sauces flavoured with white wine, gherkins, olive oil, fresh basil and parmesan shavings.

6. Baked Bean & Olive Pao Bhaji, one that will call for a second helping or even more on your plate. A typical desi pao bhaji concept involving the beans, cauliflower, peas, potatoes, capsicums, cooked in butter and oil, tempered with the pao bhaji spices, tomato puree, coriander leaves and served with splash of lime, pickled onions and olives, and a nice jalapeno cheese masala pao.

Let us check out a few Easy & Tempting Recipes with Baked Beans:

Recipe-1] Baked Bean Wraps

Ingredients:

For the Wraps:

Maida-1 cup

Oil-2 tsp

Salt-1 pinch

Water-as needed to make a firm dough

Rest for 20 mins, divide into 5-6 portions, prepare thin chapattis and cook them on both sides.

For the spread options on the wraps:
mayonnaise-1/4 cup

Schezuan chutney- 2-3 tsp

Green chutney mayo-2-3 tsp

Hung curd spread with mint and cucumber

For the filing of the wraps:

Baked beans in tomato sauce -1 cup

Oil-2 tsp

Butter-1 tsp

Garlic-1 tsp chopped

Green chilies-1 tsp chopped

Onion-1 small chopped

Salt and pepper to taste

Boiled chicken- cubes/shreds-1/2 cup

Grated cheese-1/4 cup

Mixed herbs-1/4 tsp

Chili flakes-1/4 tsp

Kasuri methi-1 tsp

Garam masala powder-1/4 tsp

Tomato ketchup-2-3 tsp

Coriander-1 tsp chopped

Lettuce leaves-1 cup

Sliced olives/ gherkins/ cherry tomatoes as needed

Method:

1. Prepare all the ingredients, assemble them as required for the recipe.

2. Prepare the wraps, cook them on a tava and keep them aside.

3. Heat oil and butter in a pan saute the garlic, onions, chilies, add in the canned beans, seasonings, herbs, chili flakes, etc and cook for 2-3 mins, add in the ketchup, spices, and coriander leaves and mix well, switch off the flame, cool aside.

4. Re-heat the prepared wraps on a tava, apply a little oil/butter, and remove, place the lettuce leaves, prepared to fill, add in the assorted veggies/olives, gherkins, cheese, etc, and give it a nice roll-up.

5. Place in a tray and bake it if desired for a few mins with a topping of white sauce and cheese, serve hot. 

Recipe-2] DESI BAKED BEAN CASSEROLE

Ingredients

Oil-2 tsp

Butter-1 tsp

Cumin seeds- ½ tsp

Hing-1/4 tsp

Dried red chilies- 1-2 slit

Ginger-garlic paste-1 tsp

Onion-1 small chopped

Tomatoes-1-2 small chopped

Salt to taste

Baked beans in tomato sauce- 1 cup 

Chicken sausages-2-3 sliced

Baby potatoes- 4-6 no cut 1 x2 boiled

Red chili powder-1/4 tsp

Coriander powder- 1 tsp

Turmeric powder-1/4 tsp

Tomato puree-1/2 cup

Cashew paste-1-2 tsp

Peanut butter-1-2 tsp

Water-1/2 cup

Coriander -2 -3 tbsp. chopped

Method:

1. Prepare all the ingredients for the baked bean recipe.

2. Heat oil and butter in a pan saute the spices for tempering, add in the ginger-garlic paste, onions, tomatoes to saute for a minute.

3. Add in the boiled baby potatoes, sausages, salt, and all masalas and mix well. Add in cashew paste, peanut butter, and a little water, cover and simmer it, Cook for 2-3 mins, garnish with coriander leaves.

4. Serve this delicacy with toasts, pitta bread, lavash, focaccia bread, etc.

indo western baked bean baked dish.jpg

Recipe- 3] INDO WESTERN BAKED BEAN BAKED DISH

Ingredients:

oil- 2 tsp

butter-1 tsp

garlic-1 tsp chopped

green chilies-1 tsp chopped

onion-1 small chopped

salt to taste

crushed black pepper to taste

baked beans in tomato sauce- 2 cups

boiled macaroni pasta-1 and a half cup

chili flakes-1/4 tsp

mixed herbs-1/4 tsp

tomato ketchup-2-3 tsp

green capsicum-1/2 cup chopped

red chili sauce-2-3 tsp

white sauce- 1 and a half cup

grated cheese-1/2 cup

assorted cold cuts- salami/ ham/ sausages/ bacon- 1 cup cut

can also use canned tuna fish -1 cup

add ons into the baking dish- black and green olives, fresh herbs.

Add ons into the baking dish- broccoli, zucchini, mushrooms.

Method:

1. Assemble all the ingredients for the baked bean baked dish.

2. Heat oil in a pan saute the ingredients starting with garlic, chilies, onions, add in the green capsicum, assorted meats/cold cuts, veggies of your choice.
3. Add in the seasonings, herbs, chili flakes, sauces, little water and cook for 2 mins. Add in the beans and macaroni pasta and mix well.

4. Simmer the mixture for 3-4 mins, add in the white sauce and little cheese and toss well.

5. Place the mixture into a greased baking dish/tray and top with more cheese, olives, etc and place it for baking around 20-25 mins and 160 degrees celsius and serve hot with garlic bread.

spiced baked beans with sausages.jpg

Recipe- 4] SPICED BAKED BEANS WITH SAUSAGES

Ingredients:

Oil- 1 tsp

Butter-1 tsp

Spring onions- 3-4 sliced

Ginger-1 tsp chopped

Red chilies- 1-2 slit

Lemon grass- 3-4 pieces

Celery-1 stalk cut into small pieces

Fresh basil leaves- 3-4 no

Shallots- 5- 8 no peeled and cut 1 x 2

Boiled chicken cubes-1 cup

Chicken sausages- 1 cup sliced

Water chestnuts- 4-5 sliced

Salt and pepper to taste

Water/stock- 1 cup

Soy sauce- 2-3 tsp

Peanut butter-2-3 tsp

Red chili sauce-1 tsp

Raisins- 2-3 tsp

Corn starch solution-2-3 tsp

Greens to garnish as required

Method:

1. Prepare all the ingredients for the recipe and keep it ready.

2. Heat oil and butter in a pan and saute the ginger, red chilies, lemongrass, spring onions, basil leaves, shallots, cook for a couple of minutes.

3. Add in the baked beans, chicken cubes, sausages, and any other veggies of your choice as well, and add little water/stock as desired for gravy.

4. Also add in the seasonings, sauces, and peanut butter and blend it all well into the recipe, simmer for 3-4 mins.

5. Add in the water chestnuts, a little corn starch slurry to thicken it up a little, and add raisins and greens, serve it hot on a bed of sticky rice/ steamed jasmine rice/ egg fried rice.

tadkewala baked bean pulao.jpg


Recipe-5] TADKEWALA BAKED BEAN PULAO

Ingredients:

Oil-2 tsp

Butter-2 tsp

Curry leaves- 8-10 no

Cumin seeds-1/2 tsp

Slit green chilies- 2-3 no

Slit red chilies-2-3 no

Sliced onions- 1 small

Garlic-1 tsp chopped

Ginger-1 tsp chopped

Tomatoes-1/2 cup chopped

Red chili sauce- 2 tsp

Soya sauce-1 tsp

Mixed herbs-1/2 tsp

Chili flakes-1/2 tsp

Cheese-1/2 cup grated

White sauce/cream-1/2 cup

Sliced black/ green olives- 4-5 no

Baked beans in tomato sauce- 1 cup

Cooked white /brown rice- 1 and a half cup

Additional veggies/non-veg ingredients may be added as well.

Assorted fresh herbs/micro-greens for garnish

Method:

1. Assemble all the ingredients for the tadka rice and bean combo.

2. Heat oil and butter in a pan, saute the curry leaves, cumin, ginger, garlic, chilies, onions for a minute. Add in the tomatoes, salt, pepper, herbs, chili flakes, sauces, I also prefer to add colorful capsicum dices here at this stage for a crunch in the rice.

3. Add in the baked beans, rice and toss it up well, cook for 3-4 mins.

4. Now add in the white sauce/ cream and cheese, olives and mix well, cook for another 2-3 mins and serve hot.

tempered baked beans on toast.jpg

Recipe- 6] TEMPERED BAKED BEANS ON TOAST

Ingredients:

Oil-1 tsp

Butter-1 tsp

Onions-1 small chopped

Green chilies-1 tsp chopped

Garlic- 1 tsp chopped

Celery-1 stalk chopped

Red/green/yellow capsicum-1/2 cup chopped

Baked beans in tomato sauce- 1 cup

Red chili sauce-1-2 tsp

Mixed herbs-1/4 tsp

Chili flakes-1/2 tsp

Chaat masala-1/4 tsp

Garam masala powder-1/4 tsp

Tomato ketchup-1-2 tsp

To spread on the bread:

Cream cheese/ peanut butter/ pesto mayo

Choice of bread/ base:

White bread/ brown bread/ french bread slices- 6- 8 no

Method:

1. Pre-prep all the ingredients for the beans on toast recipe.

2. Toast the cutout pieces of bread/sliced french bread etc for a few mins and keep aside.

3. To prepare the baked bean topping heat oil and butter in a pan, saute the onions, chilies, garlic, celery in a pan for a minute. 

4. Add in the capsicums, salt, pepper, herbs, chili flakes, spices, a little water, and sauces and mix well. Cook for 2 mins.

5. Add in the beans, and simmer them for 2-3 mins, adjust the seasonings and taste, should be moist but not watery.

6. Just before serving the toasts, apply the spread on the base toasts and spoon over the baked bean mixture, add more grated cheese on top if desired, or serve a cheese sauce/ dip at the side. Gratinate/ bake the toasts in the oven/salamander for 2-4 mins and remove. Serve hot as a snack/ appetizer.

Dr.Kaviraj.jpg

Brief About The Writer:

Dr. Kaviraj Khialani- Celebrity Master Chef, is a Mumbai based Author, Writer, Healthy Eating - Lifestyle Specialist, Food Designer, Academician & having mastered over 33 International Cuisines, is also a Food & Beverage Consultant. He has worked with esteemed properties like the Taj Group of Hotels, Kuwait Airways to name a few, he has been awarded several Global and National Awards for his outstanding performance in his chosen field he loves to share his knowledge and experience of over 2 decades with the Food & Hospitality Industry.


Ingredient Ideology | THE EXCITING EDAMAME By: Dr. Kaviraj Khialani- Celebrity Master Chef.

THE EXCITING EDAMAME

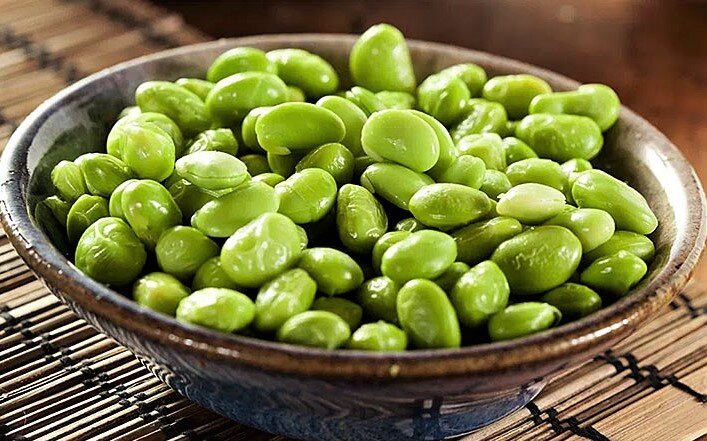
Edamame is a soybean that is young and green when picked. Because of this, edamame is soft and edible, not hard and dry like the mature soybeans used to make soy milk and tofu. The word edamame is Japanese for "Beans on a Branch." It is most often found in East Asian cuisine and sold both in the pod and hulled. Although the pod itself is not edible, it adds flavor, making edamame in the pod an ideal snack. The hulled version is great for adding to rice dishes and salads. Edamame is inexpensive, with the cost of hulled being slightly higher.

Edamame served in the pod is a popular appetizer at most Japanese food restaurants. It is a good choice for vegetarians, vegans, or anyone wanting to eat healthy, particularly since it is packed with low-fat soy protein. Edamame is sold both fresh and frozen, it can be served as an appetizer or snack and eaten straight from the pod, or the shelled soybeans can be incorporated into a recipe. When eating edamame still in the pod, the beans can be squeezed out of the pod directly into your mouth. The pods are usually salted, which adds to the flavor and experience of eating edamame. Edamame can be eaten hot or cold.

Edamame can be cooked in several ways, including boiling, steaming, microwaving, and pan-frying. To boil, add fresh, in-shell edamame to a pot of boiling, salted water and cook for 5 to 6 minutes until the beans are tender. Boil frozen edamame for 1 to 2 minutes. Drain and rinse the pods with cold water, if desire, to steam edamame, place an inch of water in a pot and bring to a boil. Place the edamame in a steaming basket, steam tray, or colander above the boiling water. Cover the pot and steam for 5 to 10 minutes for fresh edamame and 3 to 8 minutes for frozen edamame, until tender. Rinse to cool down, if desired.

My exposure to edamame beans has been a pleasant one and I have tried using it in Indian recipes as well with a touch of spice and dash of herbs as well when it comes to continental fusion as well and my experiments turned out to be positive in various ways from including edamame in Chaats, desi salad forms, in a shorba, desi mix of paprika and rustic roasted peanut flavored edamame mashed potatoes, fusion baked dishes with Indo-Chinese style eggplant and edamame bake with achari tofu and cheese sauce, edamame birishta pulao served with Tadkewala anari raita with curry leaf dust was yum too!

Although edamame is the same soybean that makes tofu, it has more taste than the bland bean curd. It is faintly reminiscent of peas and is buttery with a hint of sweetness and nuttiness. The texture is firmer than a pea, however soft, but with a bite. Frozen edamame is more readily available than fresh. Although most often sold in the pod, frozen edamame is also offered hulled. Bags of frozen shelled and unshelled edamame can be found in grocery stores in the freezer section. Though edamame is yet to get popular with us in our daily recipes and menus to a great extent, we need to create awareness and share ideas on how to use these beneficial & nutri-rich ingredients to avail maximum benefits from its qualities.

Here are a few Health Benefits of Edamame:

1. Edamame helps lower cholesterol levels, and assists in maintaining bone density.

2. Edamame is heart healthy food and also aids in weight loss.

3. Edamame aids in improving the digestive system and also reduces risk of cardio vascular diseases.

4. Edamame is a great immunity boosting ingredient and assists in healthy liver functioning.

5. Edamame is a great source of folate, it also helps in production of red blood cells in our body and allows us to access energy in foods.

6. Edamame is not only a good source of plant-based protein but also has a good content of manganese as well which helps the brain and nerve functioning well and also plays a role in the metabolism in our body.

Here are a few easy to adapt to recipes using Edamame Beans:

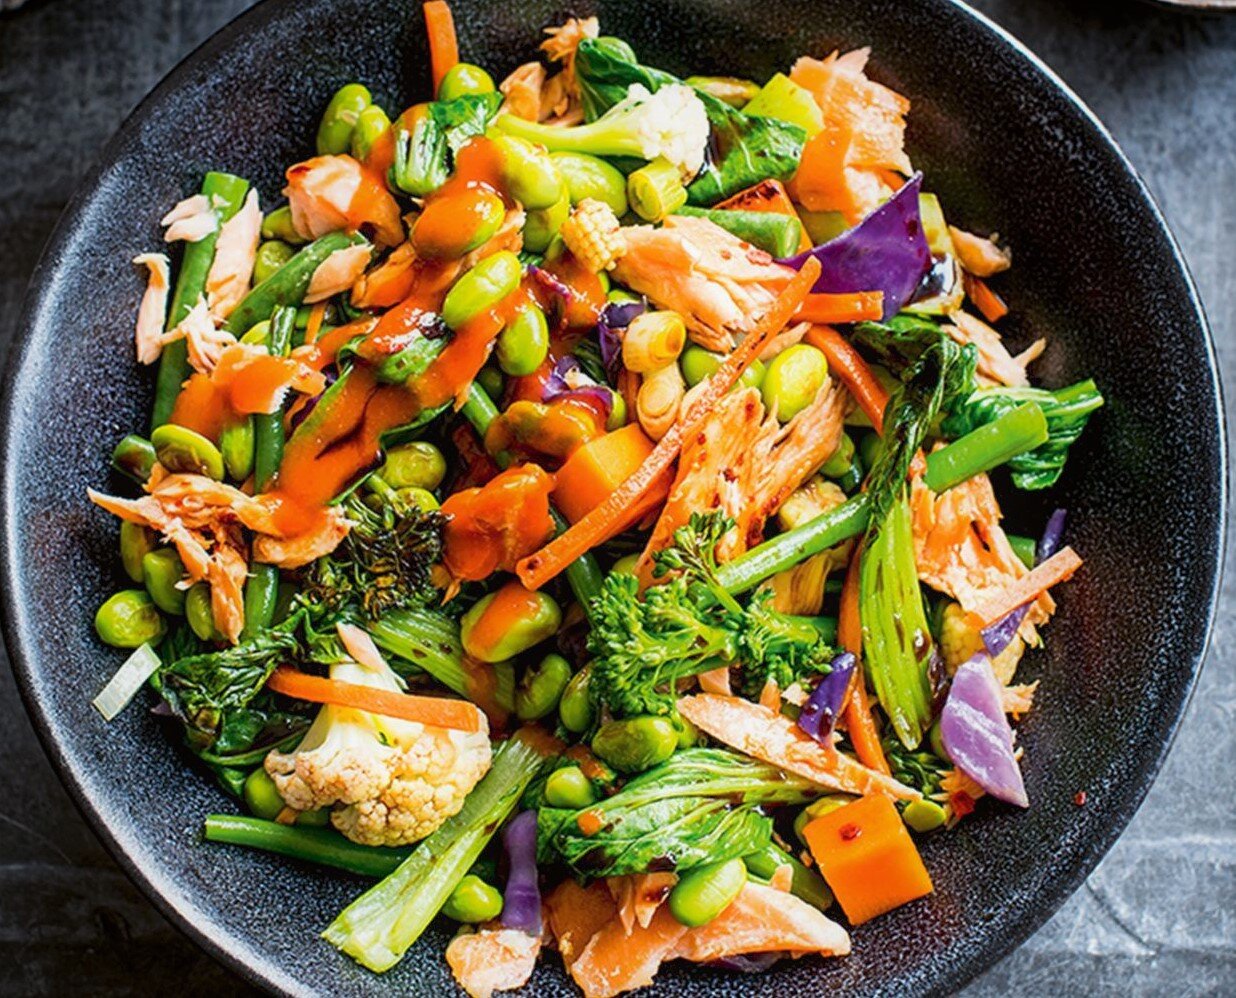
Recipe-1] CHICKEN EDAMAME COMBO

Ingredients:

Edamame beans-1 cup boiled

Chicken legs- 2 no

For the marination of the chicken legs:

Oil-2 tsp

Salt and pepper to taste

Red chili sauce- 1 tsp

Soya sauce- 2 tsp

Tomato ketchup-2 tsp

Honey-1 tsp

Apply on the chicken legs and keep aside for 30 mins.

Additional ingredients:

Oil-2 tsp

Garlic-1 tsp chopped

Ginger-1 tsp cut into strips

Spring onions-3-4 sliced

Carrots- ½ cup cubes

White cabbage/purple cabbage- ¼ cup cut

Broccoli /cauliflower-1/2 cup florets blanched

French beans-1/2 cup blanched

Fresh basil leaves- 8-10 no

Soya sauce-2 tsp

Red chili -2 tsp

Water/stock-1/2 cup

Corn starch solution-2-3 tsp

Roasted crushed peanuts-2-3 tsp

Peanut butter-1-2 tsp

Lime juice-2 tsp add and serve.

Method:

1. Prepare the edamame beans and keep aside. Marinate the chicken legs and cook them in a pan or roast in the oven until well cooked. Pull out the cooked chicken flesh and keep aside for the recipe.

2. Heat oil and butter in a pan/wok and saute the ginger, garlic, spring onions for a few seconds, add in the assorted veggies of your choice into the pan and add all seasonings, herbs, sauces, peanut butter etc and mix well.

3. Add in little water/stock as desired just to cover the mix in the pan and allow to cook on a low to medium flame for 6-8 mins, add in the pulled cooked chicken pieces, edamame beans, mix and add in the corn starch solution to thicken up the mixture.

4. Check for seasonings and texture of the dish and adjust accordingly, serve hot garnished with peanuts, fresh basil leaves and greens and add a splash of lime juice and serve.


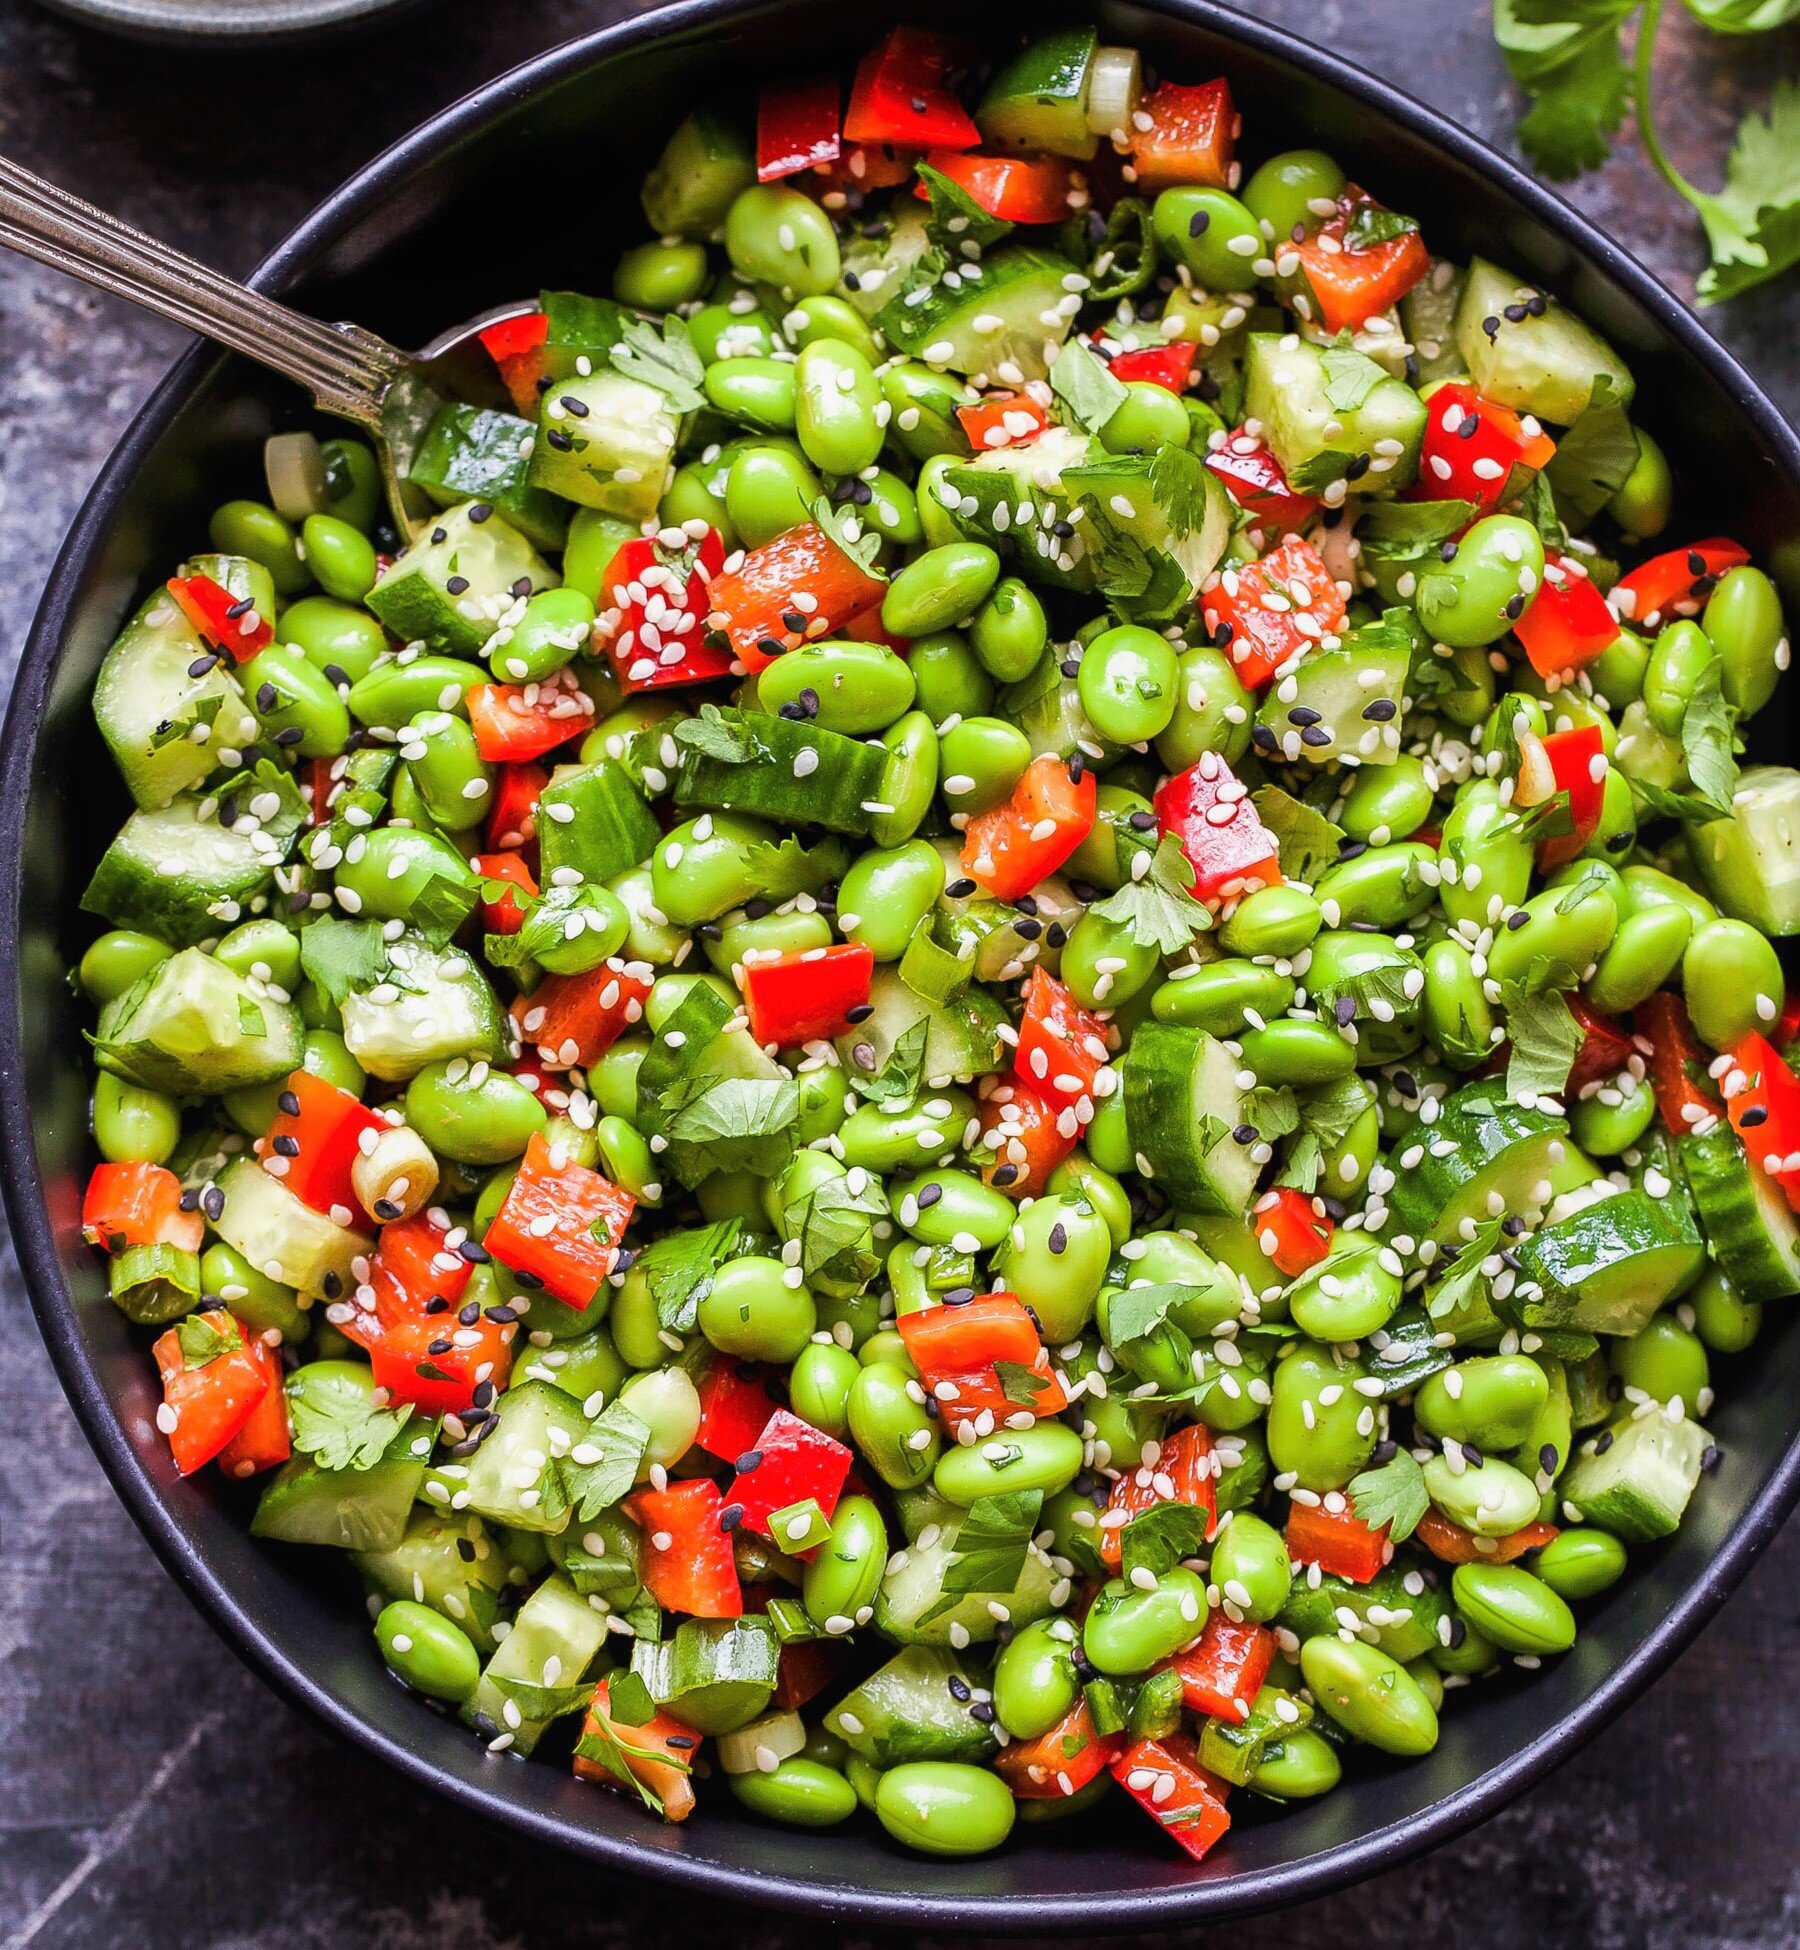
Recipe-2] EASY EDAMAME TOSSED SALAD

EASY EDAMAME TOSSED SALAD.jpg

Ingredients

Edamame beans-1 cup boiled/blanched to the bite

Olive oil-2 tsp

Garlic-1 tsp

Shallots/ madras onions- 10-12 peeled, cut 1x2

Green cucumber-1 no cut into small cubes

Red capsicum-1 no, cut into small cubes

Salt and pepper to taste

Fresh herbs-2-3 tsp parsley, basil, etc

For non-veg variations:

Boiled cubes of eggs- 1-2 eggs

Boiled cubes of boneless chicken

Sliced chicken sausages

Tuna fish- tinned/canned-2 3 tbsp.

For more veggies:

Use sliced blanched Babycorn

Saute assorted mushrooms

Zucchini green/yellow- ½ no cut into cubes

Water chestnuts-1/2 cup sliced

For the dressing:

Olive oil-2 -3 tsp

Honey-2-3 tsp

Lime juice-2-3 tsp

Pink salt/ rock salt/ sea salt to taste

Crushed black pepper to taste

Chili flakes-1/2 tsp

Chaat masala-1/2 tsp

Roasted cumin powder-1/4 tsp

White sesame seeds-2 tsp toasted

Mustard paste-1 tsp

Assorted lettuce leaves-1 cup for the base of the salad.

Method:

1. prepare all the ingredients for the edamame easy-to-toss salad.

2. arrange the crispy assorted lettuce leaves in a salad bowl/plate.

3. in a mixing bowl combine together the ingredients for the dressing and give it all a nice mix.

4. add assorted nuts like sliced almonds/walnuts/ pinenuts as well if desired and a few chopped dates too would do well.

5. Just before serving add the ingredients into the dressing including the veg/non-veg as per the list along with the cooked edamame beans and give the salad a nice toss.

6. Arrange the salad on a bed of lettuce and garnish with fresh herbs, sesame seeds, micro-greens, etc and serve immediately.


Recipe-3] EDAMAME CASHEW FRIED RICE

Ingredients:

Edamame beans-1 cup boiled/blanched to the bite

Boiled white/brown rice- 2 cups

Oil- 2 tsp

Garlic-1 tsp chopped

Ginger- 1 tsp shredded

Green chilies-2-3 slit

Red chilies-1-2 slit/shredded

Spring onions-2-3 sliced

Cashews-1/2 cup fried

Carrots-1/2 shredded

French beans-1/4 cup cut thinly

Red/green capsicum-1/4 cup shreds

Water chestnuts-2-3 sliced

Salt and pepper to taste

Soya sauce-2 tsp

Red chili sauce-1-2 tsp

Green chili sauce-1-2 tsp

Honey-1 tsp/ pinch of sugar

White vinegar-1 tsp

Spring onion greens-2-3 tbsp. chopped

For more variations: non-veg

Use boiled shredded chicken, roast sliced meat, medium sized prawns, poached or grilled fish could be served along as well.

Method:

1. Prepare all the ingredients for the fried rice recipe and keep ready.

2. Heat oil in a wok/ pan saute the ginger, garlic, onions, chilies for a few seconds, add in the assorted veggies, edamame beans and saute for a couple of minutes.

3.Add in the sauces and seasonings, vinegar, a pinch of sugar to taste and add your choice of non-veg ingredients as well as desired and mix well.

4. If using eggs, we can double fry and shred them/ or use scrambled eggs as well for more taste, color, flavour.

5. Now add in the cooked rice and fried cashews and stir it well with the other ingredients and cook for 2-3 mins.

6. Check for seasonings adjust as per taste and serve hot garnished with spring onion greens etc and serve hot with gravy or main course of your choice.


Recipe-4] EDAMAME TOFU MUSHROOM TRIO

Ingredients:

Edamame beans-1 cup boiled/blanched to the bite

Tofu-1 cup cut into large cubes, use firm or extra firm variety

Fresh button mushrooms-1 cup, sliced

Olive oil-2 tsp

Butter-1/2 tsp

Garlic cloves- 3-4 no sliced

Ginger-1 tsp shredded

Onion-1 small, chopped

Red/ yellow/green capsicum-1/2 cup shredded

Salt and pepper to taste

Mixed herbs and chili flakes to taste

Water/stock-1/2 cup

Corn starch-2-3 tsp to thicken

Soya sauce-2 tsp

Peanut butter-1-2 tsp

Schezuan sauce-1-2 tsp

Honey-1 tsp

Assorted herbs/greens to garnish.

For non-veg variations: use chicken liver marinate and cook it first, also we can use luncheon meat, sausages, salami etc in the similar recipe. We can also use lobster, prawns and shrimps too in a similar recipe with a twist to the usual.

Method:

1. Prepare all the ingredients for the trio combination recipe.

2. Marinate the tofu cubes with a little oil, salt, pepper, mixed herbs, garam masala power or a little all spice powder, lime juice, honey and keep aside for 10 mins, grill it and keep aside.

3. To prepare the recipe further, heat oil and butter, saute the garlic, onions for a few seconds, add in the assorted veggies and give them a nice saute over a high flame for a couple of minutes.

4.Add in little water/stock, sauces, peanut butter seasonings to taste and add in cooked edamame beans as well, mix and simmer for 3-5 mins.

5. Add in the corn starch solution and slightly thicken it all up and check for taste, add the tofu towards the end and mix lightly and serve it hot garnished with assorted seeds/ nuts and garnish it.


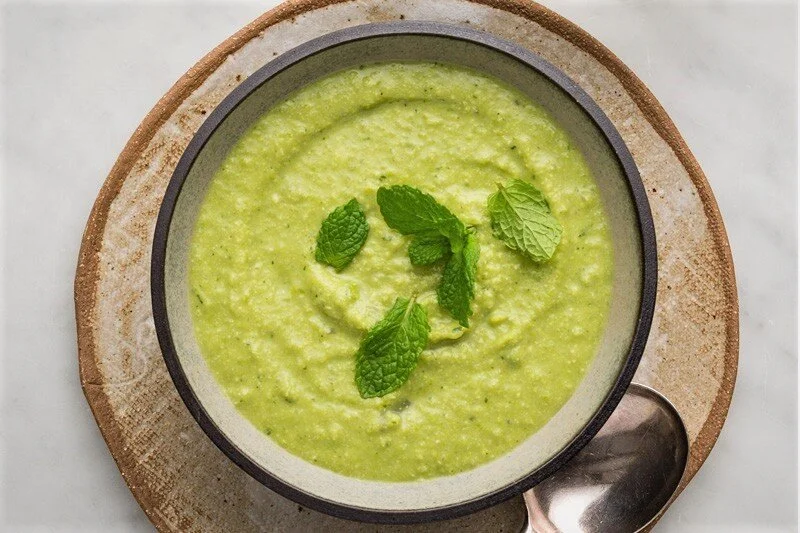
Recipe-5] EDAMAME ALMOND CREAM SOUP

Ingredients

Oil-1 tsp

Butter-1 tsp

Garlic-1 tsp chopped

Bay leaf-1 no

Peppercorns-2-3 no

Onion-1/2 chopped

Celery-1 stalk chopped

Edamame beans-1 cup

Almonds-1/4 cup soaked and peeled, paste.

Fresh cream-1 tbsp.

Water/veg stock- 2-3 cups

Salt and pepper to taste

Fresh herbs- to taste like basil, parsley, mint

Chili flakes-1/2 tsp

Sweet potato-1 med sized, peeled and cubed

To serve with: toasted/fried garlic herbed croutons

Method:

1. Prepare all the ingredients for the edamame almond cream soup.

2. Heat oil and butter in a pan saute the bay leaf, peppercorns, garlic, onions for a minute, add in the sweet potato, edamame beans, seasonings, herbs, chili flakes and saute for 2 mins.

3. Add in the stock/ water and bring to a boil, simmer for 12-15 mins until well cooked, cool, puree and strain the mixture.

4. Bring it back to a boil, adjust texture of the soup with little stock/water and check for seasonings, add in the almond paste and cream and blend it well, simmer for 3-5 mins.

5. Serve hot garnished with slivered almonds, dash of fresh cream, fresh herbs/ micro-greens etc and serve along with bread croutons.


Recipe-6] HERBED EDAMAME PEA DIP

Ingredients:

Edamame beans-1 cup boiled

Chickpeas-1/4 cup boiled

Garlic-1 tsp chopped

Olive oil-2 tbsp.

Lime juice-1-2 tbsp.

Salt and pepper to taste

Mint leaves- 8-10

Coriander leaves- 2 tbsp. chopped

Roasted crushed cumin- ¼ tsp

Dates-2-3 chopped

Chilled water-2 -3 tbsp.

Tahini paste/ white sesame seed paste-2-3 tsp

Peanuts-2-3 tbsp. roasted

Mayonnaise-2-3 tsp

To serve with: assorted toasted or crusty breads/ crackers/ vegetable sticks/ fried snacks/ french fries etc.


Method:

1. Assemble all the ingredients for the dip, pre-prep as needed.

2. Using a jar of a mixer grinder or food processor, combine together the edamame and the chickpeas together with all other ingredients and churn the mixture to a nice coarsely smooth textured dip.

3. Use chilled water/ olive oil to adjust the texture as needed. Taste the flavor for herbs use basil/ thyme as well as an option.

4. Use toasted pine nuts or walnuts for a better nutty flavor. The dates used in the recipe add a nice bite and also nutritive value.

5. Remove the prepared dip and add a little mayonnaise or whipped hung curd into the mixture for more taste and texture, place it in the fridge until being used. Before serving the dip, garnish it with some toasted sliced nuts, seeds like flax seeds, melon seeds etc for a crunch, serve chilled.


Dr.Kaviraj.jpg

Brief About The Writer:

Dr. Kaviraj Khialani- Celebrity Master Chef, is a Mumbai based Author, Writer, Healthy Eating - Lifestyle Specialist, Food Designer, Academician & having mastered over 33 International Cuisines, is also a Food & Beverage Consultant. He has worked with esteemed properties like the Taj Group of Hotels, Kuwait Airways to name a few, he has been awarded several Global and National Awards for his outstanding performance in his chosen field he loves to share his knowledge and experience of over 2 decades with the Food & Hospitality Industry.


RECIPE | Finger Millet Chicken Tikka Roll – Jet Lag Recipe By Sahil Sharma, Executive Sous Chef, Fairmont Jaipur

chickentikkarol.jpg

Traveling to a new time zone is rough, and there's nothing worse than being wide  awake in the middle of the night, or forcing your eyelids to stay open when you've  got a whole day ahead of you.  

The cause of jet lag is the inability of the body of a traveller to immediately adjust to  the time in a different zone. Recovering from jet lag depends on the number of time  zones crossed while traveling.  

In general, the body will adjust to the new time zone at the rate of one or two time  zones per day. For example, if you crossed six time zones, the body will typically  adjust to this time change in three to five days. 

Jet lag is temporary, so the prognosis is excellent and most people will recover  within a few days. 

If you want to maximize your vacation time, you need to beat your jet-lag ASAP - these foods will help get you on track. 

FINGER MILLET CHICKEN TIKKA ROLL – Jet Lag Recipe 

No. of pax recipe serves: 6 

Preparation time in (hours and) minutes: 25 min 

Cook time in (hours and) minutes: 45 min 

Total time in (hours and) minutes: 1 hr 10 min 

Dish description in 20–30 words 

Kathi rolls have fast become the regular food around the globe; this is an easy and  quick recipe that you can try at home for brunch or a heavy evening meal. Chicken kathi roll has a delicious melange of chicken tikka and spices rolled together and served with a chutney. 

List of ingredients in order of use, 

Ingredients 

  • 6 millet chapattis/bread 

  • 6 Egg Whites 

  • 100 gm Coriander, chopped 

  • 100 ml mustard Oil

For the Filling: 

  • 100 gms Onions, sliced 

  •  100 gms Coriander Leaves, chopped 

  •   20 gms Ginger-Garlic Paste 

  •  50 gms Tomatoes, chopped 

  •  20 gms Turmeric Powder 

  •  to taste Salt and Chilli Powder 

  •  1 tsp Green Chillies, chopped 

Ingredients – Chicken Tikka  

  • 500 gms chicken breasts - cut into bite-sized pieces (tikka) 

  • Juice of two lemons 

  •  1 tablespoon salt 

  •  250ml (1 cup) plain yogurt 

  •  2 tablespoons garlic puree 

  •  1 tablespoon ginger puree 

  •  1 tablespoon ground cumin 

  •  1 tablespoon ground coriander 

  •  1 tablespoon freshly ground black pepper 

  •  1 teaspoon citric acid powder 

  •  1 teaspoon turmeric powder 

  •  1 teaspoon salt (more or less to taste) 

  •        2 green chillies finely chopped 

  • 1 bunch of coriander leaves finely chopped

Directions 

  • Place the chicken tikka in a large bowl and squeeze the lemon juice over them and sprinkle with a little salt. 

  •  Now, whisk the second marinade ingredients together and pour it over the chicken. 

  •  Allow to marinate for six hours or up to 48 hours - the longer the better. If you don't have time to marinate the chicken, 30 minutes or so will still be good. ∙ When ready to cook, light a barbecue. Gas barbecues will work but I prefer the flavor of charcoal barbecues. 

  •  Cook the chicken tikka on skewers turning occasionally until the chicken is cooked through and the edges are blackened. 

  •  Meanwhile, Mix the egg whites with the coriander. 

  • Heat oil in a non-stick pan. Dip each millet bread into the egg white mix and place on the pan one at a time till it turns color. Keep aside. 

  • Cut the prepared chicken tikka into strips. 

  • In a pan heat the oil and add chopped onions, ginger-garlic paste, chopped tomatoes, turmeric, red chili powder, and green chilies. 

  • Now, add the chicken tikka strips, sliced onions, and pepper juliennes. ∙ Cook a little and add chopped coriander. 

  • Divide the tikka mixture and roll up in cooked millet pieces of bread. ∙ Serve with mint chutney and salad. 

dp.jpg

Sahil Sharma

He is an Executive sous chef at Fairmont Jaipur

Ingredient Ideology | The Praiseworthy Papaya By: Dr. Kaviraj Khialani- Celebrity Master Chef

papaya pic intro.jpg

A Popular fruit a favorite of most of us on the cart usually during our shopping, complete and wholesome, gives us a feeling of fullness & also helps in various activities of the body on day to day basis. Most of us like it just ripe and naturally sweet finds its way from a morning breakfast counter to a dessert platter as well, from the peel to the seeds to the pulp it’s a useful commodity overall with its composition being wow!

Known for growing abundantly around us all year around and reaching us in the raw form usually and as it ripens its aroma and texture get inviting and for me, it has always been worth the wait watching it get ready in my home kitchen and once it is, then it plates out to be a wonderful delight be it in the form of a juice of a smoothie concept or a simple fruit salad, or salsa the feel is so just amazing biting into it!

Health Benefits of Papaya:

  • A good source of vitamin C and vitamin A.

  • Beneficial for diabetics, great for the eyes.

  • Powerful immunity booster

  • Helps in weight loss management and is low in calories.

  • Full of anti-oxidants and offers a good value into our body

  • Protects against skin damage.

  • Contains soluble and insoluble fiber for well being of our digestive tract.

Is often considered suitable before, during & after pregnancy thanks to high vitamin C and folate (Folic Acid) content, essential nutrients that help promote baby’s growth and development;

Papaya is low in energy and fat, making them a great choice for weight loss diets! It provides nearly three times as much fiber as 1/2 a cup of brown rice per serving.

Some tips on purchasing papaya:

To choose ripe papaya or papaw, lightly press underneath the stem and it will give to the pressure.

Papaya and papaw are fragile – a few dark spots or blemishes on the skin are normal and the fruit will still be of great quality, some of us even wrap it in paper and place in a cool dry place to mature up soon!

Ripen papaya and papaw in the fruit bowl and then store in the fridge and enjoy within two days. To get the best taste, remove it from the fridge and let it sit for around 5 minutes before enjoying it!

To speed up the ripening process, you can also place it in a paper bag with a banana as well, try this tip too!

Papaya is packed with flavor and highly versatile, pairing well with coconut, passion fruit, seafood, salads, curries, chicken, lime, lemon, mango, pineapple, ginger, kiwi, banana & berries.

Papaya and its Culinary Uses:

A great ingredient to use for making salsa for Mexican dishes goes well into a blender for a healthy shake or a smoothie its puree freshly made can be easily used to make a nice dressing for salads raw grated papaya, however, has been known to be a great meat tenderizer. Add papaya cubes to a bowl of fruit salad and it just elevates the taste, aroma & flavor to level next.

Raw papaya has also been found used in Thai salads like Som Tom salad. Papaya when almost ripe has also been steeped in a nice mild gravy as well. The skin, seeds, pulp, flesh overall have also been considered to be good for skin and facial treatment as well.

For a peppery substitute, don’t toss the papaya seeds, grind them and use in place of pepper and add a dash of them into your marinades or stir-fries.

Poach papaya and cranberries in a syrup of lime juice, cinnamon, star anise, sugar & water for a citrusy dessert, top it with some freshly whipped caramel cream.

Whip up a spicy papaya/papaw salsa by combining it with red onion, coriander, lime juice & red chilli, perfect for a nice cool day!

Here are a couple of easy recipes for all our viewers to try and relish as well!

P – A – W   Salad

paw salad.jpg

An interesting combination of papaya, apple & walnuts being dressed in an easy and light nutty dressing]

Ingredients:

For the body of the salad:

  • Ripe papaya- 2 cups, peeled and cut into medium cubes.

  • Apple- 1 no, green or red, cut into medium cubes

  • Walnuts- 8 to 10 nos. sliced.

For the base of the salad:

  • Iceberg or any varieties of lettuce leaves- 1 cup

For the dressing of the salad:

  • Olive oil- 1 tbsp.

  • Honey- 1 tbsp.

  • Ginger juice- 1 tsp

  • Honey-  2 tsp

  • Mint leaves- 8 to 10 nos.

  • Roasted crushed cumin - ½ tsp

  • Rock salt- 1 pinch

  • Salt and pepper to taste

For the garnish of the salad

  • Fresh herbs- 2 tsp

  • Microgreens- ¼ cup

  • Chia seeds-1/2 tsp


Method:

1. prepare all the ingredients for the salad.

2. in a mixing bowl, combine together the dressing ingredients, mix well.

3. add in the ingredients for the body as well and toss well.

4. assemble the lettuce leaves on a salad plate

5. place the salad in a small portion size

6. garnish appropriately and serve immediately.


Chef’s variations:

Try the same salad with pumpkin and mango combination, try adding some grapes

The dressing can be made with using fresh orange juice as well with papaya.

Try using variety of nuts and seeds for enhancing the nutrition of the salad.

Boiled chicken cubes with ripe papaya cubes can also be a good option.


Pa-Pa-Ya - Yogurt Punch

pa-pa-ya yogurt punch.jpg

[ a refreshing power-packed beverage to start your day with and feel revitalized and active]

Ingredients

  • Ripe papaya- 2 cups, peeled and cut into cubes

  • Carrot- 1 no, peeled and grated/cubed

  • Curd / yogurt- 1 cup, plain not sweet

  • Honey- 2 tbsp.

  • Soy milk/ milk- 1 and half cup

  • Coconut milk- ½ cup 

  • Mint leaves- 5 to 6 for garnish

  • Cinnamon powder- 1 pinch for garnish.


Method:

1. prepare all the ingredients for the shake and keep them ready.

2. in a blender jar combine together all the ingredients cover and blend well to a smooth texture

3. pour the drink into a tall chilled glass and garnish and serve immediately.

Chef’s variations:

Try the same concept using papaya and mango pulp or juice with some chia seeds.

Combining together pear and papaya also would be great with some mint and sunflower seeds to top with.

Using a little peanut butter in the same drink also adds value and taste to the beverage.

kaviraj .jpg

Brief About The Writer:

Dr. Kaviraj Khialani- Celebrity Master Chef, is a Mumbai based Author, Writer, Healthy Eating - Lifestyle Specialist, Food Designer, Academician & having mastered over 33 International Cuisines, is also a Food & Beverage Consultant. He has worked with esteemed properties like the Taj group of Hotels, Kuwait Airways to name a few, he has been awarded several Global and National Awards for his outstanding performance in his chosen field he loves to share his knowledge and experience of over 2 decades with the Food & Hospitality Industry.

A Short History of Sushi

On the morning of 5 January 2019, gasps of amazement rippled through Tokyo’s cavernous fish market. In the first auction of the new year, Kiyoshi Kimura – the portly owner of a well-known chain of sushi restaurants – had paid a record ¥333.6 million (£2.5 million) for a 278kg bluefin tuna. Even he thought the price was exorbitant. A bluefin tuna that size would have normally cost him around ¥2.7 million (£18,700). At New Year, that could rise to around ¥40 million (£279,000). Back in 2013, he’d paid no less than ¥155.4 million (£1.09 million) for a 222kg specimen: a lot, to be sure. But still a lot less than what he’d just paid.   

Tasty and fresh

It was worth paying over the odds, though. It was, by any standards, a beautiful fish – ‘so tasty and fresh’, as a beaming Mr. Kimura told the world’s press. It was also a rarity. Though not as critically endangered as its southern relatives, the Pacific bluefin tuna is classified as a vulnerable species and, over the past six years, efforts have been made to limit the size of catches. Most of all, it was great advertising. By paying such a colossally high price for a tuna, Kimura was telling the world that, at his restaurants, the sushi is made from only the very best fish.

It was a dazzling – even ostentatious – demonstration of how greatly sushi is prized in Japan. When it comes to those tiny mounds of vinegary rice, topped with delicate slivers of seafood, almost any price is worth paying. Sushi is not simply a meal to be eaten, but a dish to be savoured. As the celebrity chef Nobu Matsuhisa has recently pointed out, it is ‘an art’ in itself. Some would go even further. For many people, it is the acme not just of Japanese cuisine, but of Japanese culture. Reserved for the most special occasions, it is bound up in the popular imagination with ideas of sophistication and good taste.

There is, perhaps, some irony in this. Sushi was, at first, neither sophisticated nor even Japanese.

Though the evidence for its early history is rather sketchy, it seems to have begun life at some point between the fifth and the third centuries BC in the paddy fields alongside the Mekong River, which runs through modern Laos, Thailand, and Vietnam. Then, as now, the shallow waters were the perfect home for aquatic life, especially carp, and farmers often went fishing to supplement their meagre diets. But this posed a problem. Whenever a catch was landed, most of the fish would go off in the heat before they could be eaten. In order to avoid wasting food, some method of slowing, or at least controlling, the decay was needed. Thankfully, the glutinous rice grown in the surrounding fields turned out to be the perfect preservative. First, the fish were gutted, rubbed with salt, and placed in a barrel to dry for a few weeks. Then the salt was scraped off and the bellies of the fish packed with rice before being placed into wooden barrels weighed down with a heavy stone and left to rest. After several months – sometimes up to a year – anaerobic fermentation would begin, converting the sugars in the rice into acids and thus preventing the microorganisms responsible for putrefaction from spoiling the flesh. Whenever there was a need, the barrel could then be opened, the rice scraped off and the remaining fish are eaten. The smell was, of course, revolting; but the taste was delicious, if rather bitter. Best of all, nothing was wasted.

Gradually, this rudimentary form of sushi – known as Nare-Sushi – began to spread. From the Mekong, it made its way south towards Malaysia, Indonesia, and the Philippines and north, along the Yangtze and into the Yunnan, Guanxi, and Guizhou provinces of modern China. The invasion took it further. Following the conquest of the Yeland, Dian, and Nanyue tribes by the Han people in the second century BC, a process of cultural assimilation then brought nare-sushi into the Chinese heartlands. For many years it remained a ‘poor’ food, favored by those who, like its first consumers, worked in or near paddy fields. But, in time, it became so widely eaten that it gained acceptance in more elevated sections of society, as well – so much so that it was even mentioned in the earliest surviving Chinese encyclopedia, the Erya.

Revulsion and innovation

Eventually, Nare-Sushi reached Japan. It is not known exactly when it arrived, but the earliest reference to it appears in the Yōrō Code, a legal code compiled in 718, during the reign of the Empress Genshō. Its reception was, admittedly, rather mixed. A story from the Konjaku Monogatarishū (Anthology of Tales from the Past), written in the early 12th century, left no doubt that, while it tasted good, many Japanese found its smell repellent.

The revulsion was, however, to prove a spur to innovation. During the early Muromachi period (1338-1573), steps were taken to make sushi more palatable. Rather than leave the fish in barrels for months – or even years – at a time, the fermentation process was reduced to a few weeks. This meant that less acid was allowed to form and the stench was kept to a minimum.

Recipes from the Historian’s Cookbook: An Early American Take on Sushi

But this also had the effect of making the contents of the barrel rather less sour. Instead of being mouth-puckeringly bitter, the rice was now pleasantly tart and could be eaten with the fish instead of simply being thrown away. It was just the sort of flavor the Japanese were looking for. During the 12th century, the development of rice vinegar had transformed tastes and created an appetite for acetic foods. All sorts of new dishes had been developed, including namasu (vegetables in vinegar) and tsukemono (pickles). But none was quite as popular as this new combination of semi-fermented fish and rice – known as han-nare. No longer the preserve of the rural poor, it was soon being enjoyed by artisans, merchants, warriors, and, eventually, even nobles.

Fast sushi

Now that the fermentation had been cut down, it was not long before someone started to wonder whether it was necessary at all. Although it had fulfilled a valuable function on the banks of the Mekong and the Yangtze, its utility was less obvious in Japan. Not only were salt-water fish more readily available, but the growth of prosperity, the acceleration of urbanization and improvements in domestic trade had made long-term preservation less of a concern.

By the middle of the 17th century, this had led to the emergence of a third form of sushi. Known as haya-sushi (fast sushi), this did away with fermentation altogether, while preserving the dish’s familiar tart flavor. Instead of waiting for the sugars in the rice to be turned naturally into acids, vinegar was simply added instead. It was then packed into a box, under slices of cooked or cured fish, and pressed with a heavyweight for no more than a couple of days. Over time, different prefectures added their own twists to this, either to reflect regional tastes or to take account of the availability of different ingredients. In Toyama, for example, the sushi was wrapped in bamboo leaves, while in Nara persimmon leaves were used.

If you were going to do away with fermentation, however, why not get rid of pressing, as well? After all, its purpose had only ever been to prevent air from getting to the fish while the sugars in the rice turned to acid. Now, it was just a hang-over from the past: aesthetically pleasing, perhaps, but wholly unnecessary. Besides, it slowed preparation down and, by the early 19th century, time was money in Japan’s growing cities. Busy rushing here and there, people needed something quick and easy to eat – not something which took days to make.

To meet this need, the fourth form of sushi was developed. Consisting of slices of cooked or cured fish laid over vinegar-seasoned rice, this was similar to modern nigrizushi. What distinguished it, however, was its size. Each piece was two or three times bigger than the bite-sized treats we are used to eating today. The fish was treated rather differently, too. Before being served, each slice was carefully steeped in vinegar or soy sauce or else coated in a thick layer of salt, so as to ensure consistency of taste – and to ensure that it kept fresh for at least a while.

Known as Edo-mae, this sushi was named for the city of Edo (Tokyo), where it was developed in the 1820s or 1830s. According to one popular legend, it was invented by a chef named Hanaya Yohei (1799-1858) at his stall in the north-east of the metropolis in around 1824. Whatever the truth of its origins, its huge popularity led to the establishment of the first sushi emporia. Apart from Yohei’s restaurant, the most famous were Kanukizushi and Matsunozushi (which still exists); and within a few decades, they numbered in the hundreds, if not thousands. Indeed, if one mid-century encyclopaedist is to be believed, every hectare of Edo contained at least one sushi stall.

Edo-mae was not to remain the preserve of Edo for long, though. In 1923, the Great Kanto earthquake – which killed more than 100,000 people and left many more homeless – forced several sushi chefs from the city and thereby helped to spread the new sushi throughout Japan.

Fridge magnet

It was, however, a technology that created the sushi we know today. With the development of refrigeration, it became possible to use slices of raw fish for the first time. Other types of fish also came into vogue. Whereas fatty fish like tuna had previously been dismissed, because there had never been a suitable method of curing or cooking them, they could now be served fresh whenever needed. Coupled with the persistent image of refrigerators as ‘luxury’ items, this greater variety transformed sushi into a ‘festive’ food; a refined treat to be enjoyed with family and friends on special occasions.

Yet, even as it was being enshrined as the pinnacle of Japanese culture, it was spreading its wings further. After the Second World War, the US occupation and the growing ease of international travel took it across the Pacific and beyond. In the 1960s, Californians even pioneered their own form of sushi – the inside-out roll. Since then, ever more inventive variations have been introduced the world over.

So, if it’s worth Mr. Kimura paying a king’s ransom for a single bluefin tuna, it’s worth keeping the humble origins of this most ‘regal’ of dishes in mind. Since its emergence more than 2,000 years ago sushi has changed almost beyond recognition. If its transformation from a sticky, stinky leftover to a fragrant delicacy shows anything, it is that it will probably go on changing for years to come.

sushi_main.jpg